How to connect a Soil moisture sensor to Arduino
Contents
Toolkit
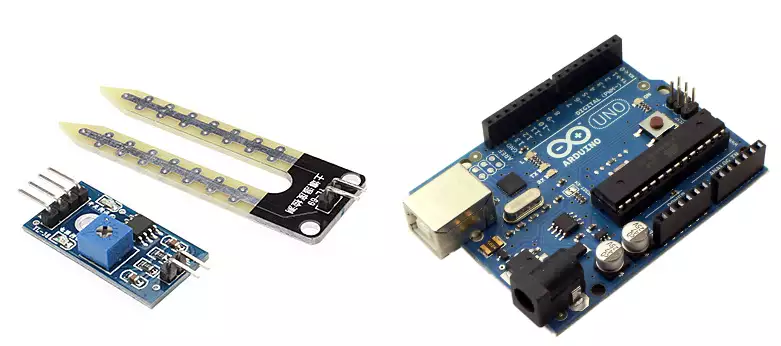
- 1x Arduino Uno
- 1x Soil Moisture Sensor For arduino
- 1x Soil Hygrometer Detection Module
- Wires to connect the sensor to Arduino

Specification
This is a simple water sensor, can be used to detect soil moisture. Module Output is high level when the soil moisture deficit,or output is low. This sensor is inexpensive and easy to use but very accurate so the starters and the experts can use all of it's functions.
Can be used in module plant waterer device, and the plants in your garden no need people to manage. Adjustable sensitivity by adjusting the digital potentiometer.
- Operating voltage: 3.3V~5V
- Dual output mode,analog output more accurate.
- A fixed bolt hole for easy installation
- Panel PCB Dimension: 30mm * 16mm
- Soil Probe Dimension:60mm*30mm
- With power indicator (red) and digital switching output indicator (green)
- Having LM393 comparator chip, stable

PIN Assignment
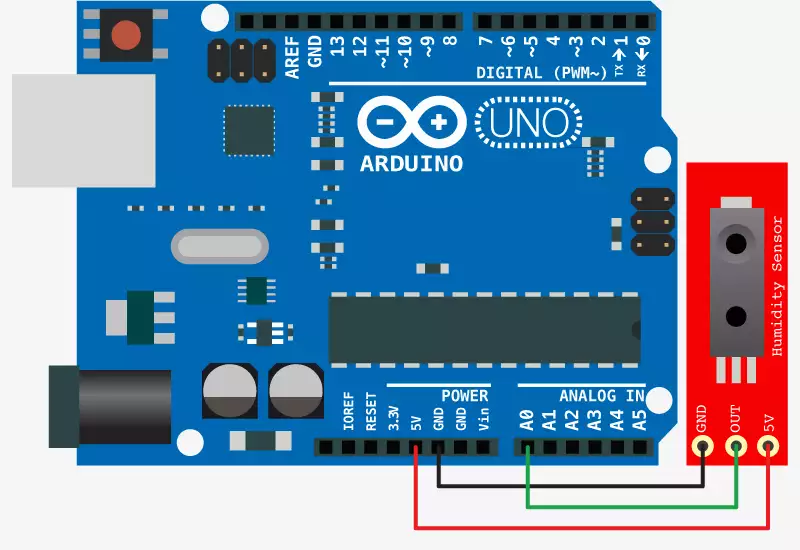
- VCC : 3,3V to 5V
- GND : External GND
- DO : Digital output interface (0 and 1)
- AO : Analog output interface
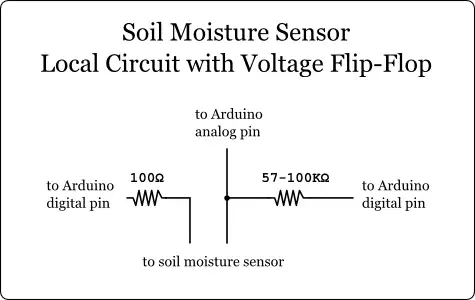
- The local circuit - simple, voltage flipping style sensor

Example Code
Arduino Code:
void setup() {
// initialize serial communication at 9600 bits per second:
Serial.begin(9600);
}

void loop() {
// read the input on analog pin 0:
int sensorValue = analogRead(A0); Serial.println(sensorValue);
delay(100);
}
References
- http://bildr.org/2012/11/hih4030-arduino/
- http://smart-prototyping.com/Soil-Hygrometer-Detection-Module-Soil-Moisture-Sensor-For-Arduino.html
More information
- Connecting DHT11 temperature and humidity sensor
- How to connect an NFC reader to the Arduino
- How to connect a soil moisture sensor to your Arduino
- How to connect TMP36 temperature sensor to the Arduino
- Connecting US1881 Hall sensor to the Arduino
- How to connect a BMP085 pressure sensor to Arduino
- How to connect a TSL2561 luminosity sensor to Arduino
- How to connect a YL-83 Raindrop sensor to Arduino
- How to connect a Modern Device Wind Sensor to Arudino
- How to connect a SI1145 UV sensor to Arduino
- How to connect an Infrared Remote

 Sign in