How to setup ODBC database connection
In this chapter you can learn how to connect to your database through ODBC connection. Via ODBC you can connect to different types of database servers, because it is a general type of connection. If you have connected successfully, then you can import contacts from your database to the Ozeki Bulk Messenger Software.
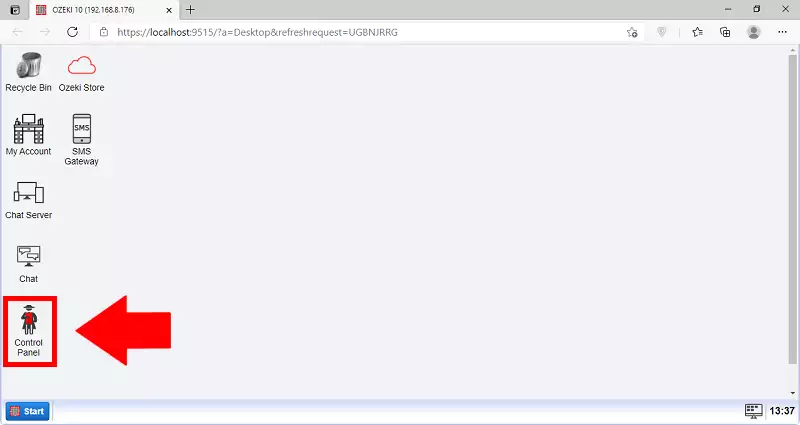
To start setting up the ODBC database connection, you need to first open the control panel application. To launch it, please search for the Control Panel icon on the desktop of the Ozeki OS. You can see which icon you need to click on Figure 1.
Step 1 - Create new database connection
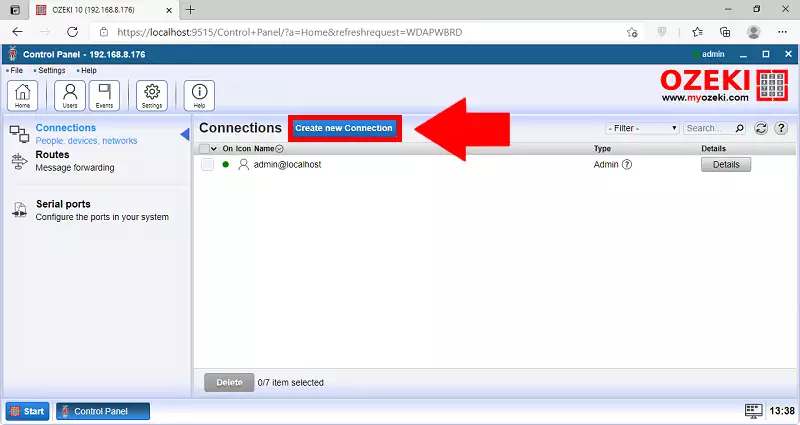
In this step you can see how to create a new database connection. First you need to click on Create new database connection button.
Here you need to search for the Create new Connection button, which is located on the top of the connection windows. You can see on Figure 2 which button you need to click.
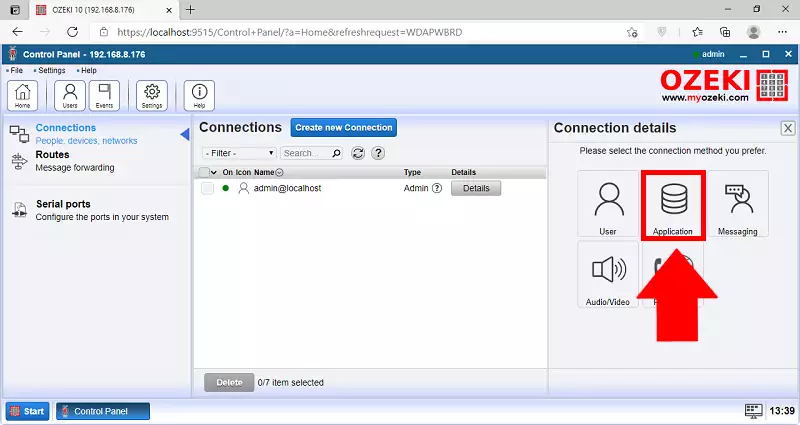
Here, you have five options. All the options are for different connection methods. In this case, you need to choose the application option. Click it to proceed to the connection details tab. You can see on Figure 3 where to click.
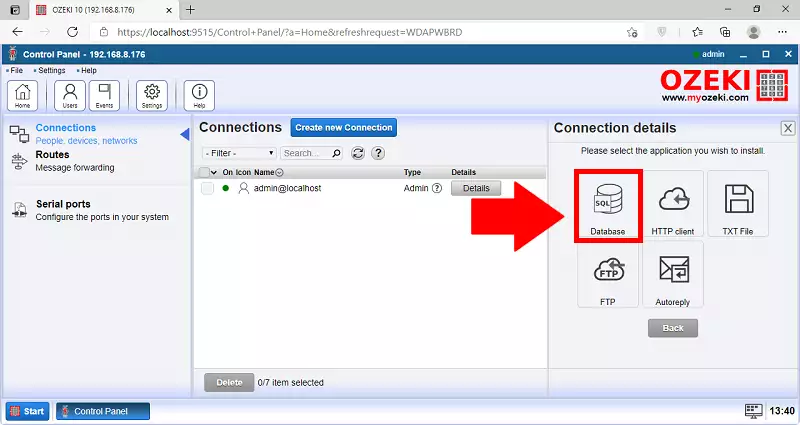
Now you need to select which type of application you wish to use the connection with. Click the Database option to proceed to the next step. You can see where to click on Figure 4.
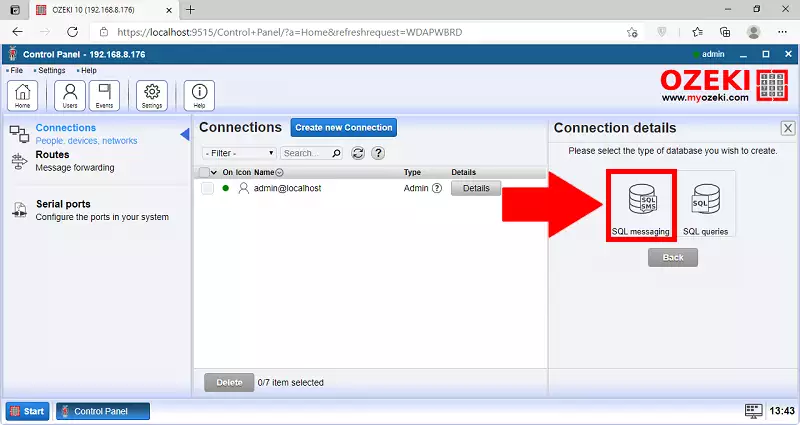
Now you need to choose the type of database you wish to create for the connection. Please select the SQL messaging option and click it to proceed. You can see both you options on Figure 5.
Step 2 - Type of database
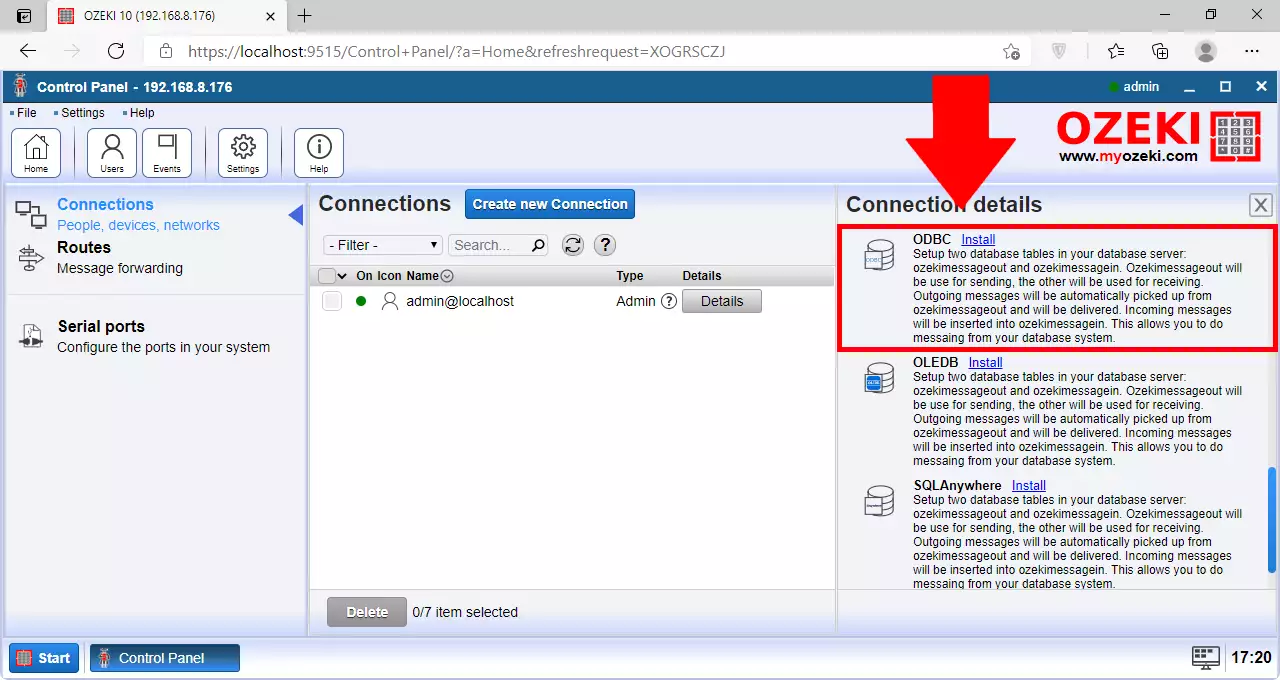
With Ozeki Bulk Messenger software solution it is possible to connect to different types of database servers. In the following figure you can see on which button you need to click to install a new ODBC connection.
With Ozeki Bulk Messenger software solution it is possible to connect to different types of database servers. On Figure 6, you can see on which button you need to click to install a new ODBC connection.
Before you perform the next step, a special driver needs to be installed
so the ODBC connection will be built-up successfully.
The ODBC driver database can vary in each servers, you can find an example of MySQL on the next page.
Step 3 - Database connection details
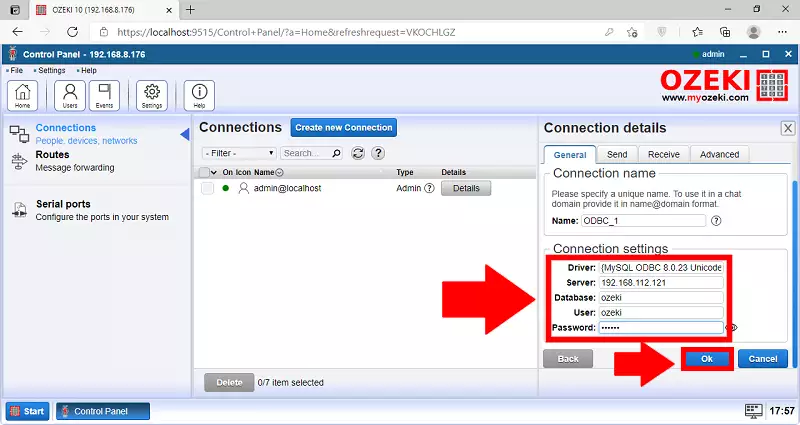
There are two ways for this: you can give the data below the General menu,
or you can give the connection string below the Advanced menu.
In case you give the connection string, it overwrites the data given below the General menu.
In this example we give the data under the General menu:
- Driver: The type of the odbc driver, you have to write here what you have installed to the computer (e.g. {MySQL ODBC 8.0.23 Unicode Driver}).
- Server: The IP address of the database server (e.g. 192.168.112.121).
- Database: The name of the database that stores the contacts (e.g. ozeki).
- User: The username with which you can connect to the database (e.g. ozeki).
- Password: The password that belongs to the previously given username (e.g. ozeki).
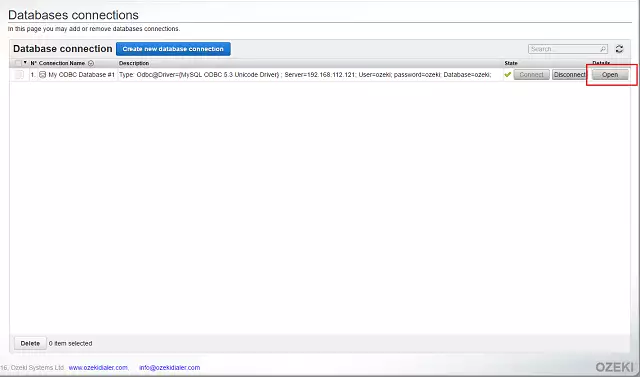
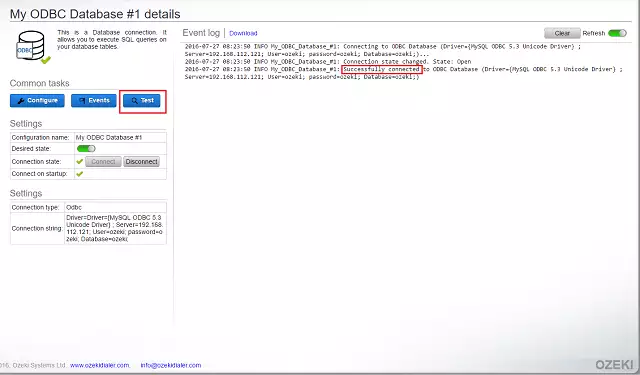
If the connection is successful, a green tick will appear under State. Click to Open button to go to the details page of this connection.
In case of unsuccessfull connection the event log
will show you the problems with the exact error message.
This is how it appears if you have connected successfully:
Step 4 - Testing the database connection
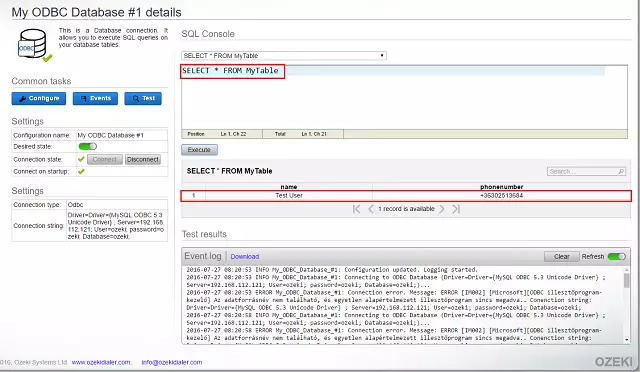
If you click to the Test button, you can give the database table in which you store your contact lists. Click to the Execute button to list the phone numbers that are stored in the given database's table.
More information
- How to setup ODBC database connection
- How to setup OLEDB database connection
- How to setup OLEDB database connection
- How to setup SQL EXPRESS database connection
- How to setup Oracle database connection
- How to setup Microsoft Access database connection
- How to setup DB2 database connection
- How to setup PostgreSQL database connection
- How to setup an Informix database connection
- How to setup SQL Anywhere database connection

 Sign in