
 Sign in
 Configuring the application for CIMD2
OZEKI SMS supports the CIMD2, to connect to an SMSC over the Internet or other private TCP/IP network. Some mobile operators provide CIMD2 connections for higher volumes of SMS traffic. In order to configure this connection you must perform the following steps:
After installation select the Preferences... from the Server menu.
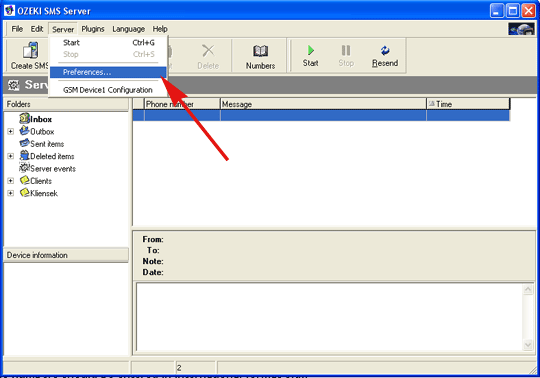
When this menu item is selected, the Server Options form opens.
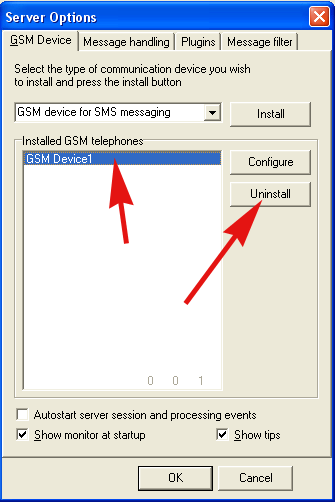
Select the GSM Device1 in the Installed GSM phones box and click on the Uninstall button. When you uninstalled the GSM device successfully you can start to install the CIMD2 connection.
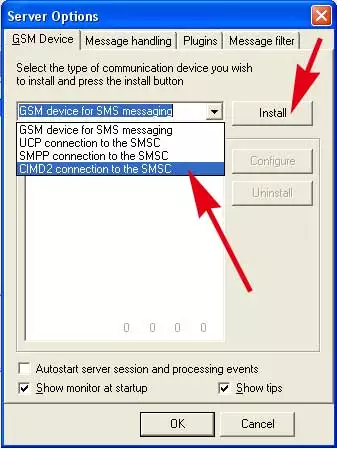
Select the CIMD2 connection to the SMSC from the
GSM Device for SMS messaging combobox and press Intall button.
In the Installed GSM phones box will appear the CIMD2 connection 1.
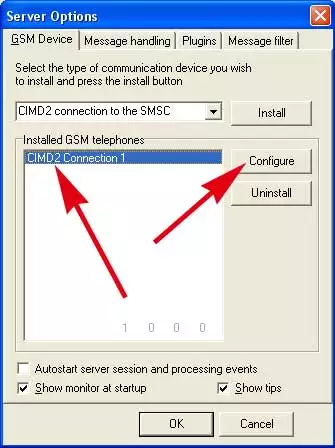
After installing the CIMD2 driver click on the Configure button to start the configuration. On the configuration screen you should provide the necessary login information to connect to the server.
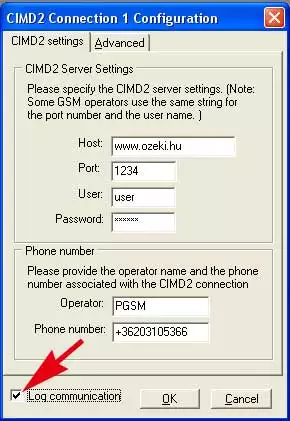
When you fill in the Phone number text box you can modify the phone number to text.eg.: OZEKI
Testing the connection
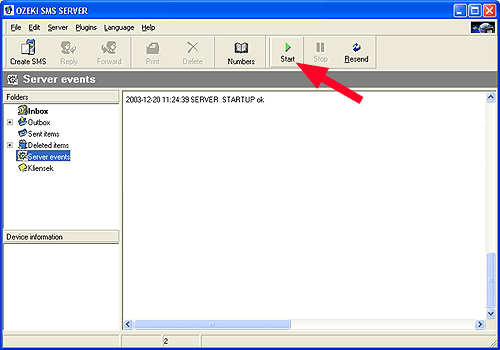
After finishing these settings close the CIMD2 Connection 1 Configurating form by clicking on OK and start the SMS sending and receiving service by clicking on the "Start" button on the main screen of the application.
If you select the Server Events folder on the left, you can see the startup message of the server. This message should be: "SERVER_STARTUP ok"
Once the application is started you can view the CIMD2 communication
log by clicking on the CIMD2 communication menu item in the Server menu.
(This menuitem becomes visible after you have installed the CIMD2
driver) 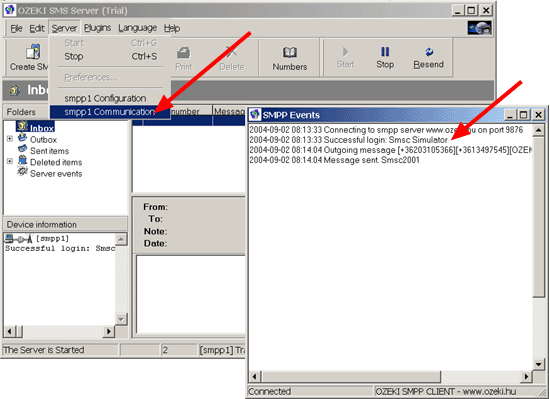
Sending your first SMS
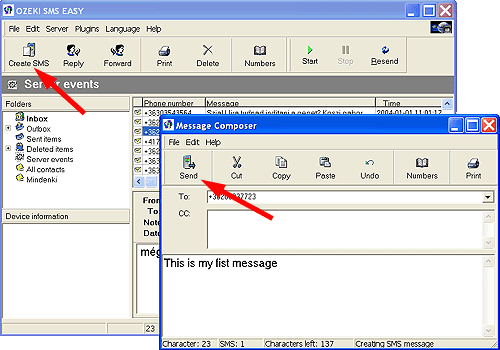
Once the application is installed and configured properly, you can send an SMS by clicking on the Create SMS icon. This brings up the SMS composer, where you can specify the phone numbers and the message text. Make sure you specify the phones numbers in international format. e.g.: +36209937723. When the message is written, you can send it by clicking on the Send button.
Once you installed the server, you can configure plugins or you can start developing applications. Good luck!
Related topics:Configuring SQL support
Related topics: Configuring more than one device
More information
- Installation Guide
- Configuring the application for CIMD2
- UCP Installation
- TCP_push