SMS Message routing
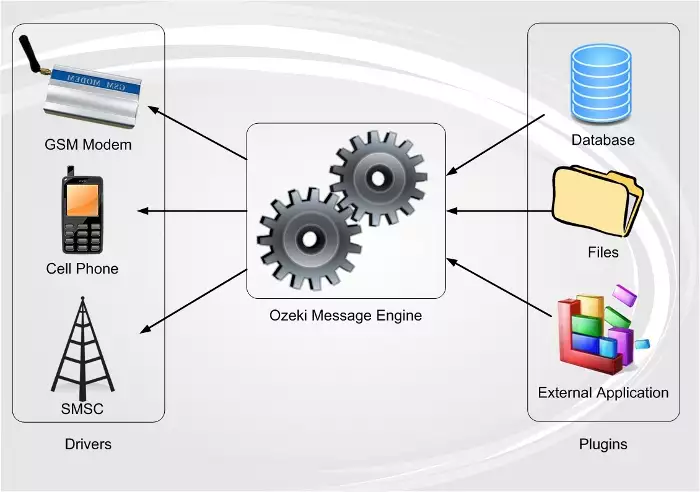
A basic feature of Ozeki Message Server 6 is message routing. It collects SMS messages from various sources, such as a user typing in a message using the built-in graphical user interface (GUI), a database or an external application. ;Once the messages are collected they are organized into message queues in the message engine. The message engine (Figure 1), handles the sending devices. Each sending device, whether you use a GSM modem or an IP SMS connection, has a driver assigned. If more than one device (or connection) is used for sending messages, more instances of the drivers need to be installed.
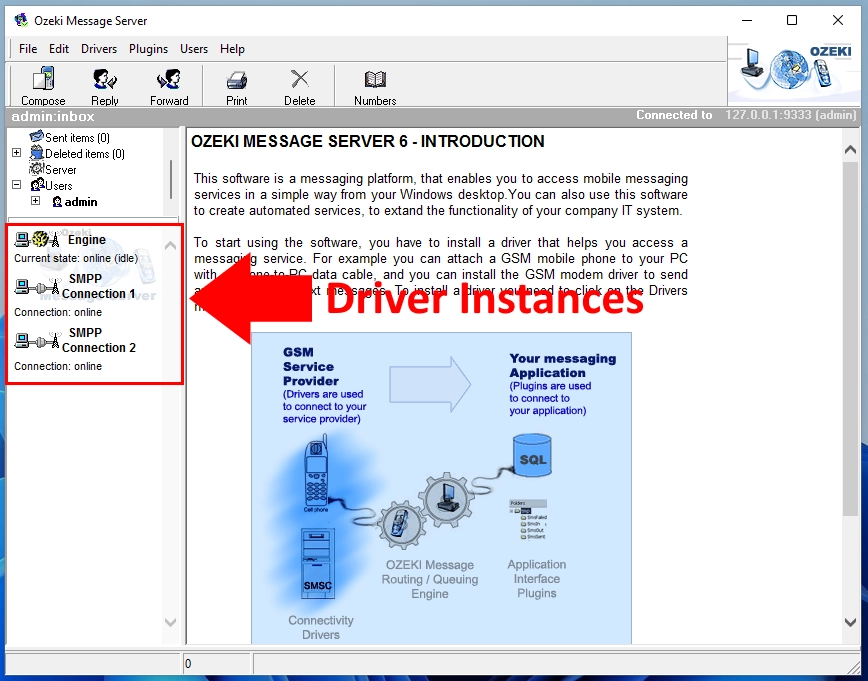
When you install a driver, it can be seen in the Server Manager Application below the folder options. If more than one connection is installed, more than one instances are displayed (Figure 2).
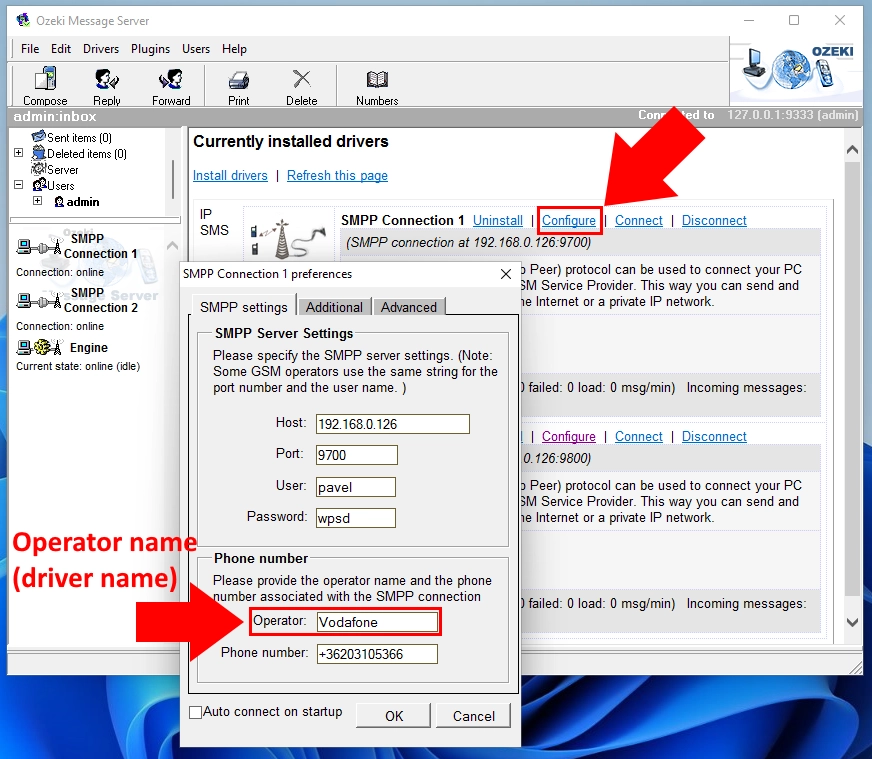
When you install a driver, you configure it using the driver configuration form. On this form there is a special field, called operator name (Figure 3). An operator name is a unique name identifying the driver. You can put any name you like in this field. The operator name has a key function in message routing. It can be used to tell the engine which driver should be used to send a particular SMS message.
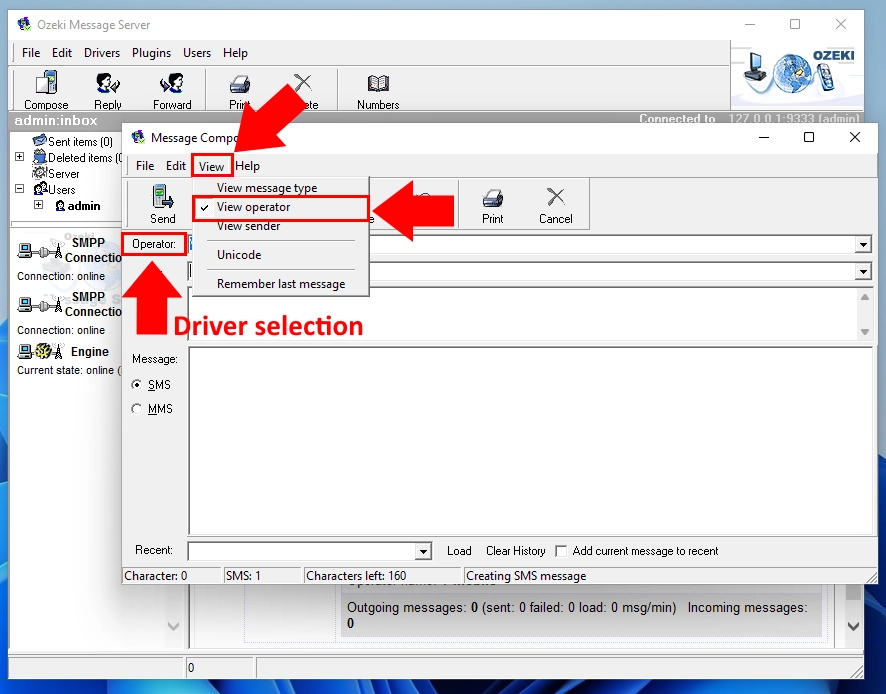
If you have more than one driver installed, you can select which driver you wish to use by selecting the appropriate operator name in the user interface when you compose the message (Figure 4) . If you use a database plugin, you have a special field set up in the outgoing message table called operator name. In this field you can put the name of the operator.
The user properties form and the plugin configuration forms always contain an operator name field. If you specify this field, the user or plugin will only send outgoing messages using this connection.
In the users' settings you can specify the routing of incoming and outgoing messages. The routing is defined from the user's viewpoint. The user can be a person or a program. You can determine which incoming messages should be delivered to a user by specifying a list of keywords and/or telephone numbers belonging to the user, and you can also determine the operator(s) to be used for the user's outgoing messages. IP SMS connections allow you to specify a custom sender telephone number belonging to a user for outgoing messages.
To specify the routing you need to take the following steps:
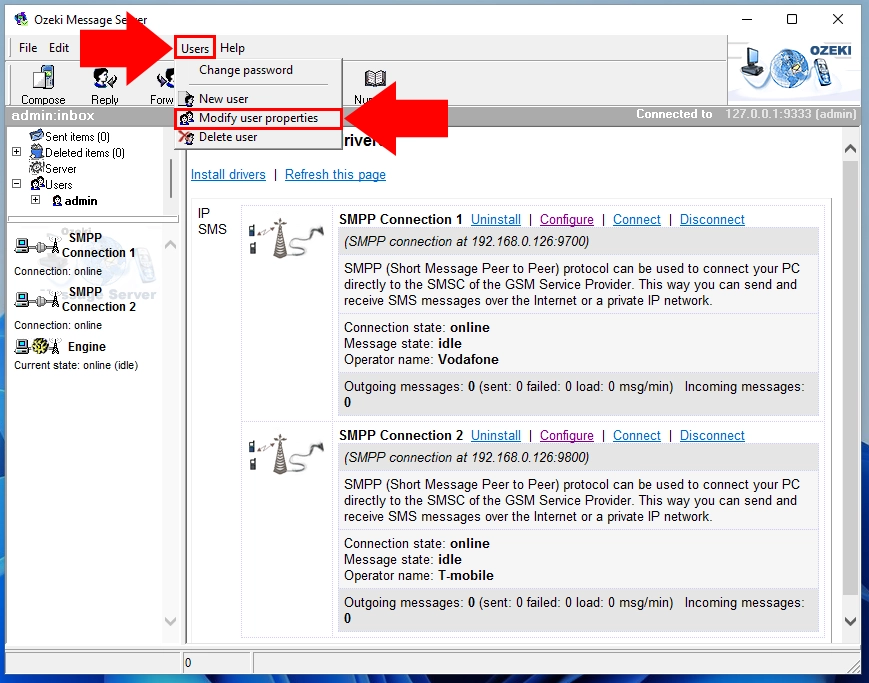
Click on the Users pull-down menu and select 'Modify user properties'.
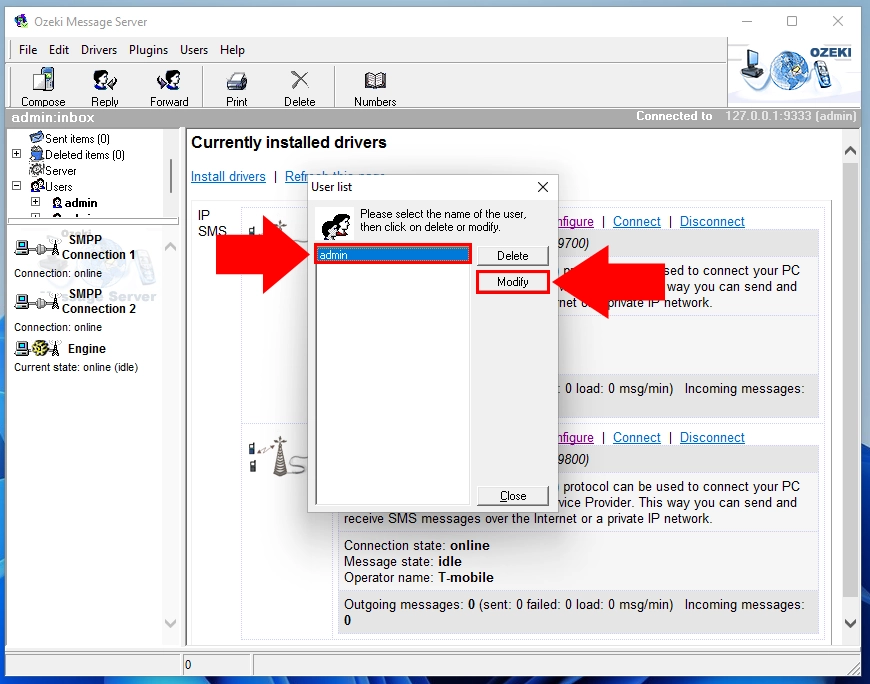
A user list dialog box will show up, in which you can select the user whose properties you would like to modify. Once you have selected the user, click on the Modify button.
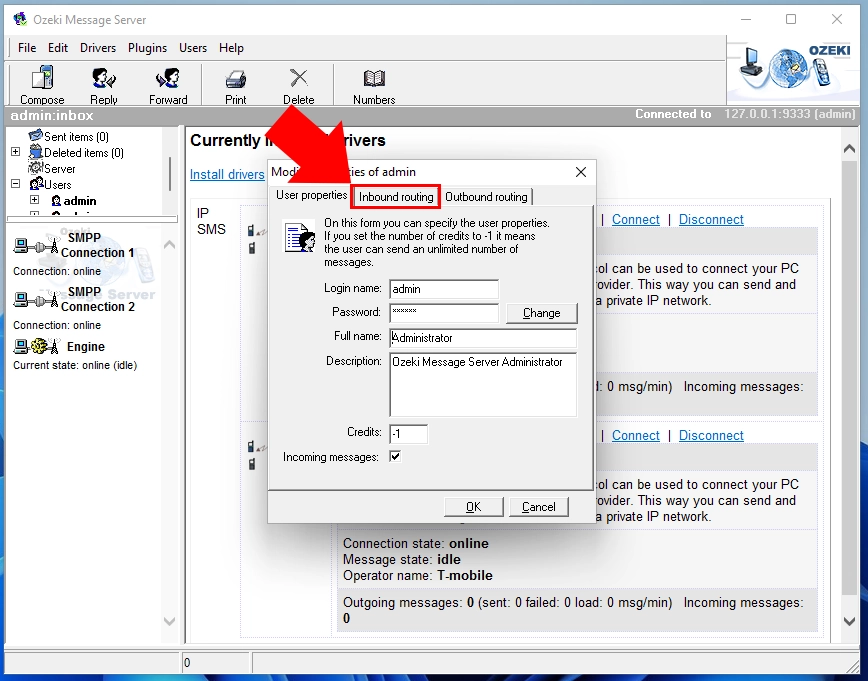
In the following dialog box the user properties will show up. To specify the routing of incoming messages, click on the Inbound routing tab .
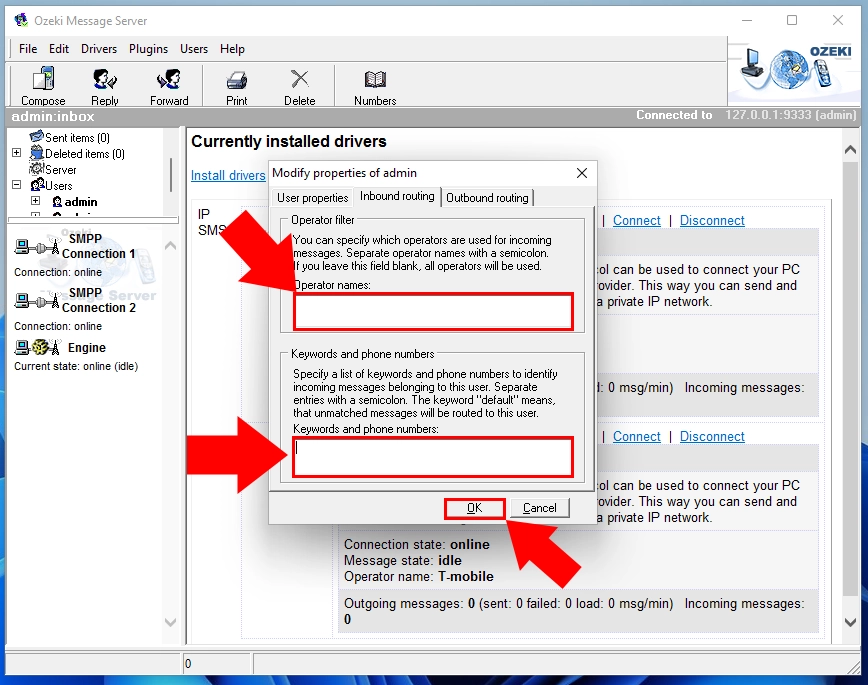
The Inbound routing dialog box will show up, in which you can fill in two fields. The first one is for operator names, which have to be separated with a semicolon (if you would like to specify more than one). If you leave this field blank, all operators will be used.
In the second field you can specify a list of keywords and phone numbers to identify incoming messages belonging to the user, which also have to be separated with a semicolon. The keyword is the first word of a message. If you put the keyword "default" in this field, unmatched messages will be routed to the user. When you have finished the specifications for the inbound routing, click on the OK button.
To specify the routing of outgoing messages, click on the Modify button in the User list dialog box (See Figure 6) after selecting a user in the list of users.
Click on the Outbound routing tab .
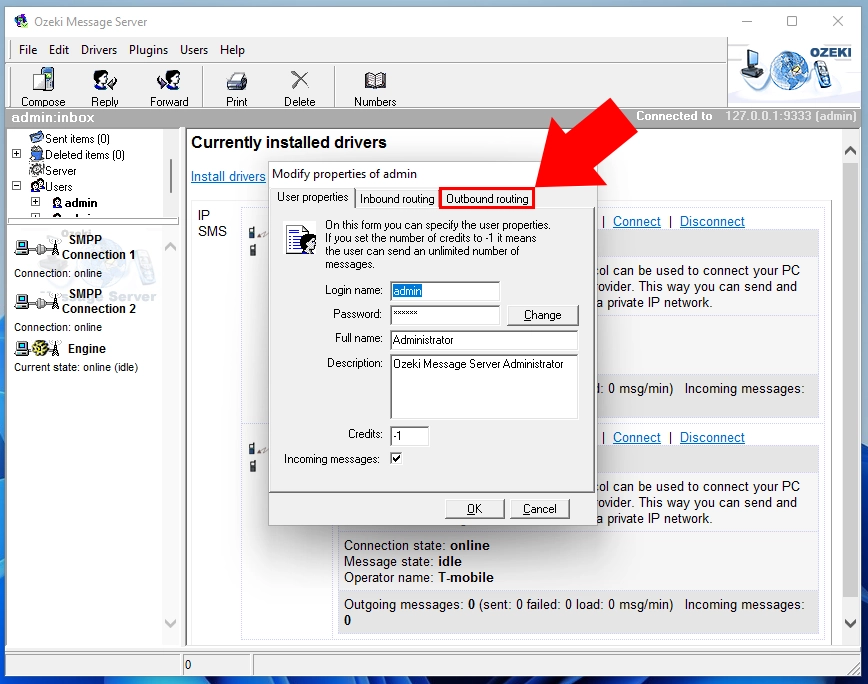
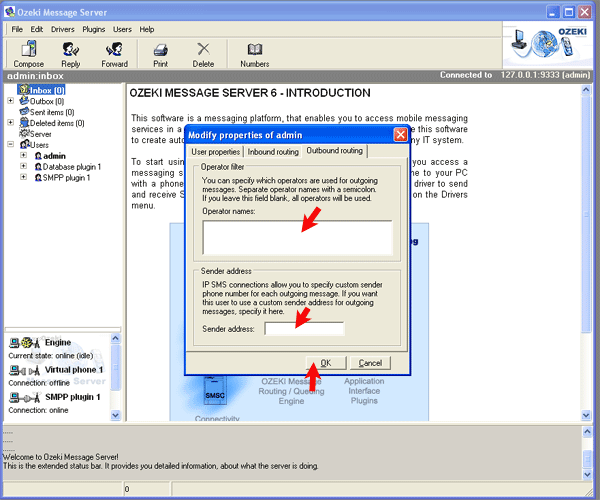
A dialog box will show up, in which you can fill in two fields. The first one is for operator names to specify the operators to be used for outgoing messages. The operator names have to be separated with a semicolon (if you would like to specify more than one). If you leave this field blank, all operators will be used.
In the second field you can specify the custom sender phone number for outgoing messages of the user. When you have finished the specifications of the outbound routing, click on the OK button.
Load balancing
Load balancing can be achieved by using the same operator name for more than one driver.
More information
- The envelope system
- Link and message management
- Message routing system

 Sign in