Usage of the users
Ozeki Message Server is a software-based solution for you to benefit from advanced communication functions. When the installation is finished, a shortcut can be found in the Windows Start menu. Use this shortcut to start the application (Figure 1).
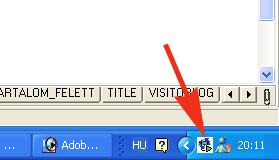
Start using the service manager. Select the Manage Service from the tab. (Figure 2)
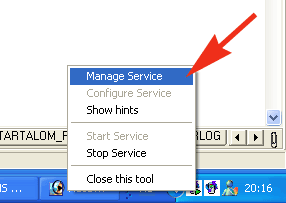
Login to the Ozeki Message Server. (Figure 3)
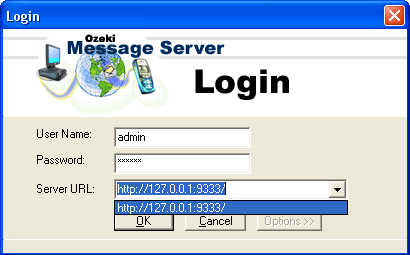
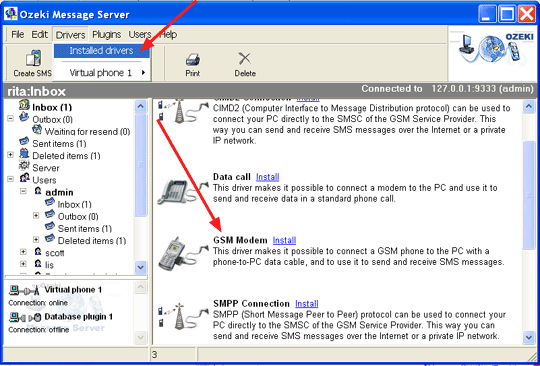
As a first step we install the virtual phone from the Drivers menu (Figure 4).
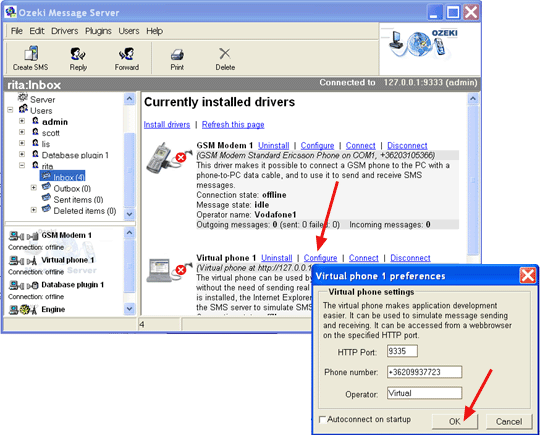
After installation of the virtual telephone, we install the GSM modem (Figure 5).
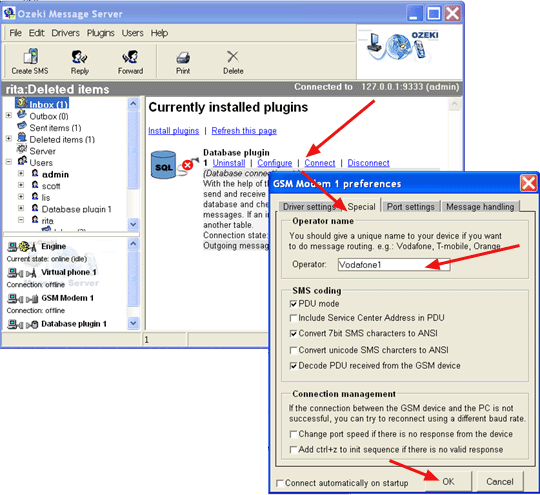
Configure the installed GSM modem. We choose the Special tab and we name the operator name. In our case we name the operator Vodafone1 (Figure 6).
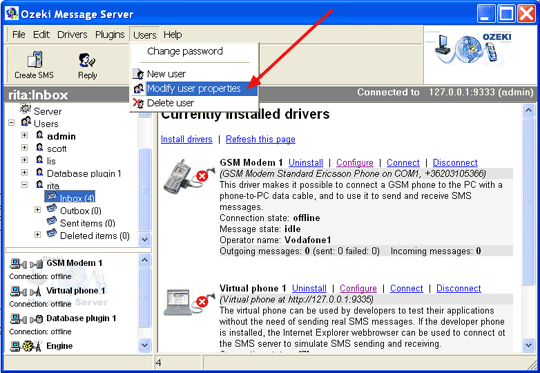
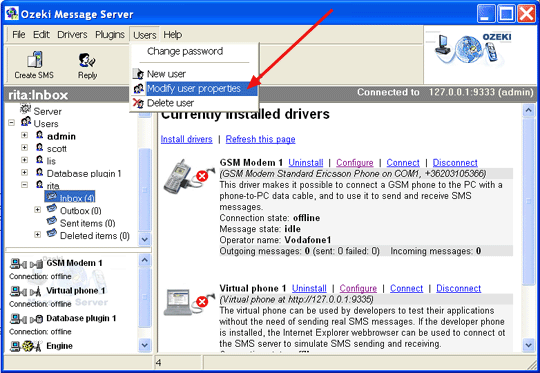
Choose the name from the registered users, which you want to test. Select the Users/Modify user properties menu (Figure 7).
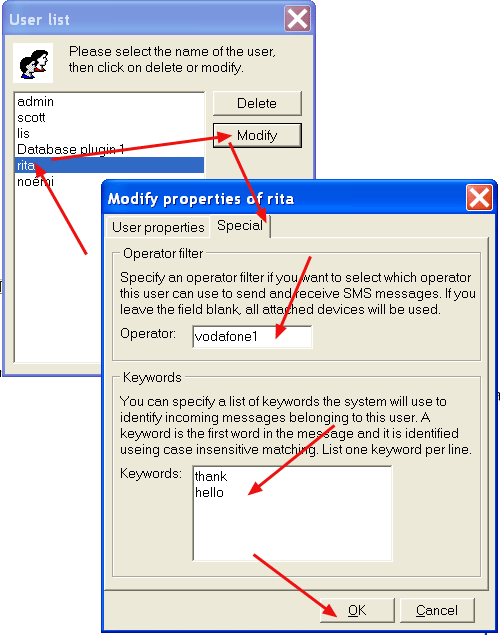
At the properties of the user you have to select the Special tab and
we add the same operator name as we did the configuration of GSM
modem.
In our case we name Vodafone1 as operator. You can add any defined
keyword. It means you are able to receive the messages, which begin with
the previously defined keywords (Figure 8).
We can test the keywords defined by virtual phone. Enter the Drivers menu and choose Virtual phone 1/Testphone. Write a message that begins with keywords, and click on the Ok button (Figure 9).
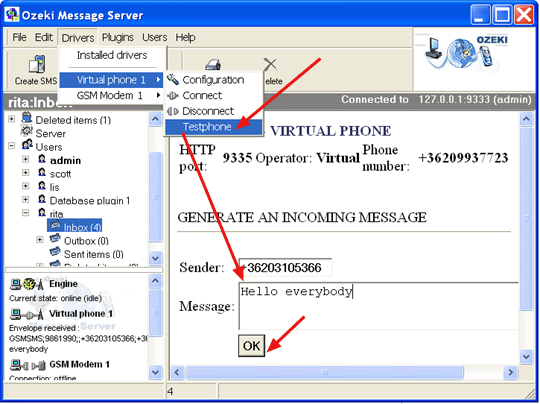
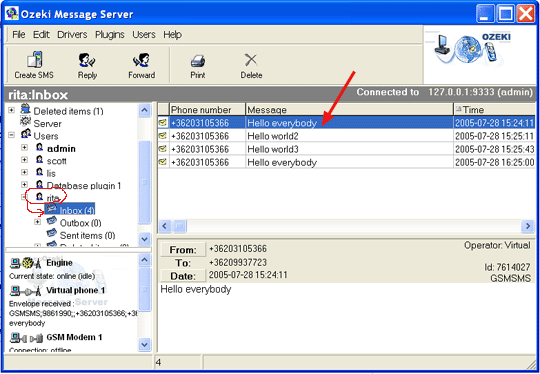
You can see that message that begins with ' hello' keyword appears in the inbox of registered user, which we selected in the example.
How to create the new user?
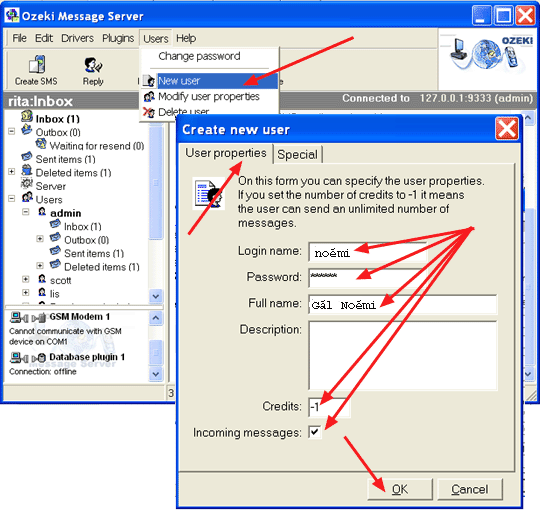
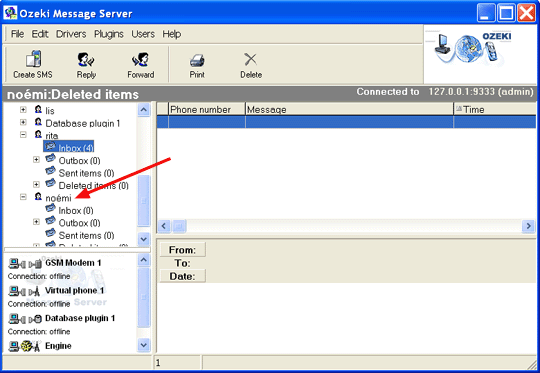
If you want to generate a new user, select the User/New user menu. In the Create
new user screen you have to give a details. You have to write "-1" in the
blank of the Credits. If you place a checkmark in the checkbox of Incoming
message, it means that you are able to receive and send messages.
If you don't place a checkmark in the checkbox of Incoming
message, it means that you are able to send messages (Figure 11).
How to modify the properties of the users?
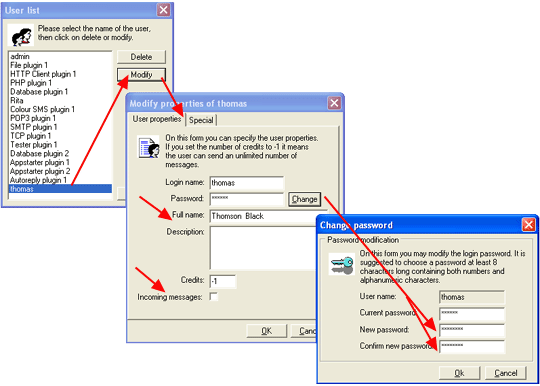
The Ozeki Message Server enables you to modify the properties of the registered user. You can change the password of the user (Figure 13, 14).
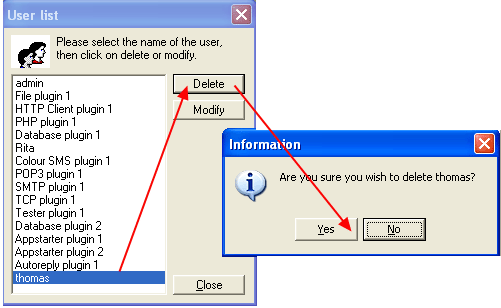
You can delete any user (Figure 15).
If you delete any of the users, their incoming messages will be visible. You can see them only if you enter the Ozeki Message Server 6 as admin username (Figure 16).

More information

 Sign in