How to add e-mail friends to your chat client
Having a system where you can manage more communication platform at one, could make your life easier and your workflow faster. The Ozeki Chat provide a solution to this, by creating a connection between the Chat software and your e-mail account. You could forward chat messages as e-mail messages and receive e-mail messages in the chat conversation. To do that, you need to create an IMAP connection. This guide will provide you with all the information you need to successfully configure one.
Step 1 - Create an IMAP client connection
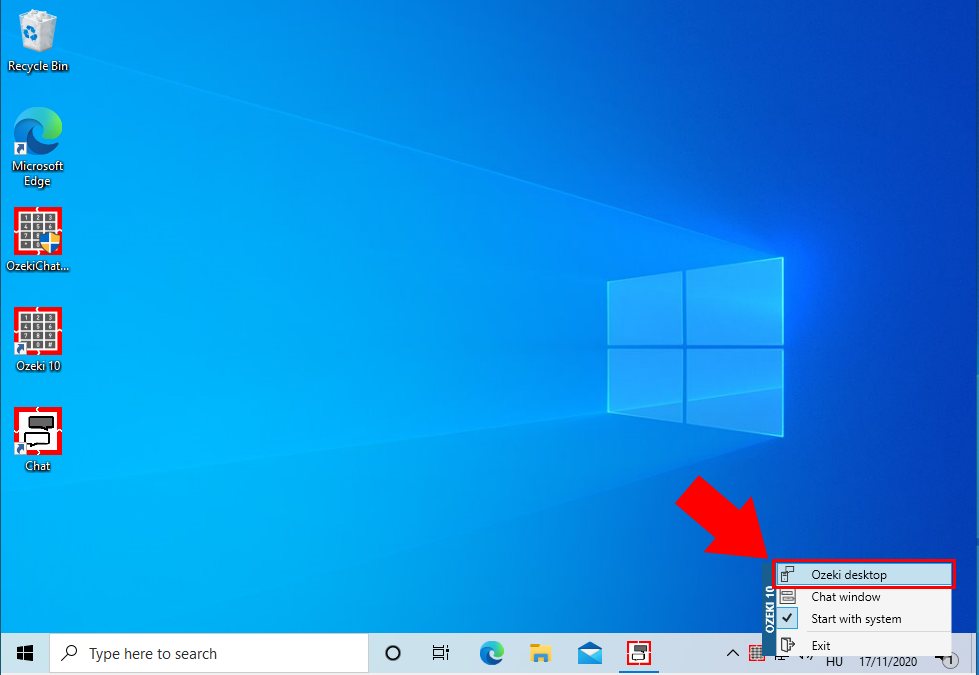
To create an IMAP connection, you need to open the Ozeki desktop. You can do this by searching for the Ozeki logo on your tray, right-click it and search for Ozeki Desktop. Click it and it will open the Ozeki OS. To find the icon, look at Figure 1.
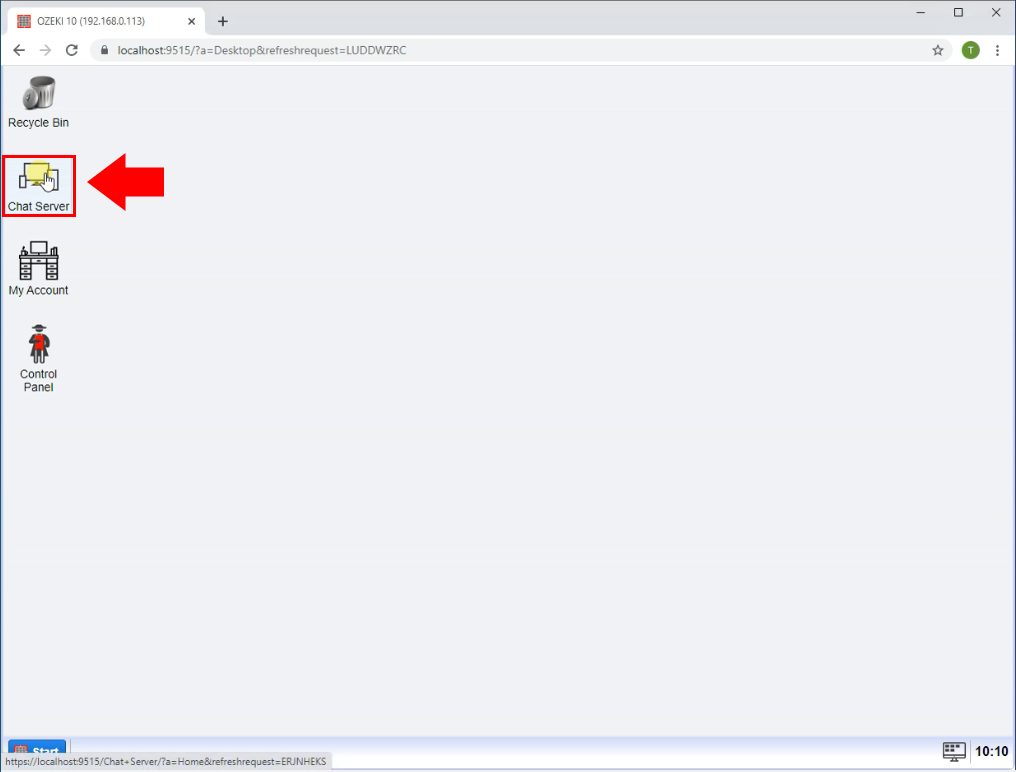
Now you will need to open the Chat Server application. To do that, search for the icon on the desktop and click it. It will open the Chat Server application. Look it Figure 2, to find the icon.
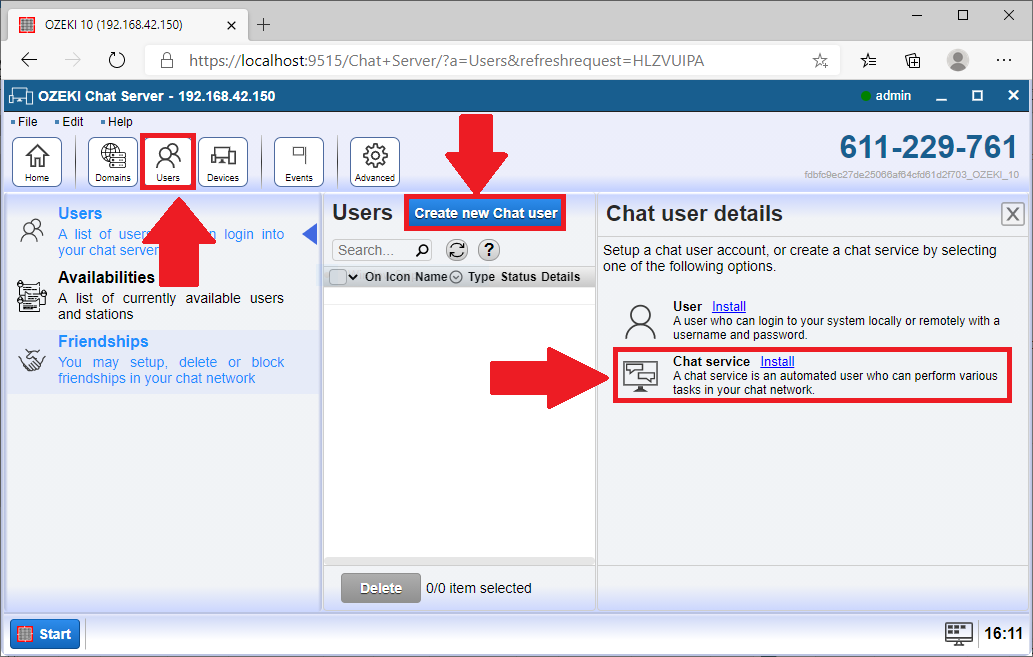
Click the Users button that you can find with the help of Figure 3. Now you need to install a Chat Service, which is a non-human service that can handle communication with other application through a server. To open the Chat User details panel, click the Create new Chat user button on the bottom of the Users window. To create the user, click the Install button next to the Chat service title.
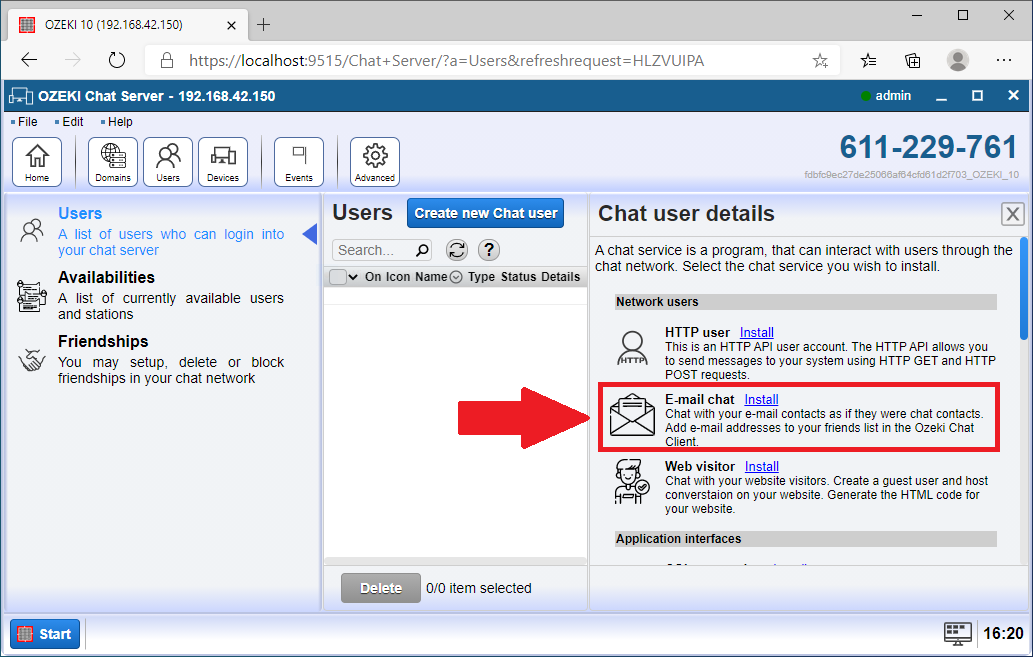
Now you should choose which kind of a network user you will be communicating with. In this case, please choose the E-mail chat option. It will open the client type selection window.
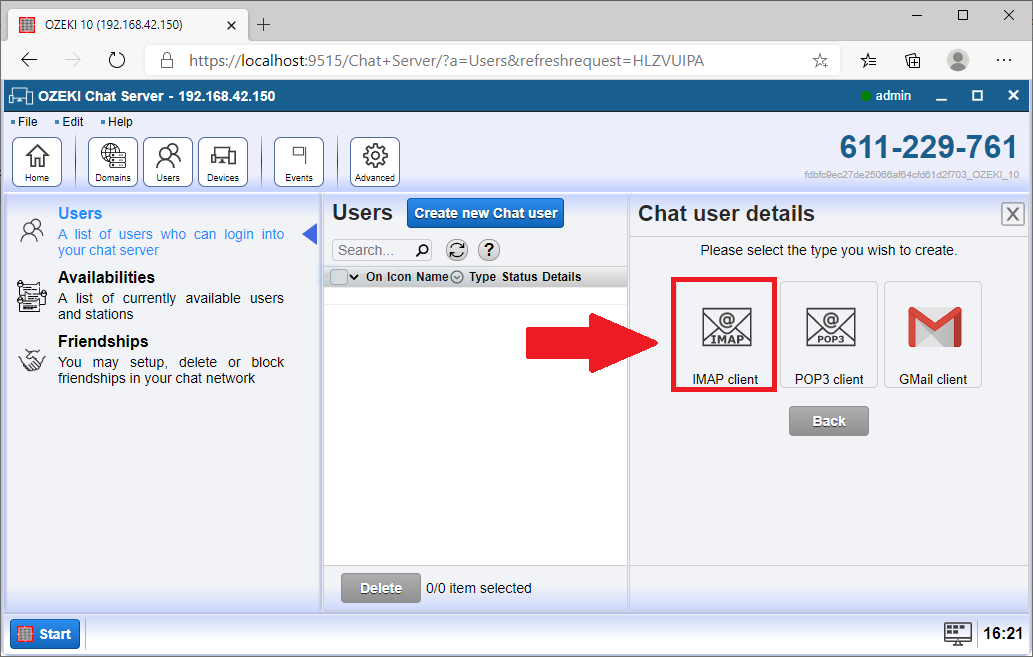
Here you get to choose which type of a user you wish to create. What we need is IMAP Client. IMAP stands for Internet Messages Access Protocol. It is a protocol used for accessing email messages from a mail server or a service. The desktop e-mail applications use this to have access to your messages. In this case, we will use it to download the e-mails to the Ozeki Chat. You can see your options on Figure 5.
Step 2 - Configure the IMAP server details
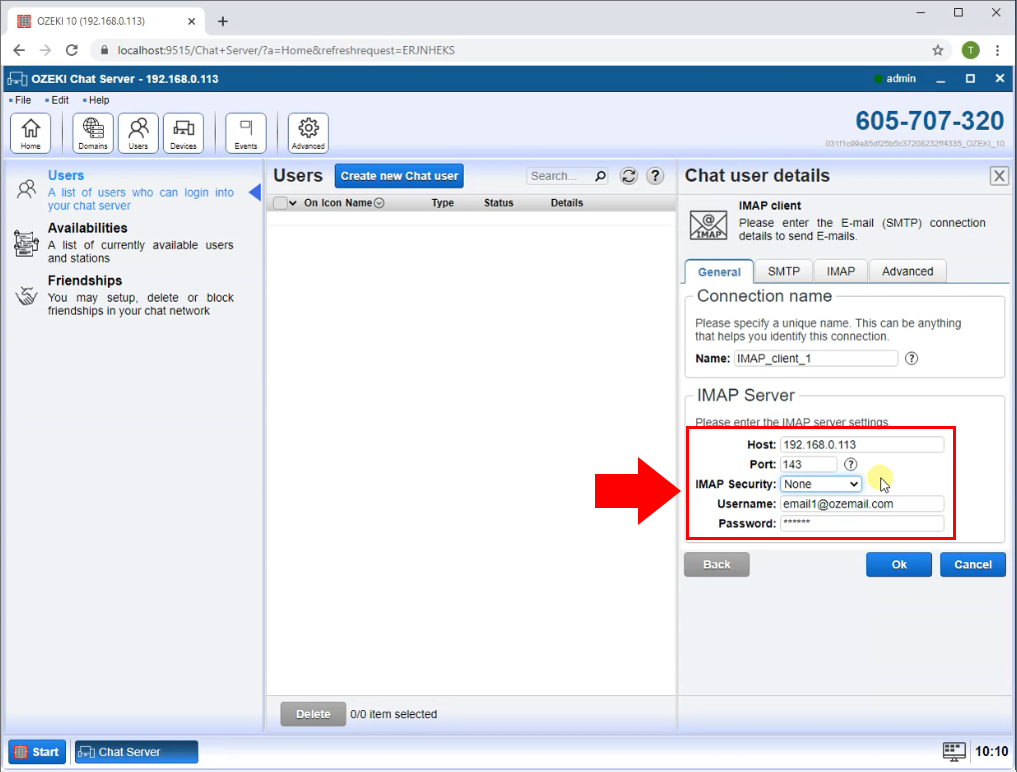
The next step of the configuration of the IMAP client connection is to provide the details of the IMAP server. As you can see it in Figure 6, type the server ip or host name as Host and type the Port number. Then, provide the username and password of your e-mail account.
Step 3 - Configure the SMTP server details
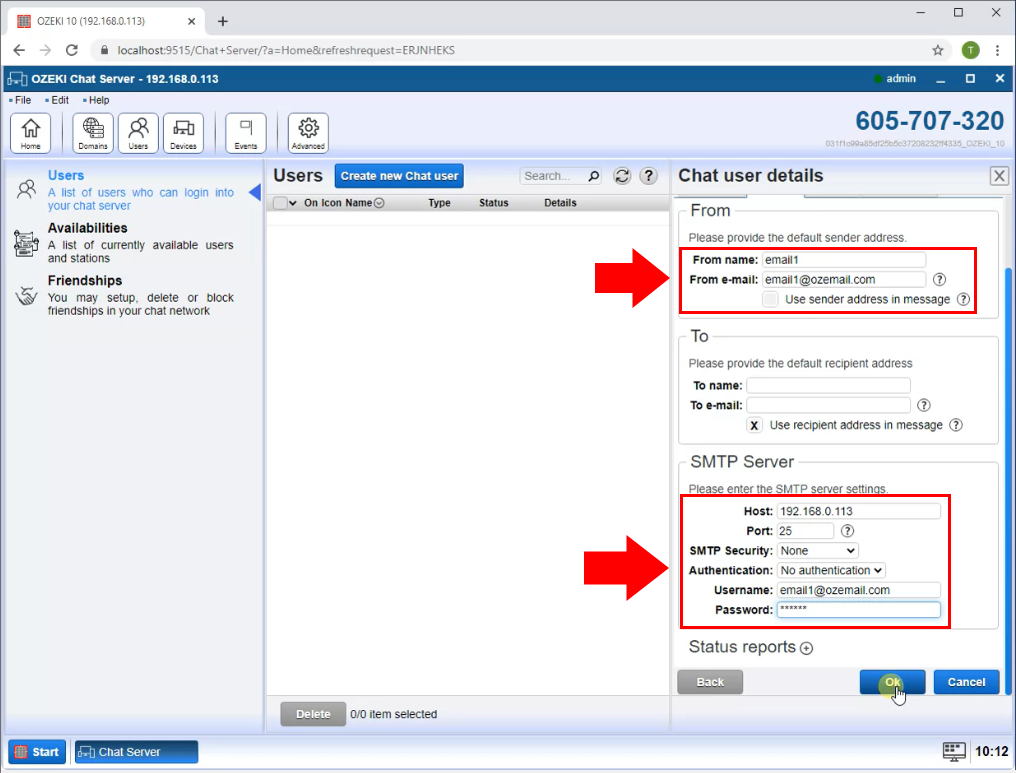
To be able to forward Chat messages as an e-mail, you need to configure an SMTP(Simple Mail Transfer Protocol) server that can send the e-mail message. This configuration can be done with the IMAP client connection. In the SMTP menu, you can configure the details of the SMTP server. Figure 7 shows what settings you need to do to use the SMTP server. So, type Host and the port number. Select the Authentication option and type the username and password of your E-mail account.
Step 4 - Add E-mail contact to Ozeki chat
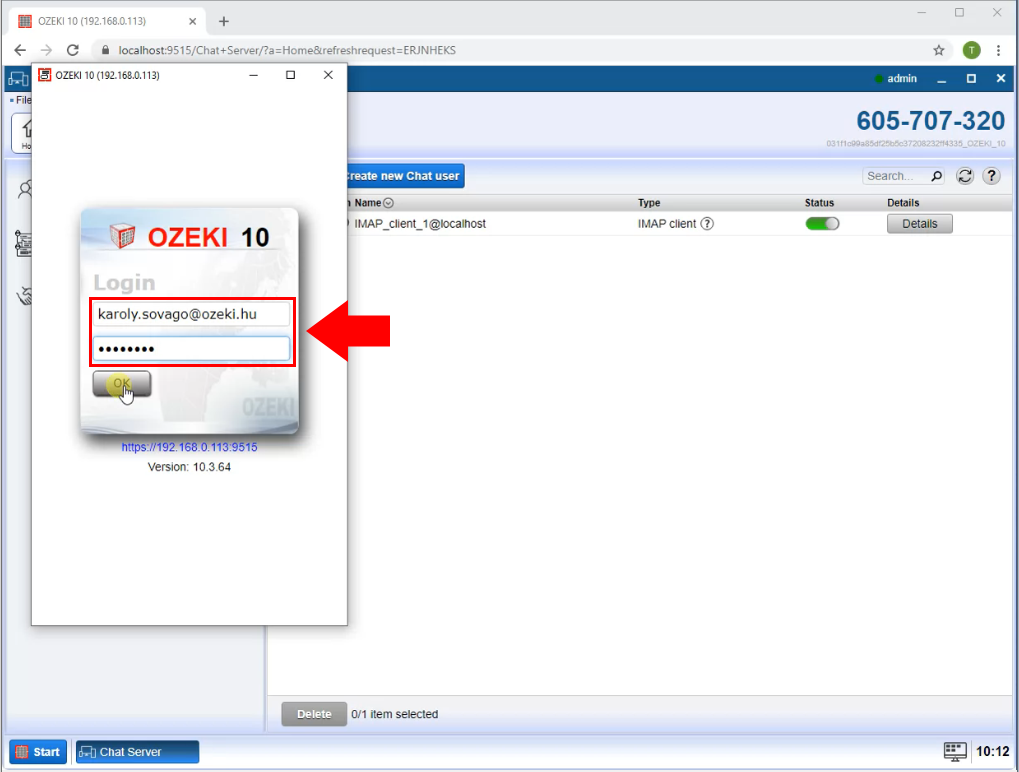
To start sending and receiving messages in chat, please login to the Ozeki Chat Service with your ozeki address and password. You can see the example login credentials on Figure 8.
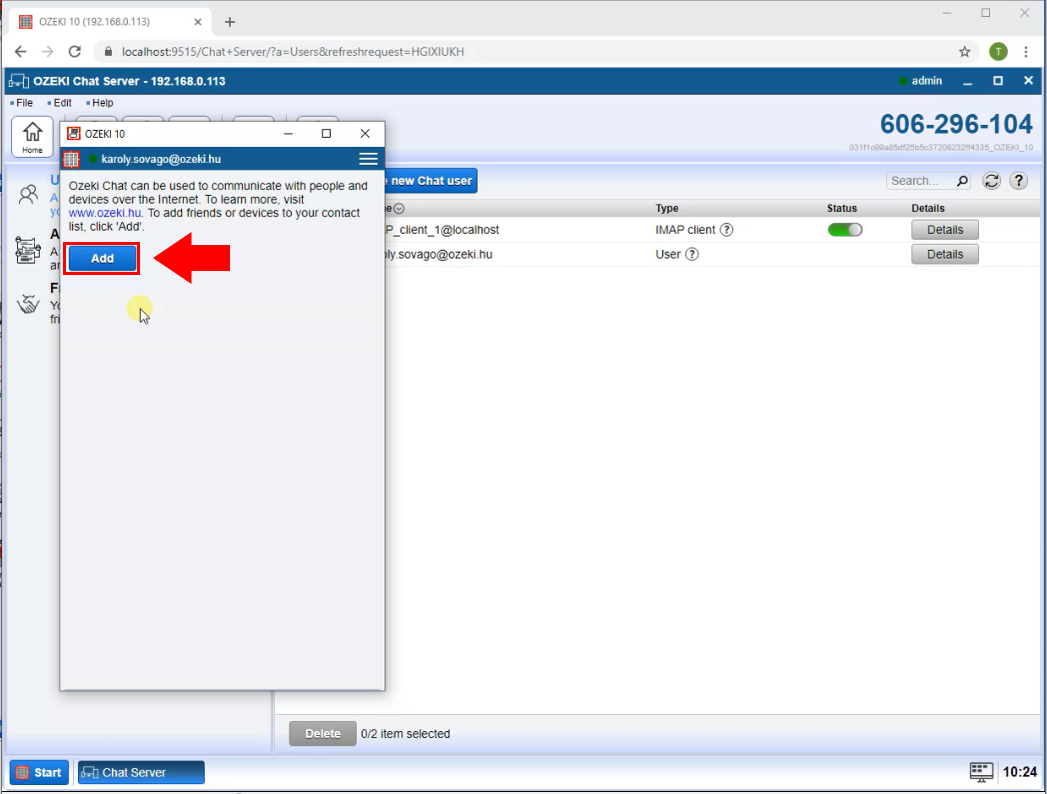
Now that you have a working connection between the Ozeki Chat and your e-mail account, you only need to add the Chat service to your friendlist, and you can start sending and receiving e-mails. To do that, please click the Add button on the home page of the Ozeki Chat. You can see the button on Figure 9.
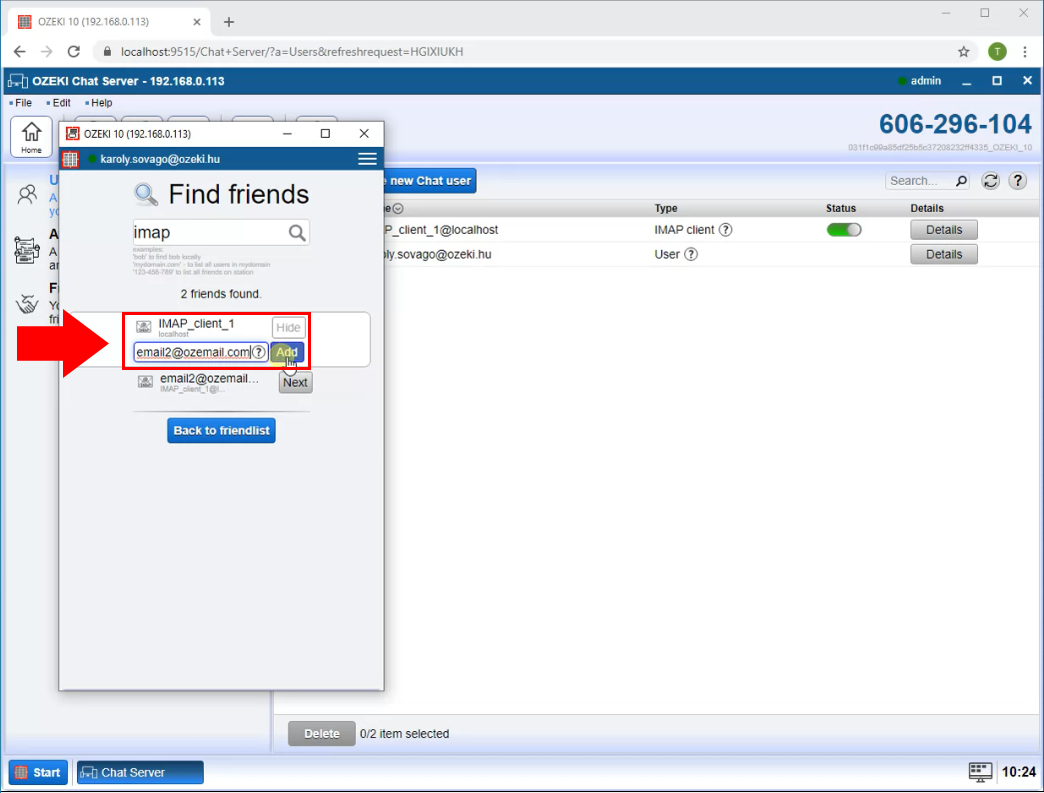
The Find Friends page will let your search through the server for chat partners with the name you provided. Type in IMAP to the search bar and hit enter. It will find the IMAP client, you need to add. Add it and start having conversations.You can see the Find Friends page on Figure 10.
Step 5 - Test chat to E-mail
Now you can send Test messages to make sure that the service is working properly. As you can see on Figure 11, If you send any text to the IMAP service, it forwards it to the provided e-mail account.
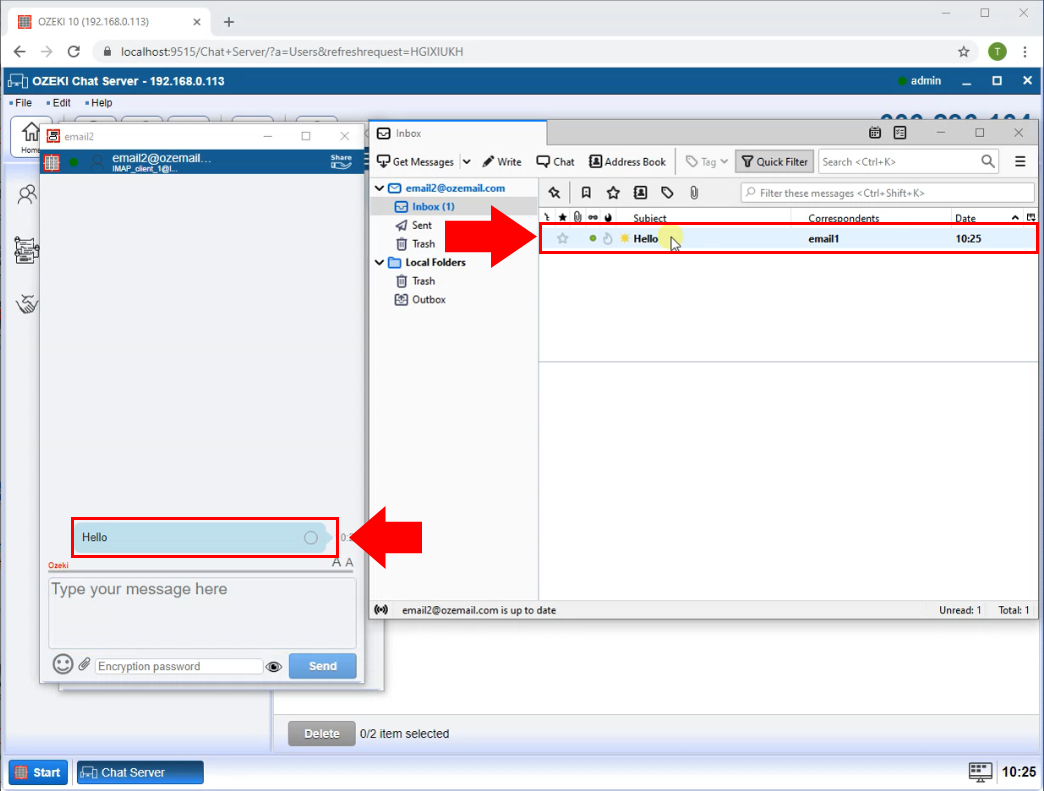
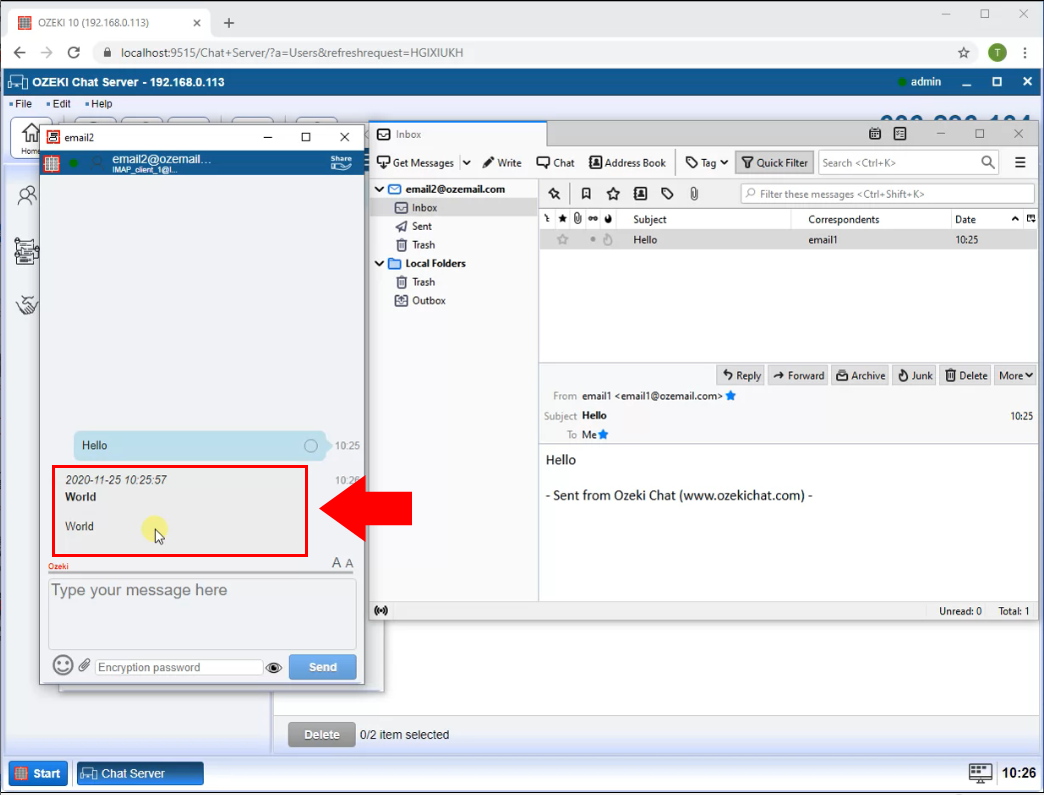
It works the other way around as well. If you send an e-mail to the IMAP service, your message will be forwarded to the Ozeki Chat. You can see the test message on Figure 12.
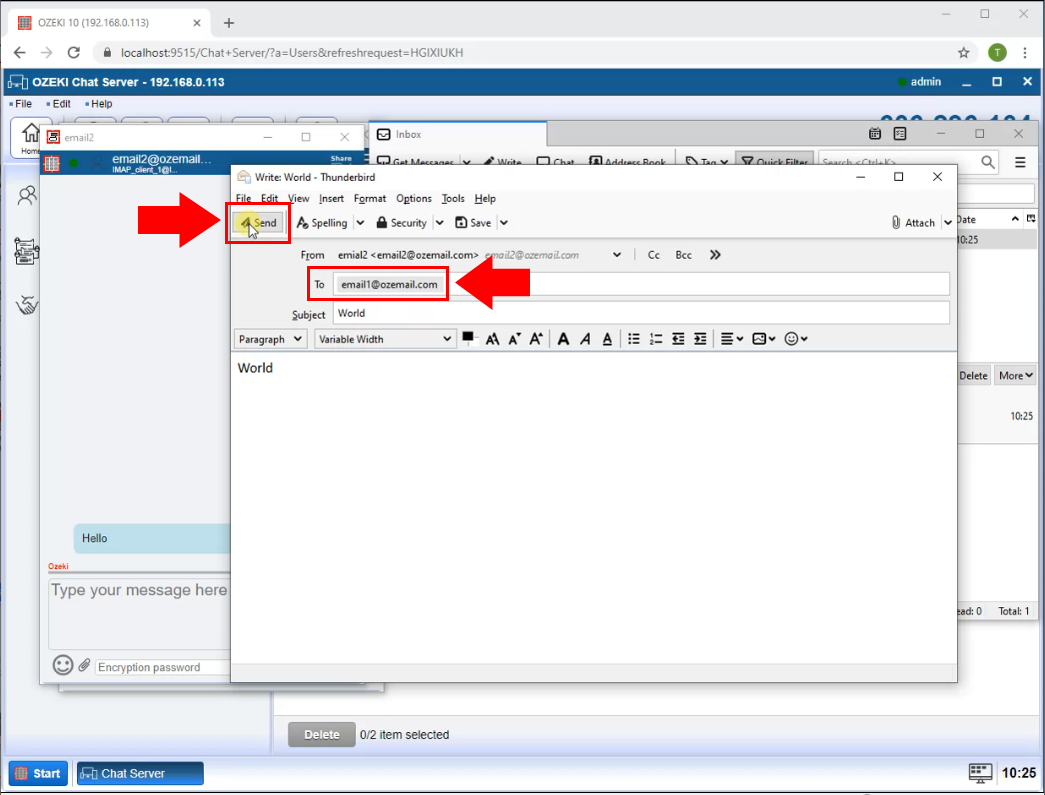
You can see on Figure 13, that the message we sent from the e-mail account was received and could be seen by the chat user.
We hope that this guide was helpful. If you have any problem with any of the steps, feel free to contact us at info@ozeki.hu

 Sign in