SMS as E-mail through Gmail
This guide teaches you to convert incoming SMS messages into outgoing emails sent through Gmail in Ozeki SMS Gateway. In just 10 minutes, our guide will walk you through the entire process, complete with a concise video tutorial, a short breakdown of the steps necessary, a detailed step-by-step guide with screenshots, and a FAQ section. Ozeki SMS Gateway's user-friendly interface ensures a smooth setup, regardless of your technical background. What are you waiting for? Let's get started!
What is SMS forwarding?
SMS forwarding is basically like call forwarding, but for text messages. Normally, texts go straight to your phone, but with forwarding enabled, they get rerouted to another number, email address, or even an app.
Ozeki SMS Gateway can send messages through your Gmail's SMTP connection so it can forward SMS messages by email.
Sending SMS as E-mail through Gmail (video tutorial)
The following video showcases forwarding incoming SMS messages as e-mails through Gmail in Ozeki SMS Gateway. It is barely 3 minutes long, but covers all the necessary steps, including setting up 2-step verification and allowing your Gmail account to be accessed by Ozeki SMS gateway, all the while showing how versatile the software is, making it a worthwhile watch.
Sending SMS as E-mail through Gmail (short version)
- Create Gmail client
- Enable 2-step verification in Google
- Generate app password for Google account
- Configure Gmail client
- Test the connection
Sending SMS as E-mail through Gmail (detailed guide)
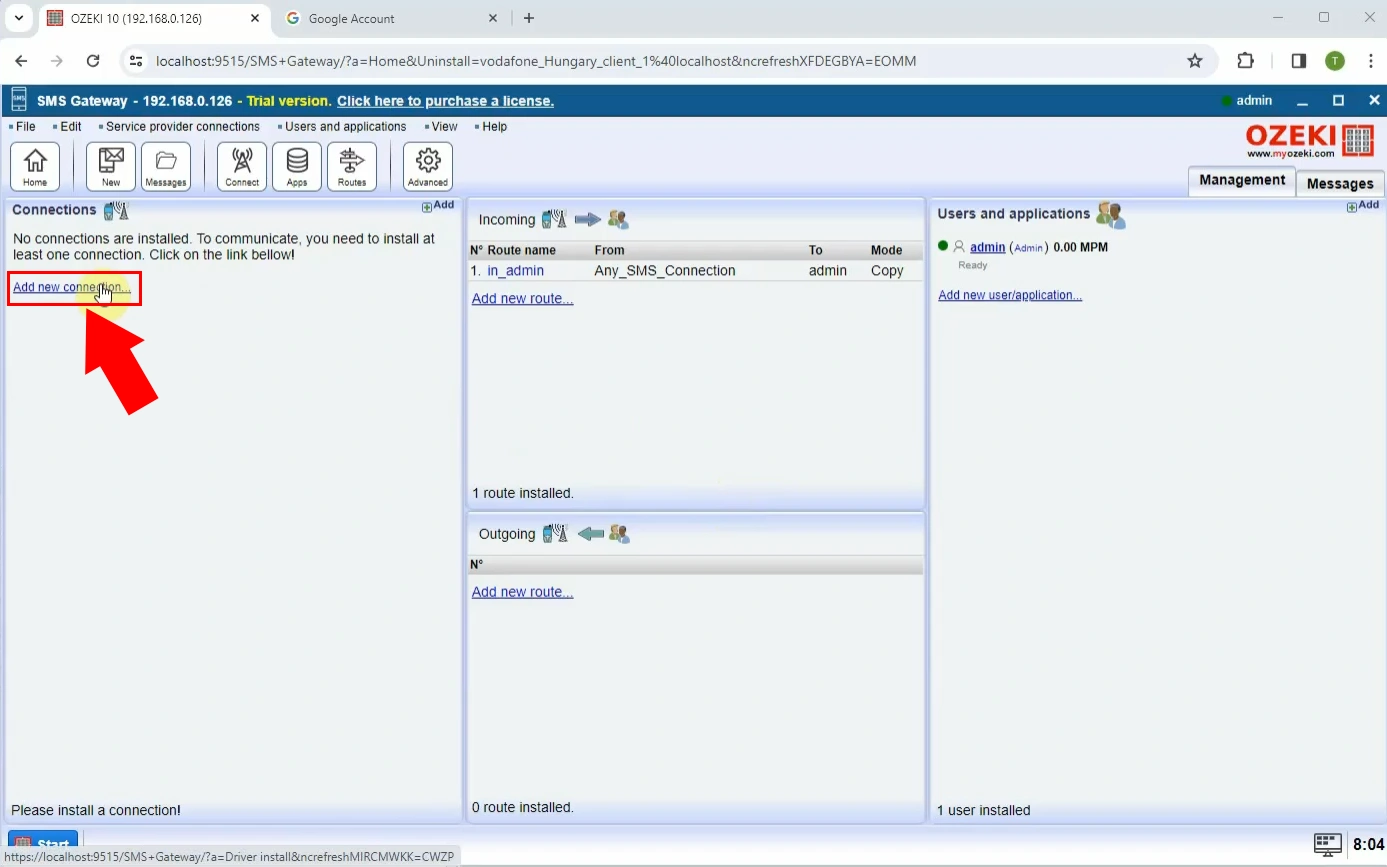
Gmail connection can be easily installed and configured through the browser GUI of Ozeki SMS Gateway. So first, open the SMS Gateway, and click on the Add new connection (Figure 1).
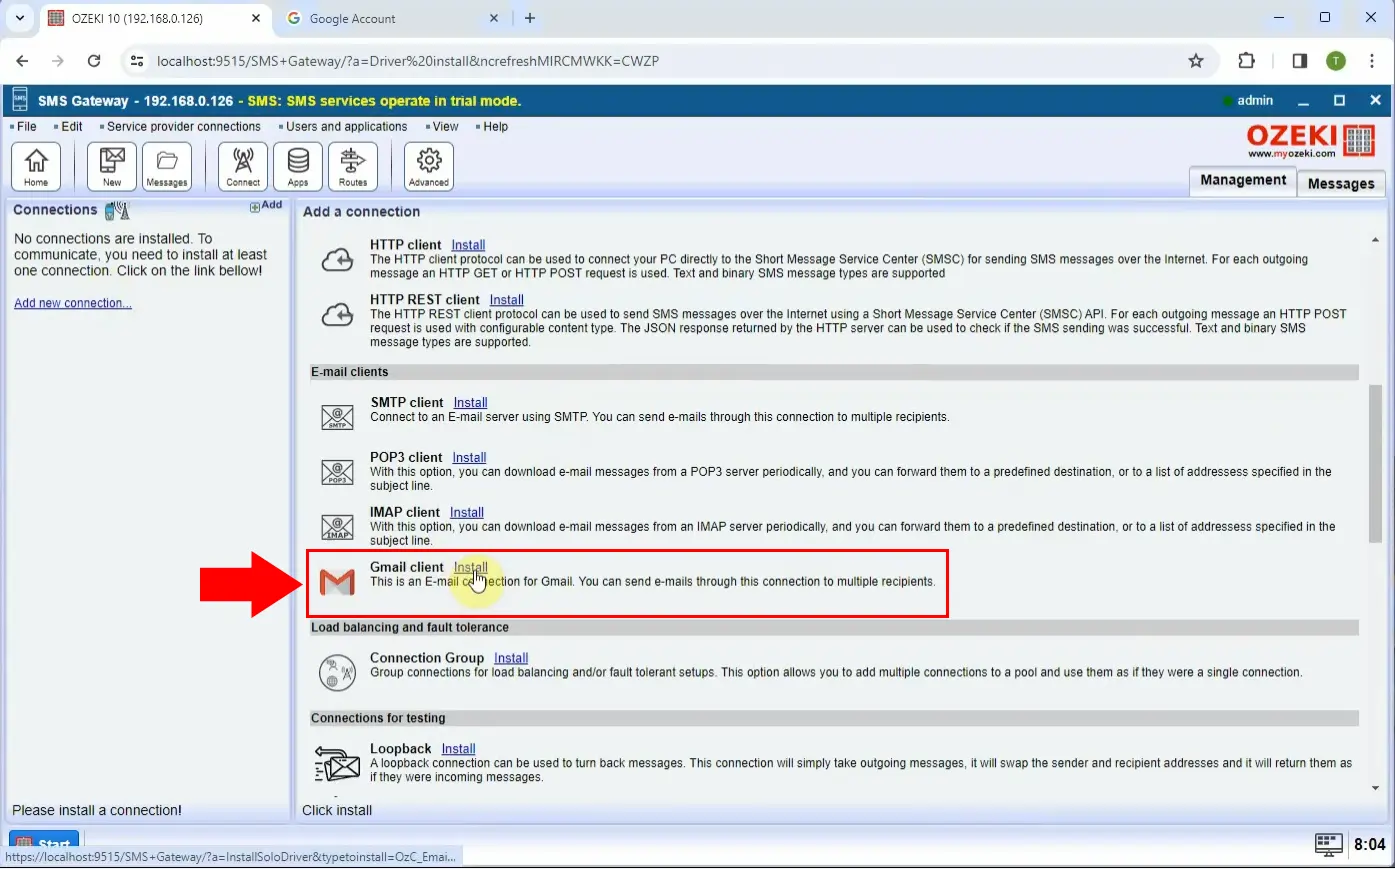
Here, in this menu, scroll down to the E-mail clients submenu, and like in Figure 2, select Gmail client by clicking on Install.
Important: To create an app password, you need 2-Step Verification on your Google Account.
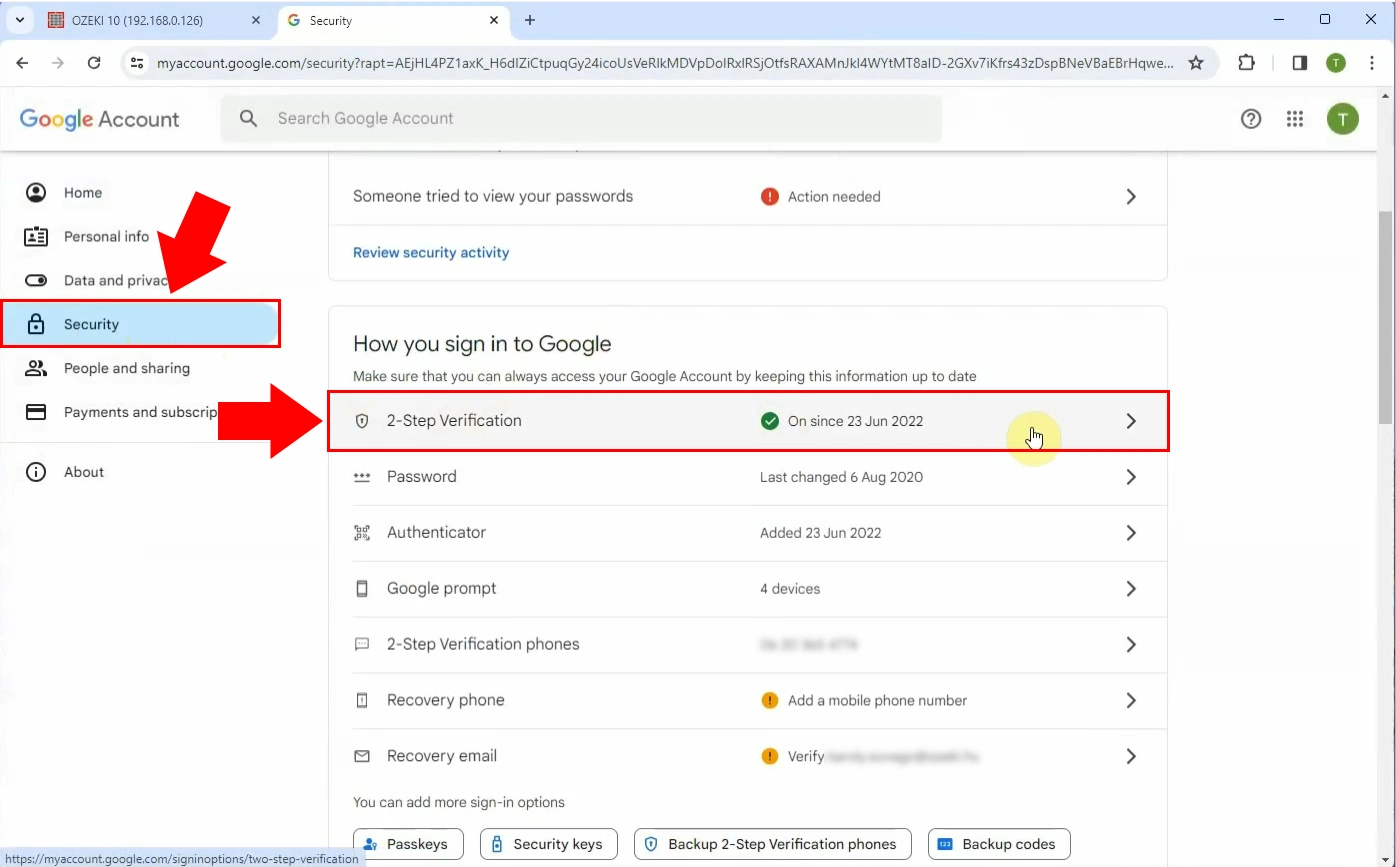
Go to your Google account, select Security and under Signing in to Google, select 2-Step Verification, as shown in Figure 3.
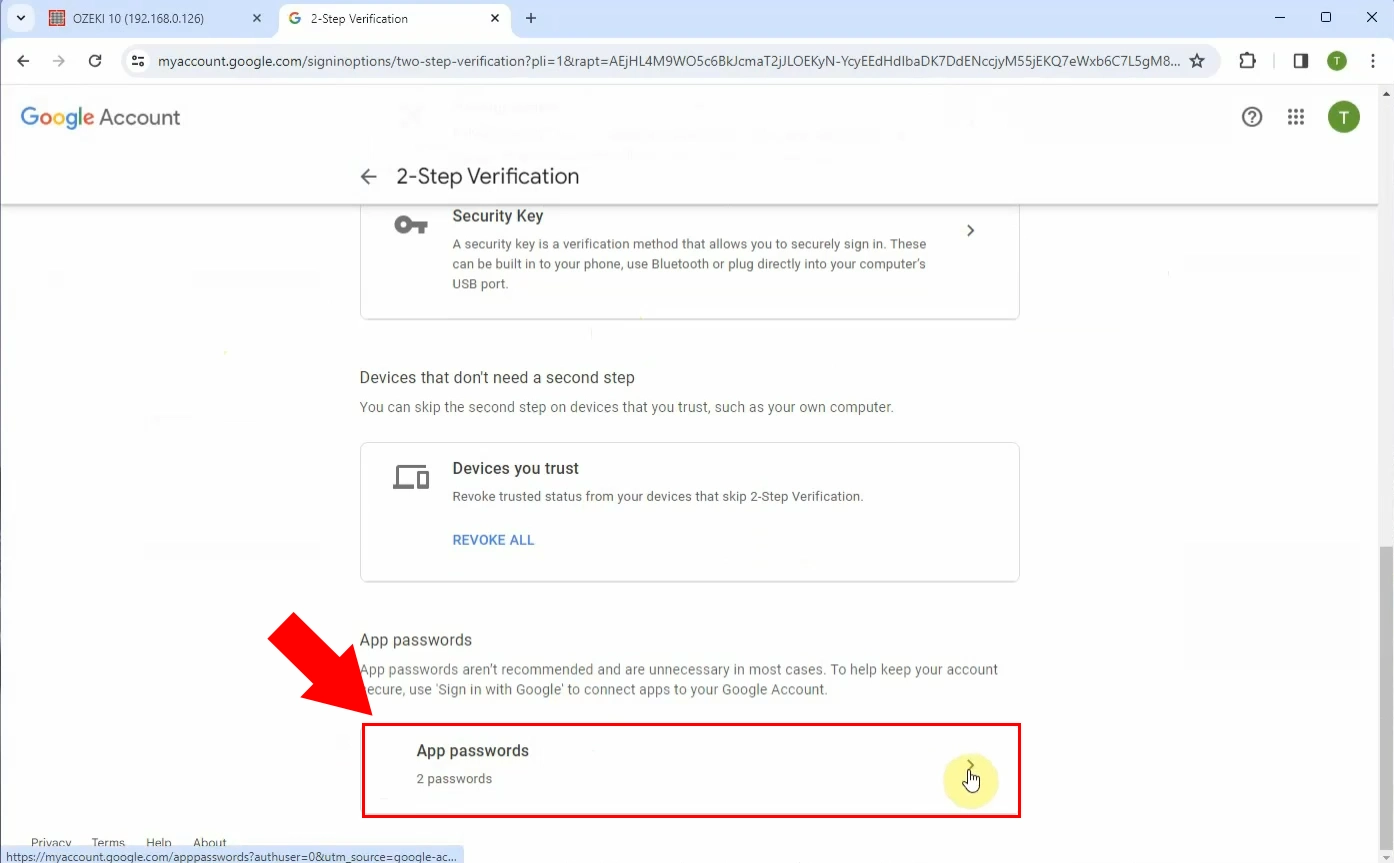
At the bottom of the page, select App passwords, highlighted in red in Figure 4.
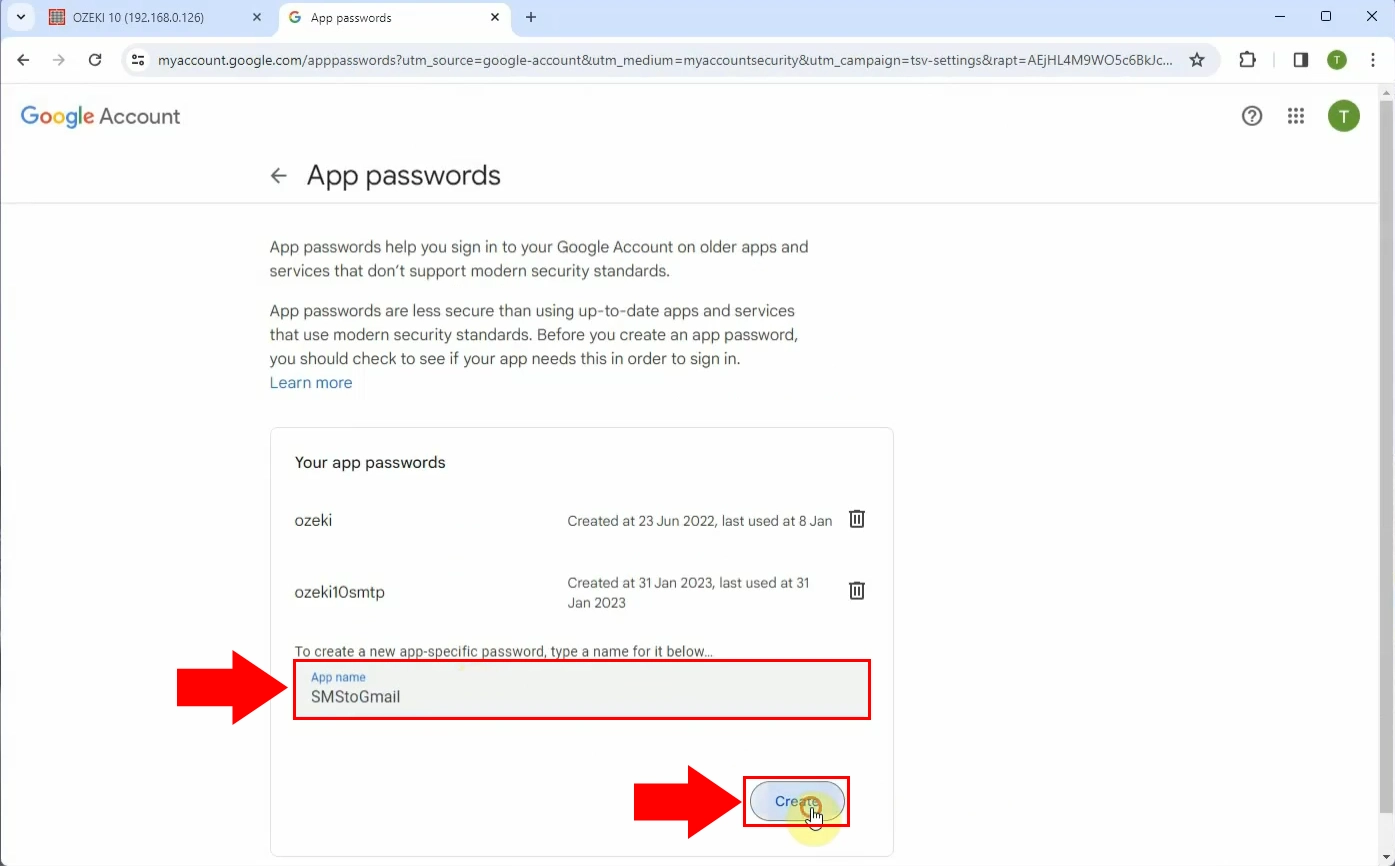
Enter a name that helps you remember where you will use the app password, then hit Create (Figure 5).
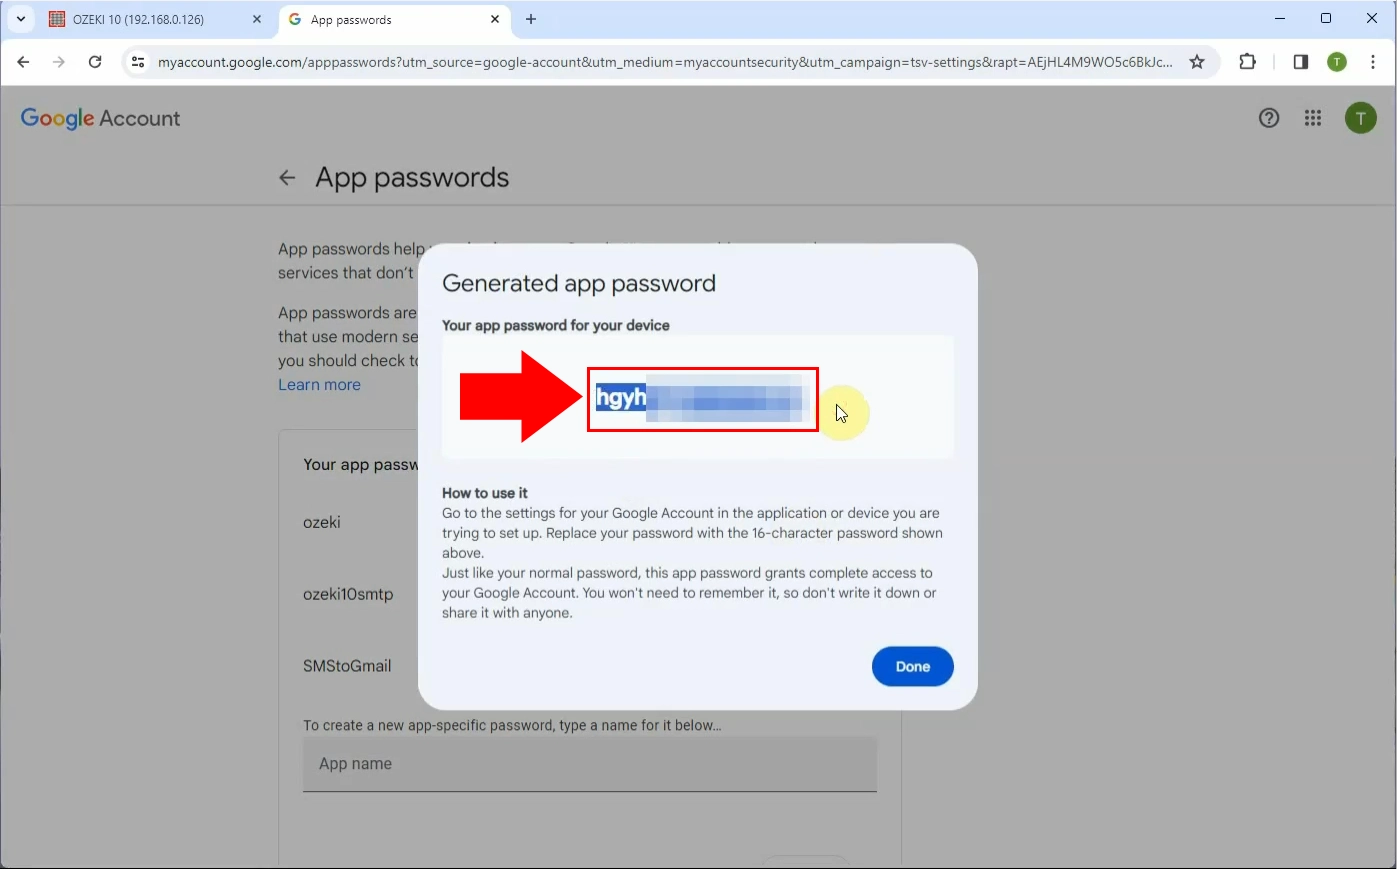
Copy your generated password from the highlighted textbox in Figure 6, and click Done.
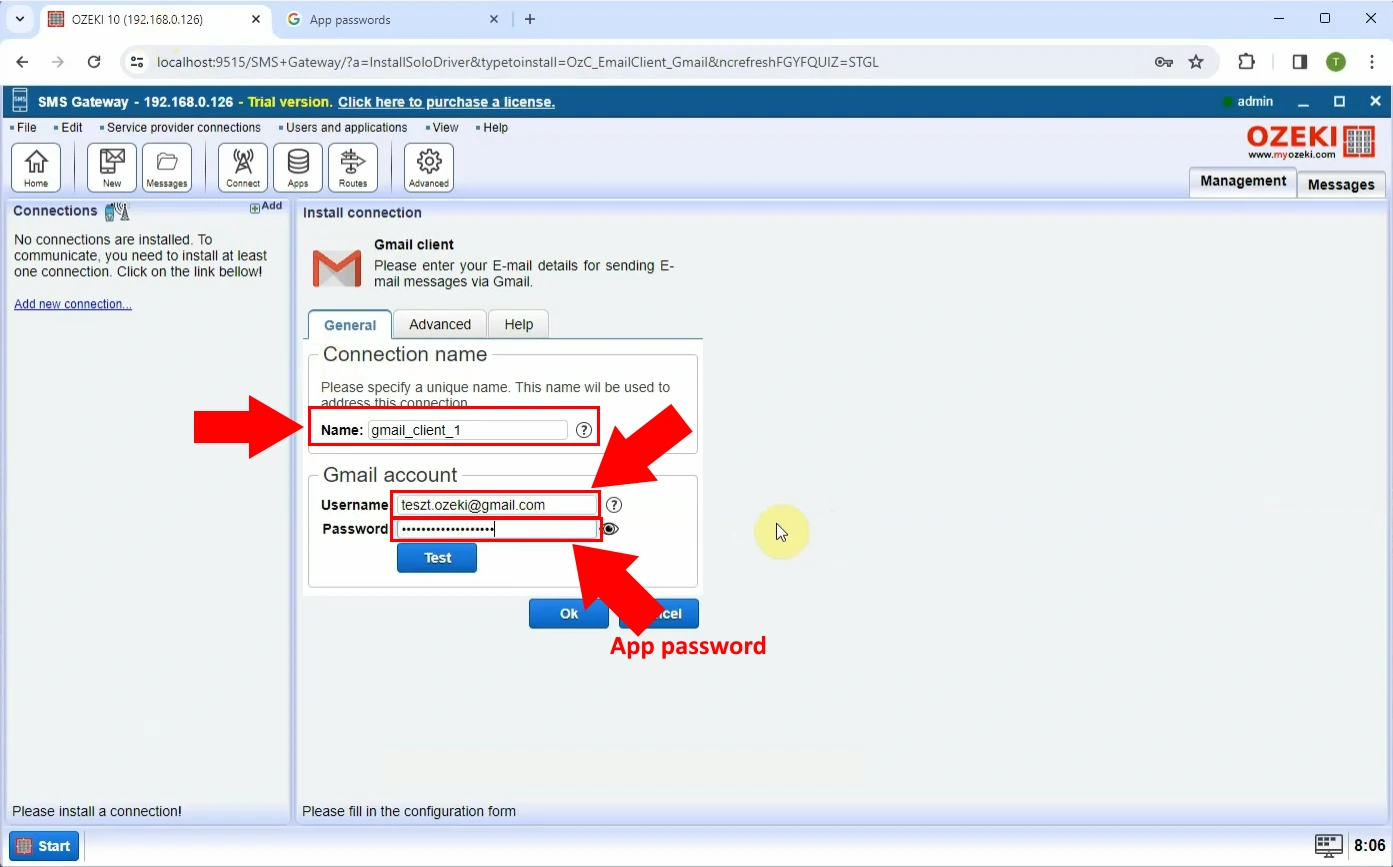
Head back to Ozeki SMS Gateway, click on the Gmail client you have created, and enter your desired name, and the credentials of the Gmail account you wish to use in the corresponding textboxes, as shown in Figure 7.
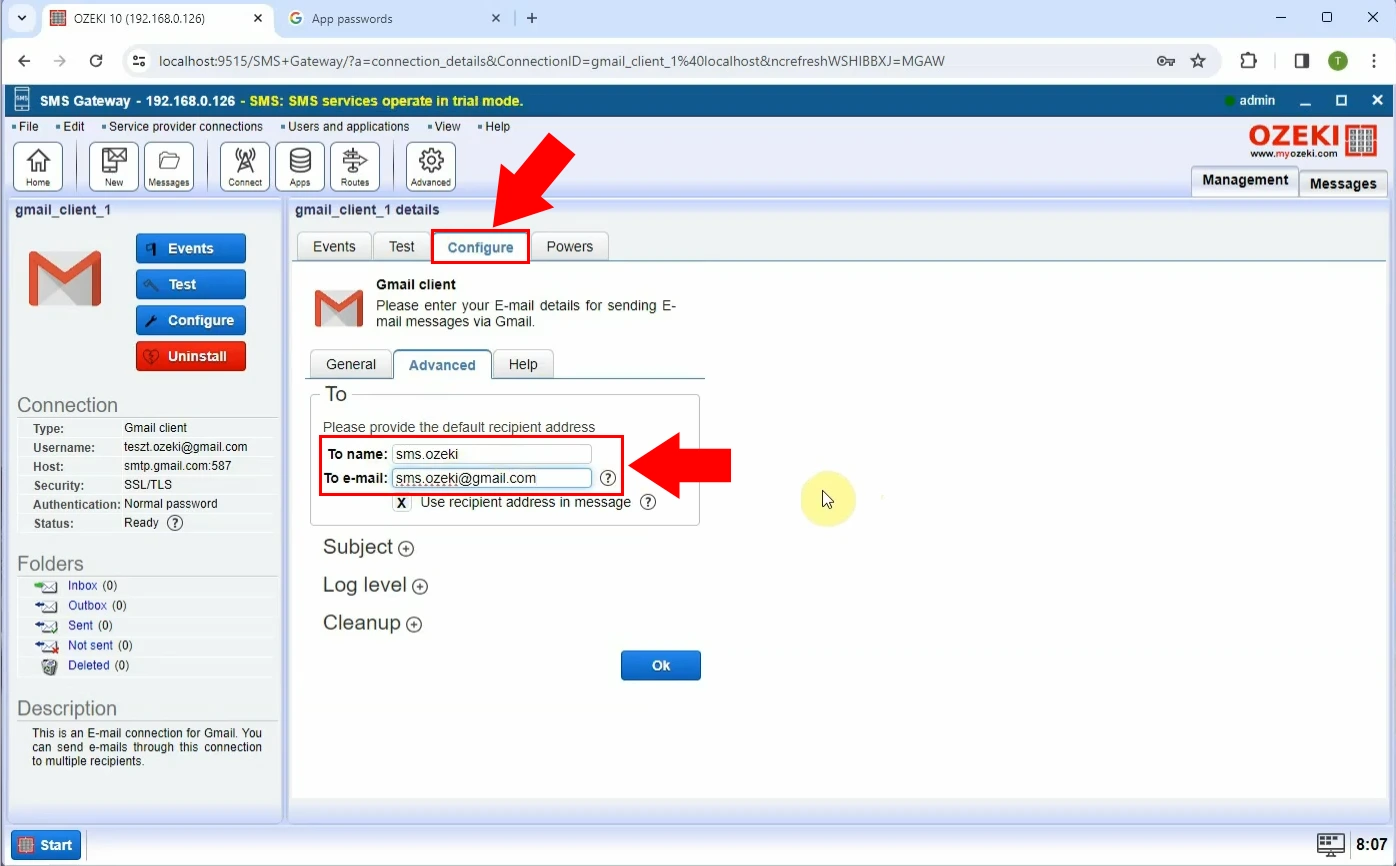
Now switch to the Advanced tab (Figure 8) and make sure the emails are sent to the correct address. In the textboxes you can set the default recipient name and address.
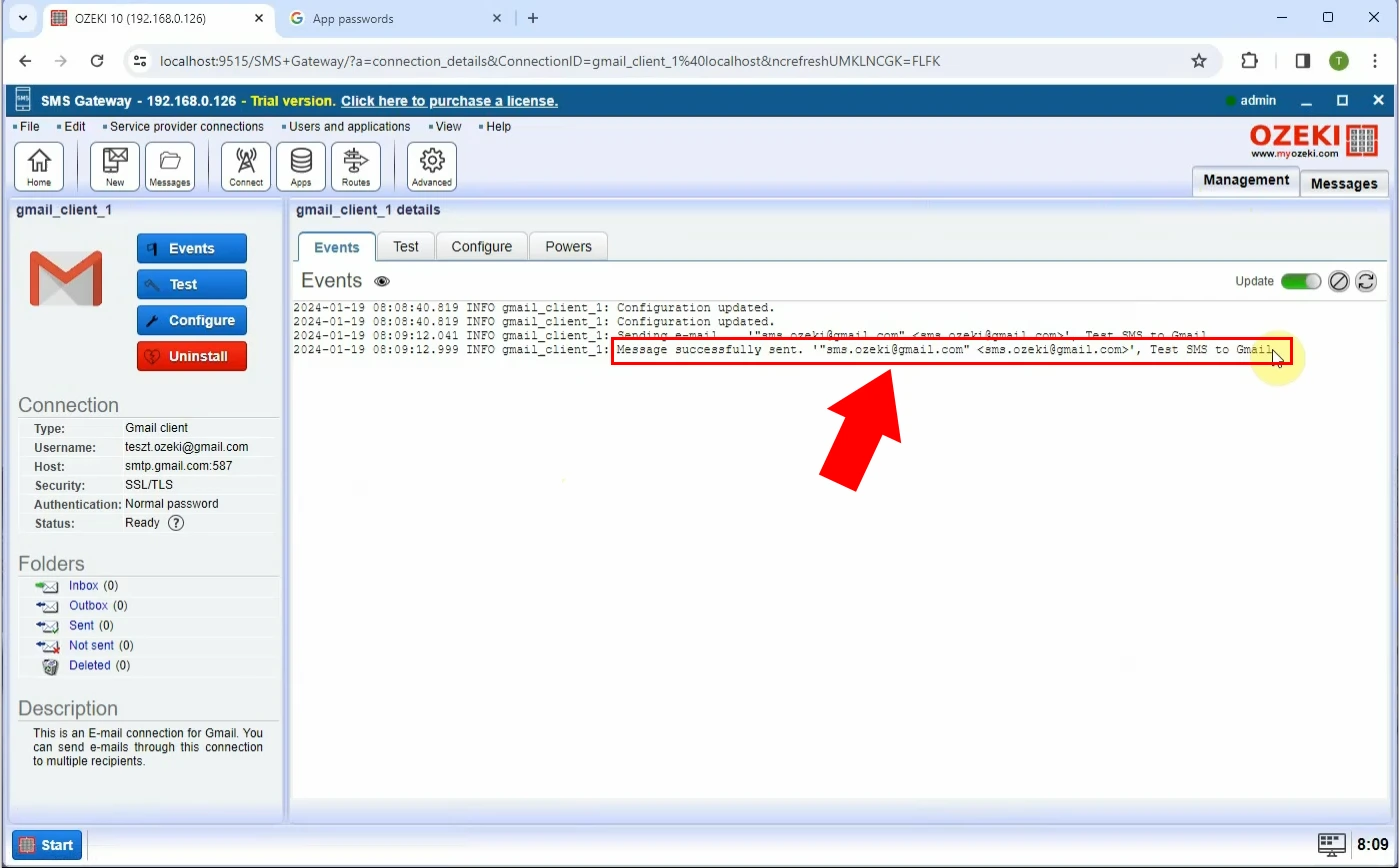
Finally in the Events tab you can see that when a message arrives on this SMTP client it is forwarded to the SMTP server which sends it to the recipient's email address (Figure 9).
Can I forward SMS messages to different e-mail clients?
Yes, Ozeki SMS Gateway allows you to forward to SMTP, POP3 and IMAP clients.
Can I forward SMS messages to different platforms?
Yes, with the help of Ozeki SMS Gateway you can forward SMS messages to apps such as WhatsApp, or forward them to other phone numbers.
More information
- How to send SMS as E-mail through Gmail
- How to send SMS from POP3 / IMAP
- How to send SMPP SMS to E-mail

 Sign in