Securing the user interface
In cryptography, a public key certificate is an electronic document used to prove the ownership of a public key.
The certificate includes information about the key, information about the identity of its owner (called the subject),
and the digital signature of an entity that has verified the certificate's contents (called the issuer).
If the signature is valid, and the software examining the certificate trusts the issuer,
then it can use the public key to communicate securely with the certificate's subject.
Trusted companies like GoDaddy or VeriSign can store your public key certificates, so your customers all over the globe can trust your verified websites
that are using the HTTPS protocol. With it you can safely type your passwords or use your credit card. In this tutorial the
public key certificate is stored on your Ozeki 10 server, so the client users have to manually allow browser access.
STEP 1 - HTTP connection
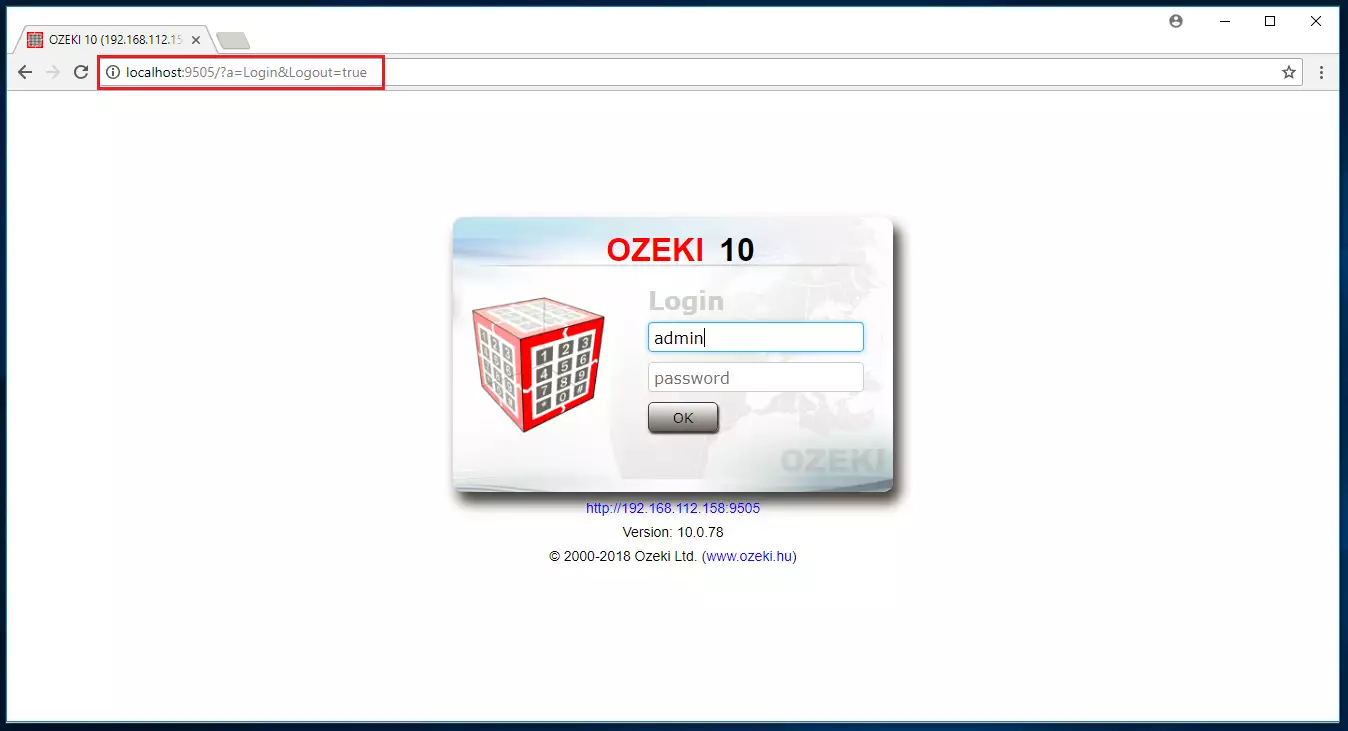
At a normal login, there is no HTTPS security on your Ozeki client GUI. This guide will show you how to change the connection to HTTPS. Please log in. Hopefully this will be the last time you have logged in through an unsecured channel using HTTP protocol. Use the admin login credentials belonging to Ozeki 10. Keep in mind that changing the protocol to HTTPS will not change your password, it will just create more trust between you and your Ozeki 10 server.
STEP 2 - Open the Security application
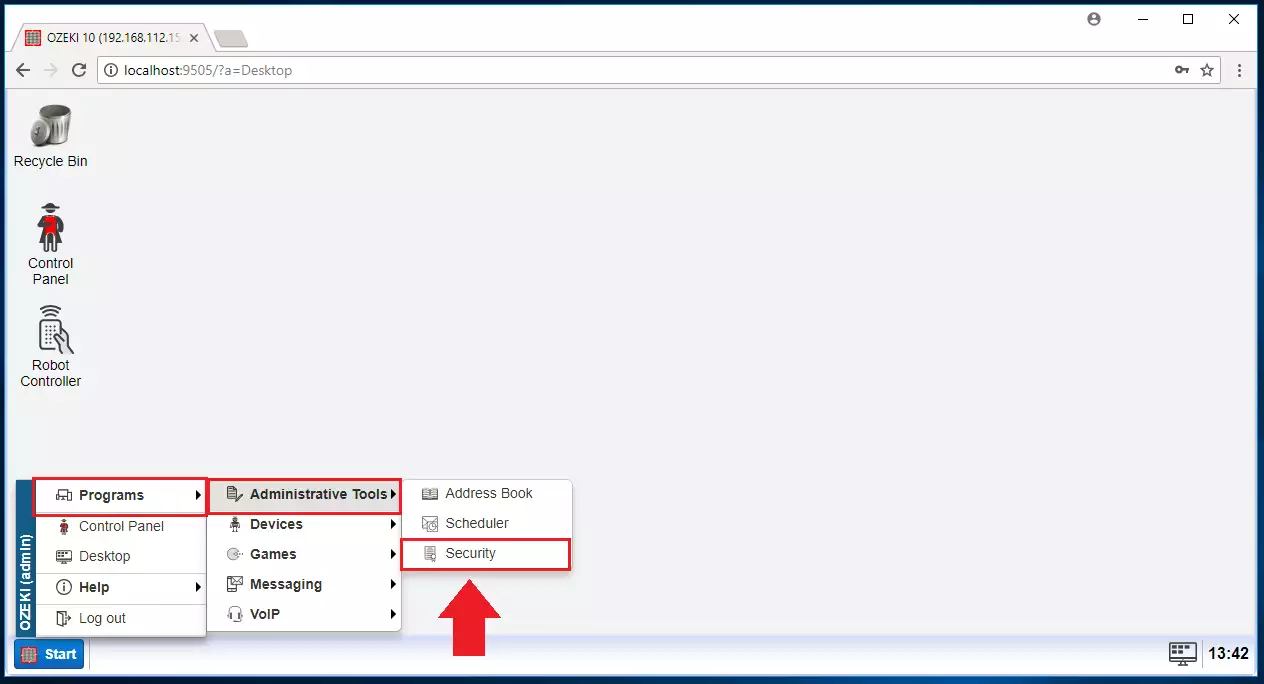
Ozeki 10 has a great application to create and manage security certificates. You can Open the Security application from Ozeki's Start menu. You can also drag and drop it to your desktop. Find it at
Ozeki's Start Menu/Programs/Administrative Tools/SecurityThe application contains many encryption, decryption algorithms as well.
STEP 3 - HTTPS icon
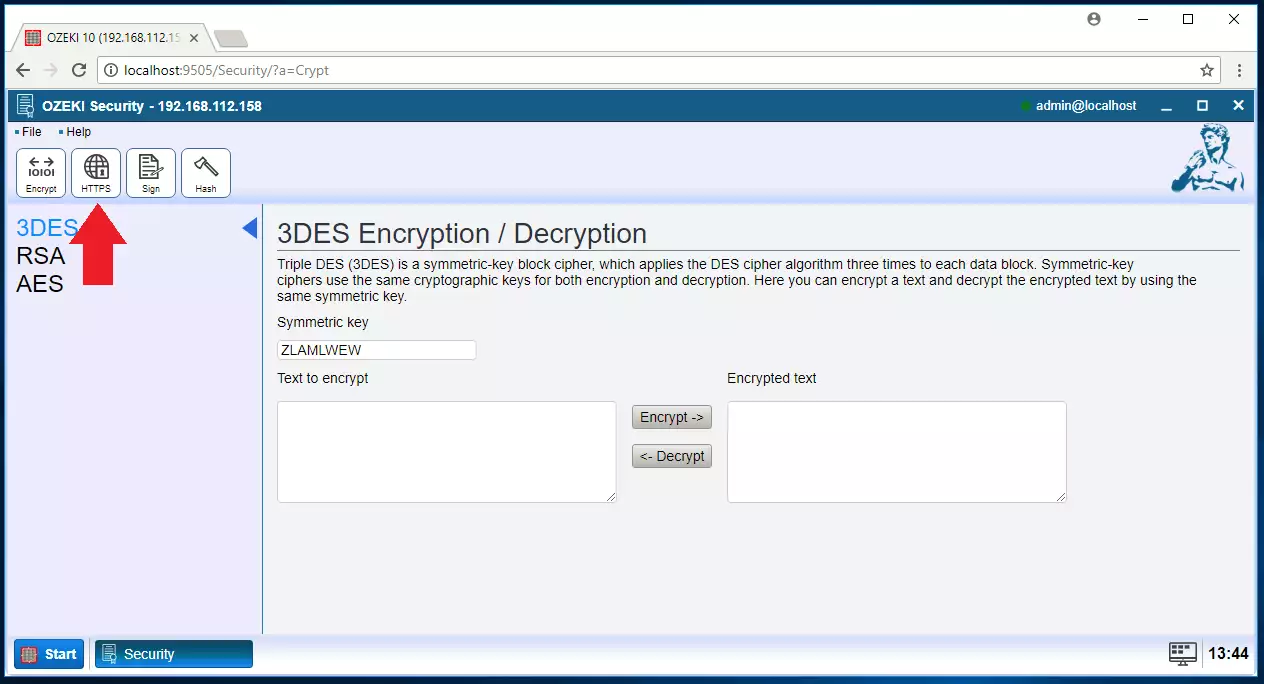
Find the 'HTTPS' icon on the toolbar. Click it and you will travel from the encryption / decryption algorithms to the HTTPS configuration window. Check the image below to see where to click.
STEP 4 - Certificate tabpage
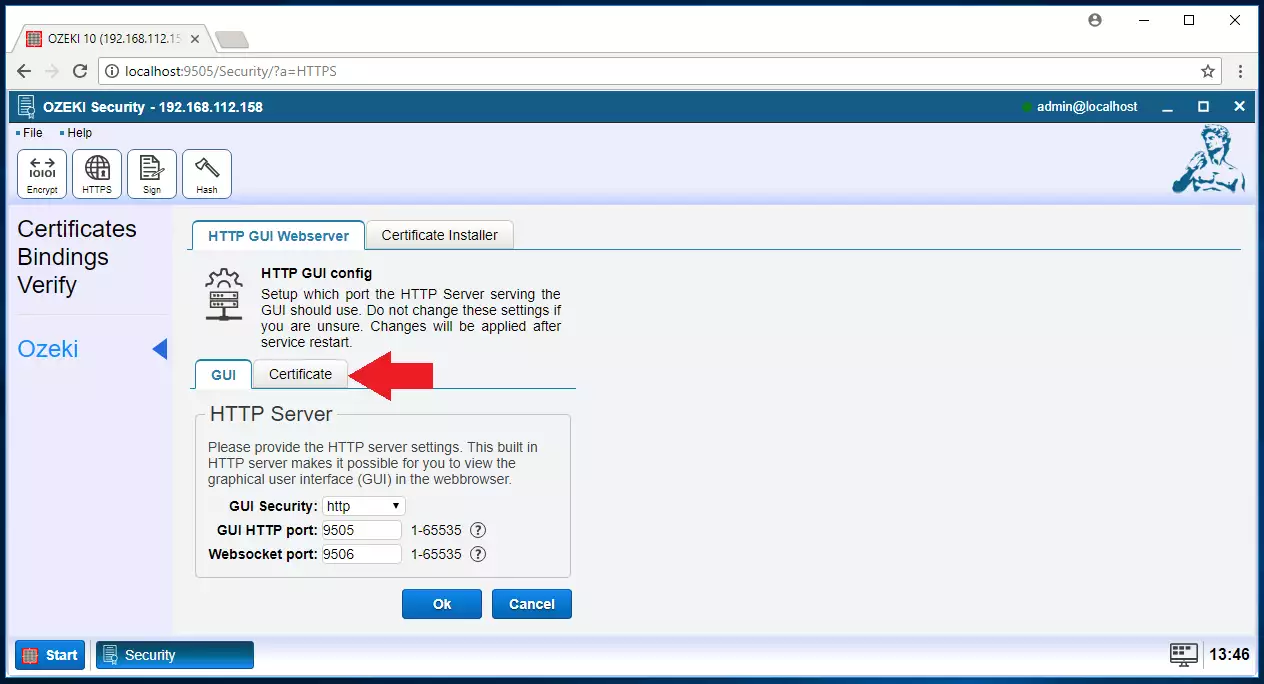
This is really important. Click on 'Ozeki' on the vertical toolbar, then click on the 'Certificate' tabpage as seen below. This is where you can create a certificate if you do not have one.
STEP 5 - Create a certificate
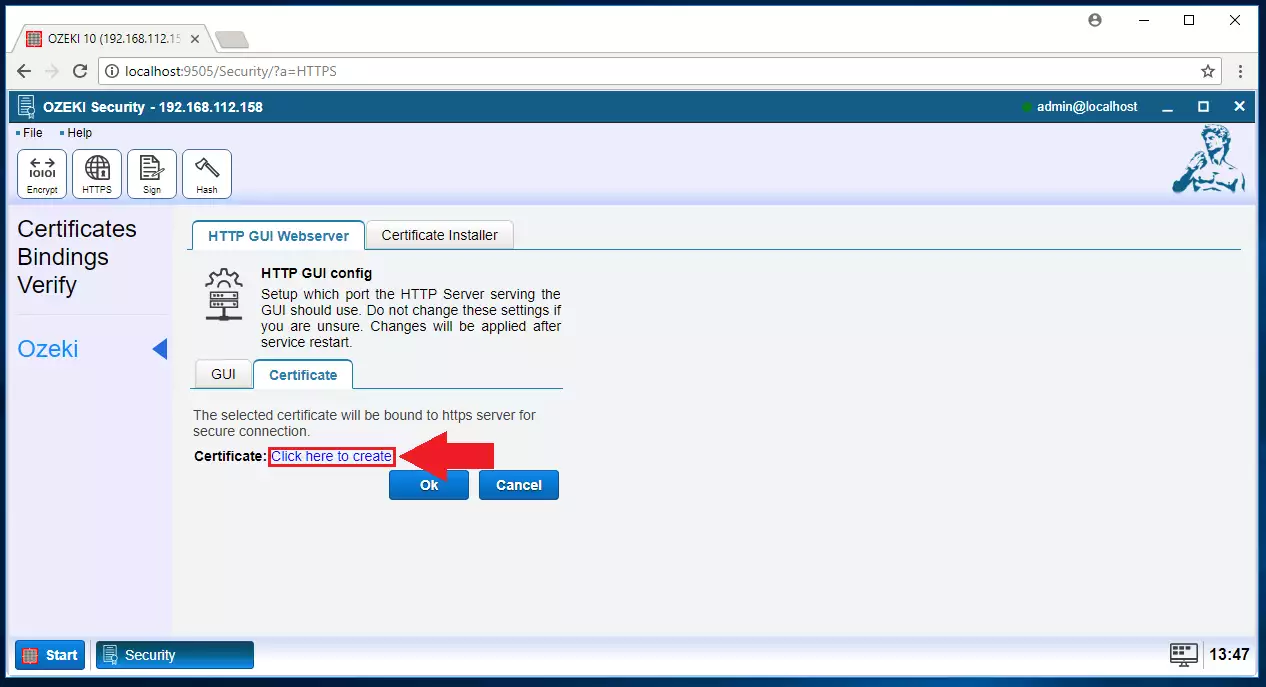
There will be a dropbox of the already installed certificates. If you haven't created any certificate yet, please click the link as you can see it on the screenshot and create a new one at STEP 8.
STEP 6 - HTTP GUI Webserver
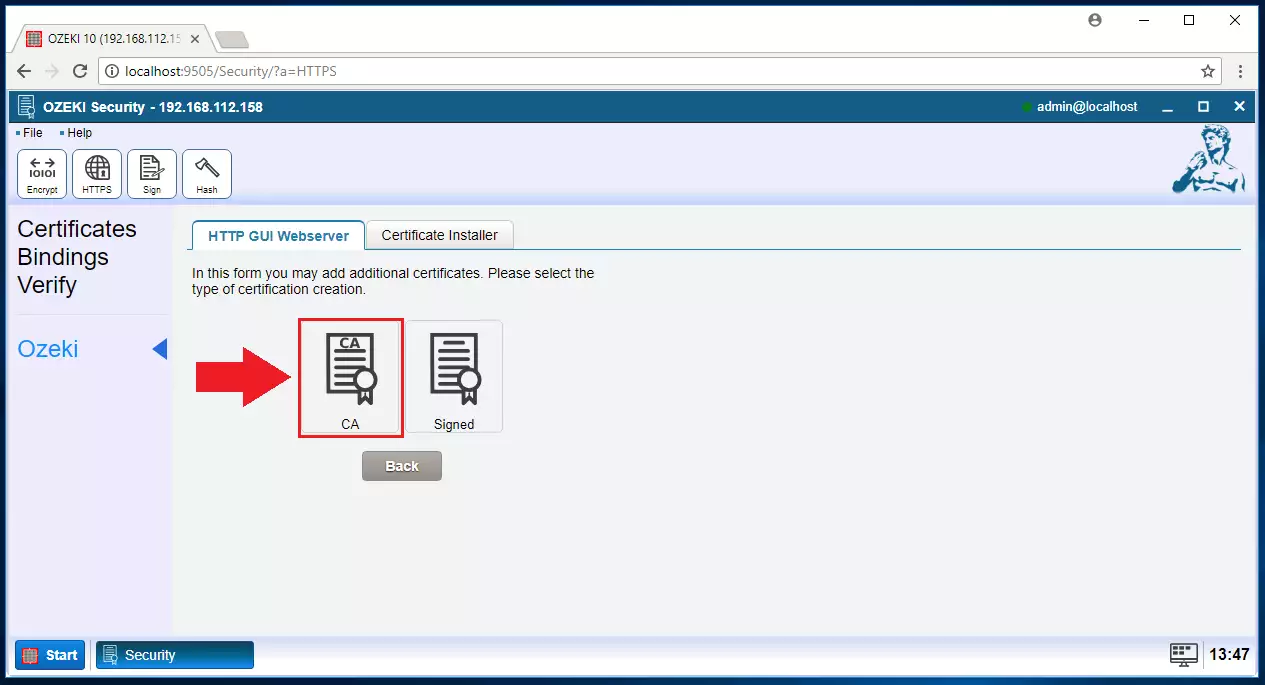
You will see a few big icons on the 'HTTP GUI Webserver' tabpage. You can upload a .pfx file or create your own. Click on 'Create' then click on 'CA' to create a new public certificate of the issuer.
STEP 7 - Fill the details of the certificate issuer
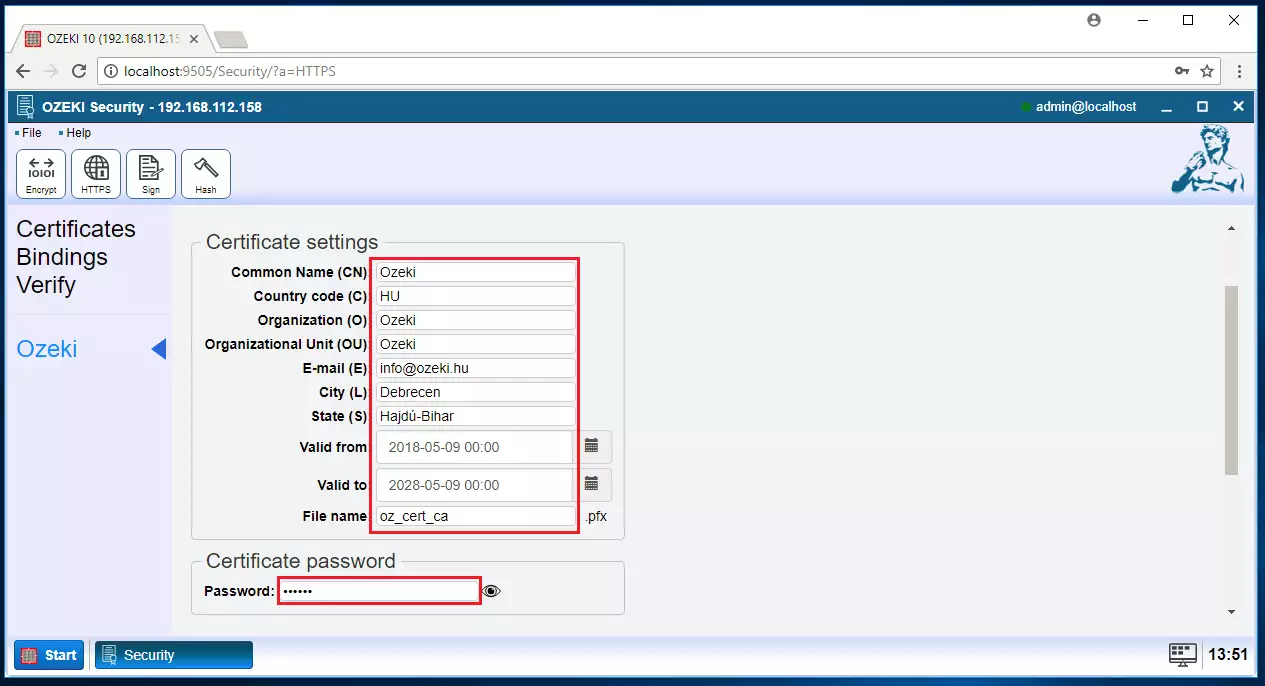
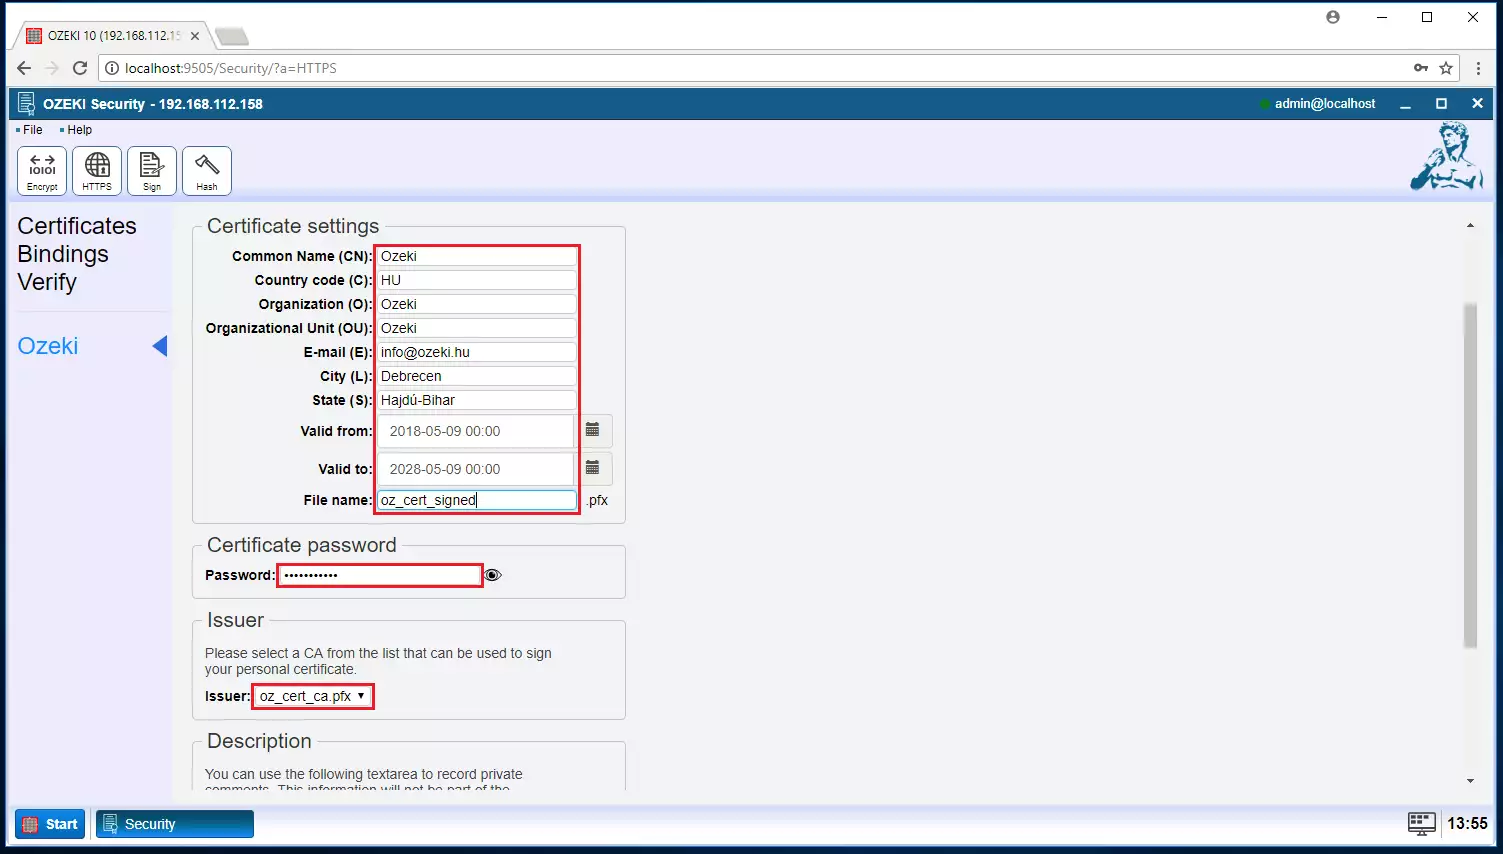
Now you will have to fill a few details of the certificate issuer, which will be you at the moment. Please use your contact information instead of the ones you see in the screenshot. Add a validity and password. Finally click 'Ok' to create it. You will use this CA certificate to create your Ozeki GUI's signed certificate. The signed certificate can be seen from any webbrowser by the user. See how to create it in STEP 8.
STEP 8 - Become the certificate owner
Go back to the selection icons you have started from to create the signed certificate. This time you will be the certificate owner as well as the issuer, so you will use the same company data and password you have used in STEP 7. It is advised to trust 3rd parties to be the CA issuer, which makes your Ozeki GUI to be reached without manually approving the signed certificate from your browser.
STEP 9 - Use your certificate
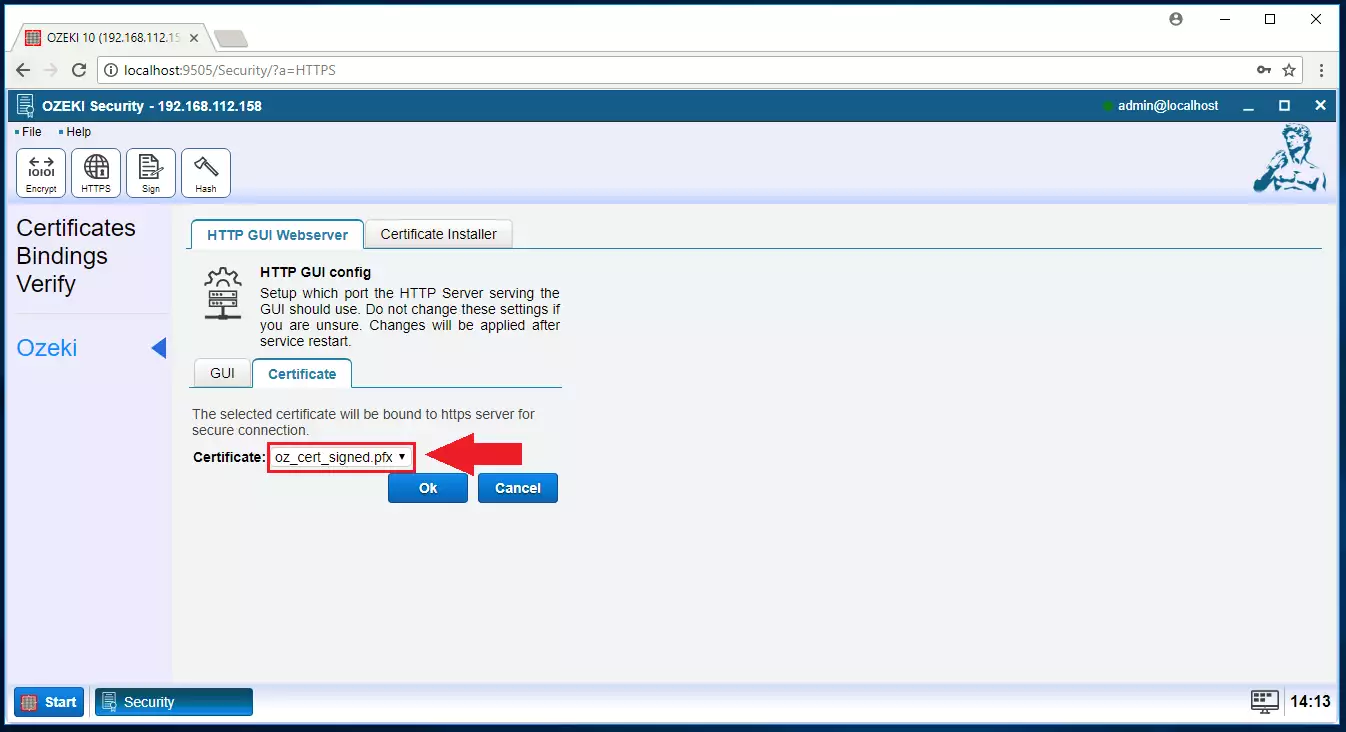
Now it is time to use it. Go back by clicking 'Ozeki' on the vertical toolbar. Please select the 'Certificate' tabpage and add the signed certificate you have just created. You can select it from the dropdown menu. Click 'Ok' to certify your Ozeki GUI.
STEP 10 - Set the protocol and the port number
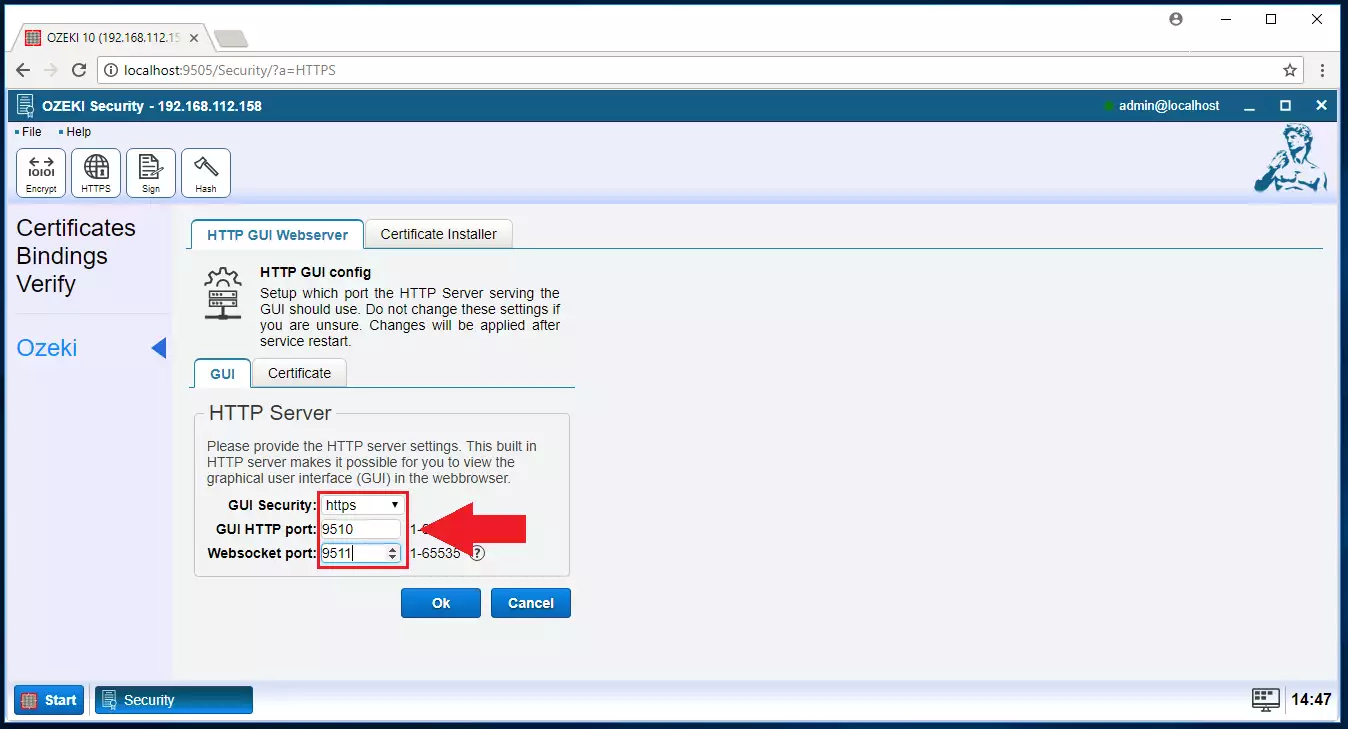
Move to the 'GUI' tabpage, where you can set the protocol and the port number for both the GUI and websocket port. Now that you have activated your signed certificate, you can use HTTPS for Ozeki 10. After restarting the service, simple HTTP won't be available anymore.
STEP 11 - Restart the service
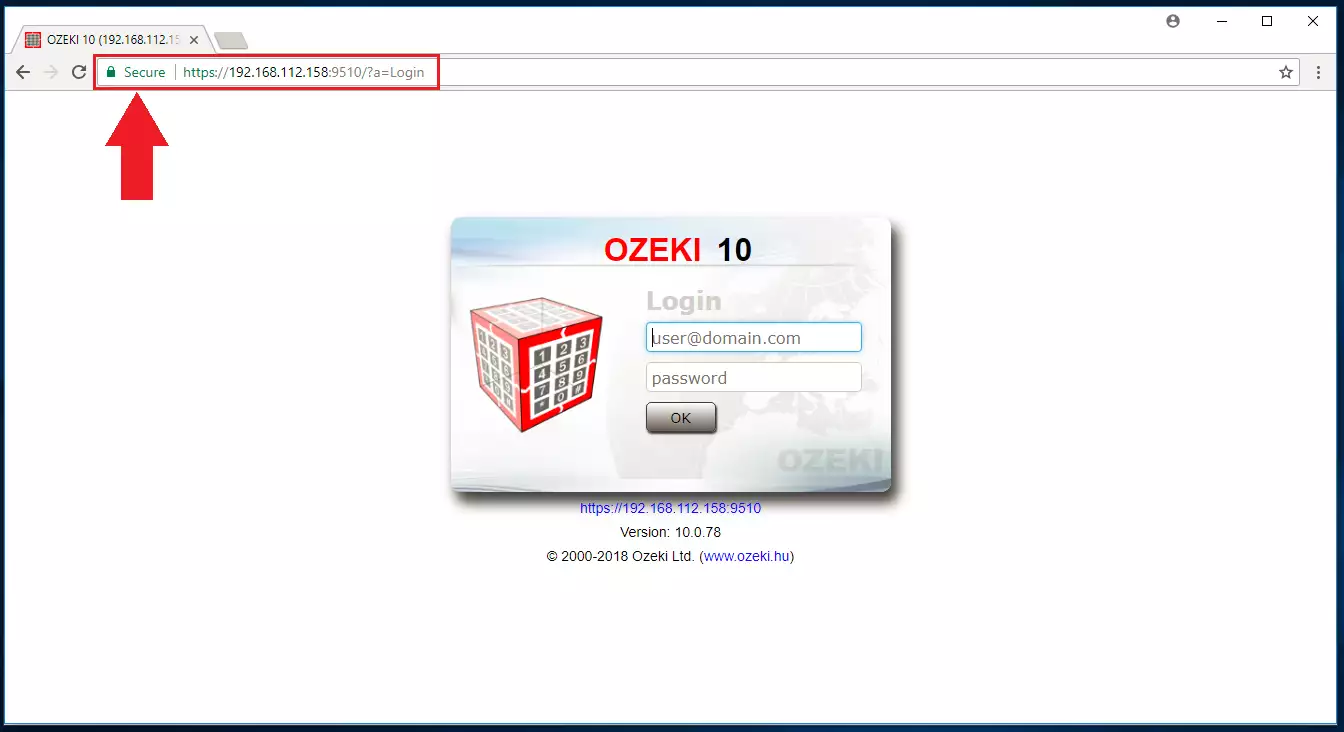
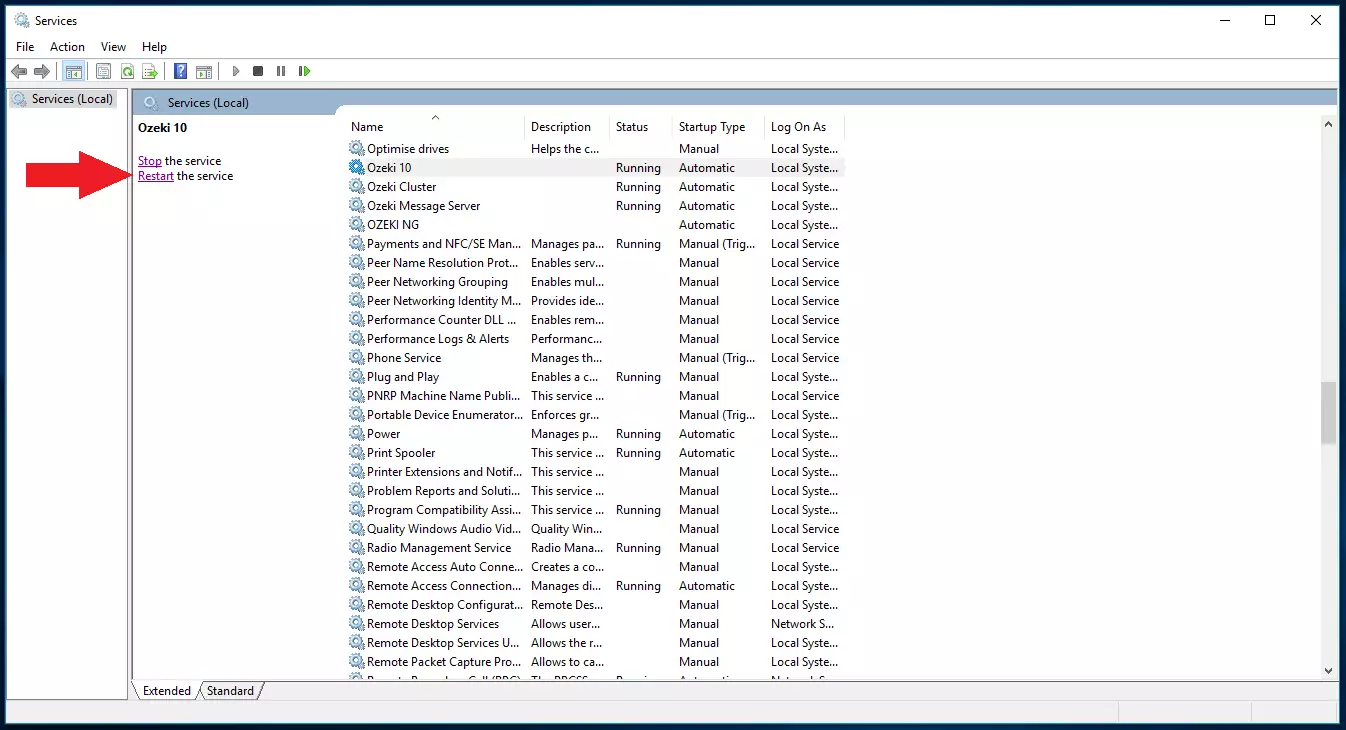
Find the task manager of your OS. The screenshot below uses a Windows task manager. Stop the Ozeki 10 service, wait a bit and start it again. Now you can open the browser GUI by using the https://IP:PORT format so you can use Ozeki 10 securely. Do not forget to inform all of your Ozeki 10 users about the changes.
STEP 12 - HTTPS login
Do not get scared of the warning sign in your browser. If you have followed our tutorial, you will have to allow the private connection before continuing using Ozeki 10. In the searchbar of your webbrowser you will see a small lock left to the 'Secure' sign. If not, then click on the website information icon left to the URL in the searchbar.
