How to install SMS Gateway using Ozeki Installer
The next simple guide is about to show you how you can install and set up the SMS Gateway application. This product is capable of managing a lot of messages in a short time and you do not have to worry about messages getting lost. This document is organized into 6 highly detailed, but still simple steps. At the end of this guide, you will be able to send your first message using SMS Gateway. So, let's get underway with the first step right now!
Prerequisites
In order to use Ozeki Installer to setup Ozeki apps, you need a suitable computer, with a network connection (Internet or LAN). On this computer you should have Windows 10 (or Windows Server 2016 or newer) installed. For more information, please check out the detailed list of system requirements in our System requirements page.
☑ Personal computer (PC)
☑ 8 GB RAM
☑ Quad Core CPU
☑ SSD drive (for better performance) with 100 MB of free disk space
☑ Windows 10 or Windows 11 operating system
☑ Internet connection
☑ Web browser: Google Chrome or Microsoft Edge (Chrome based))
☑ Ozeki Installer

|
You may download Ozeki Installer from the link below. https://ozeki.hu/p_1017-download-ozeki-software-products.html Download Ozeki Installer |

|
Step 1 - Select SMS Gateway from app store
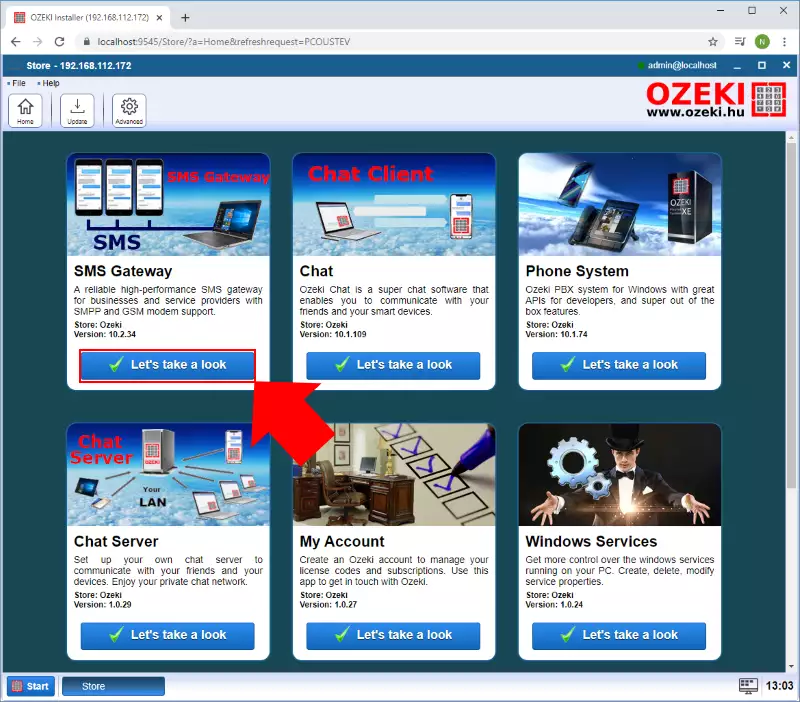
The first thing that you have to do, is to open Ozeki Installer. If you have not installed Ozeki Installer on your computer yet, check the following link where you can do that in a few simple steps: http://ozeki.hu/index.php?owpn=1001. After you opened Ozeki Installer, just you need to select the SMS Gateway product from the app store as Figure 1 demonstrates it.
Step 2 - Install SMS Gateway
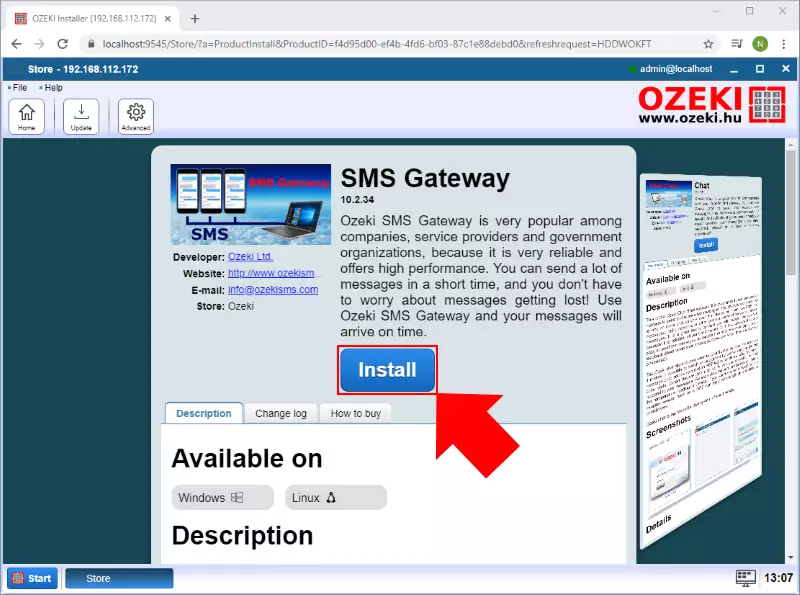
After you selected SMS Gateway, the next page that shows up is the details page of the app. Here you can see every bit of detail that gives you a brief description of the purpose and advantages of that application. To install SMS Gateway on your computer, just click on Install as you can see it on Figure 2.
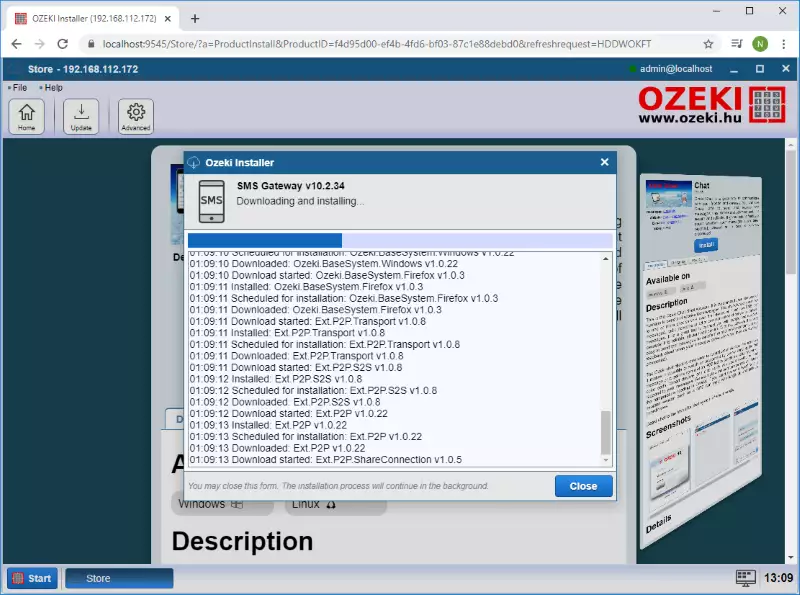
During the installation of the product, a dialog window shows up to inform you about the progress (Figure 3). This window logs you all events that occurred during the installation process.
Step 3 - Open SMS Gateway
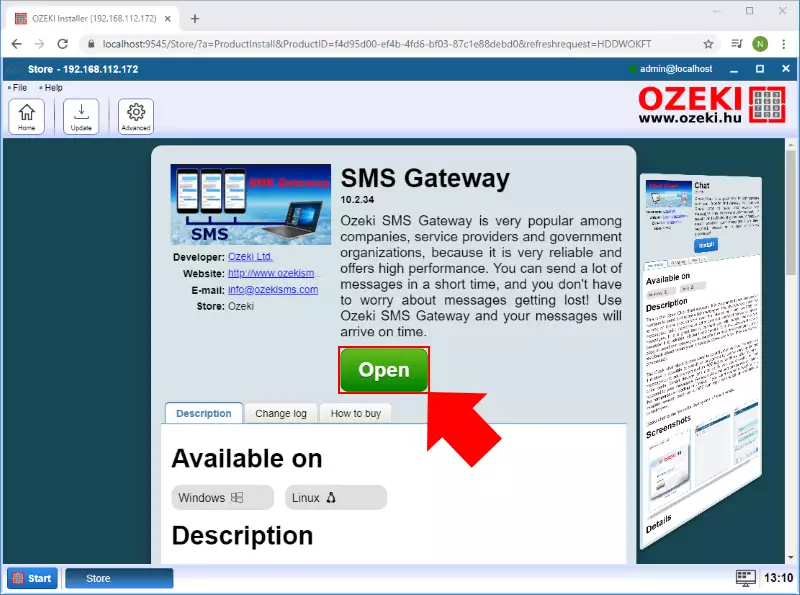
After the installation finished, you can directly open the application with the 'Open' button. Click on it like in Figure 4 to open the SMS Gateway product in your web browser. The installed app runs on the port 9515.
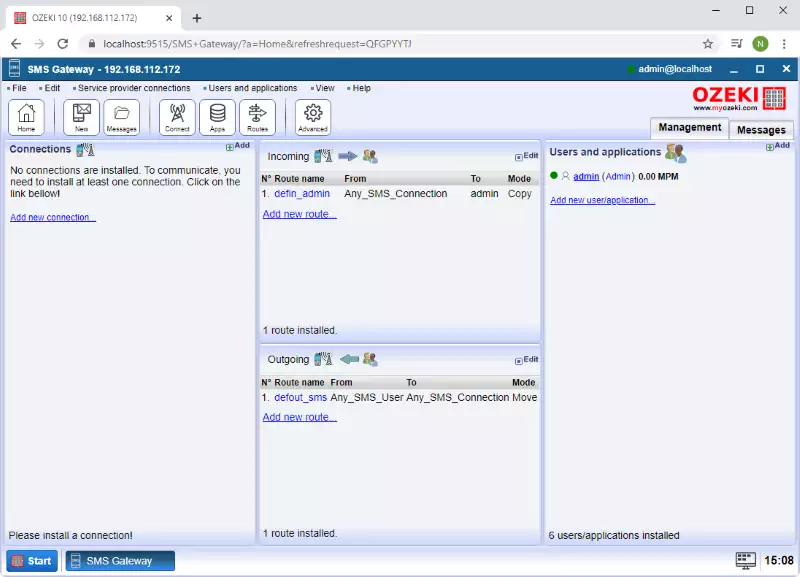
After clicking on the Open button, SMS Gateway starts running on the port 9515 and opens its main menu in your web browser (Figure 5). This menu shows all important information like currently active users or connections and message routing tables.
Step 4 - Create SMPP User
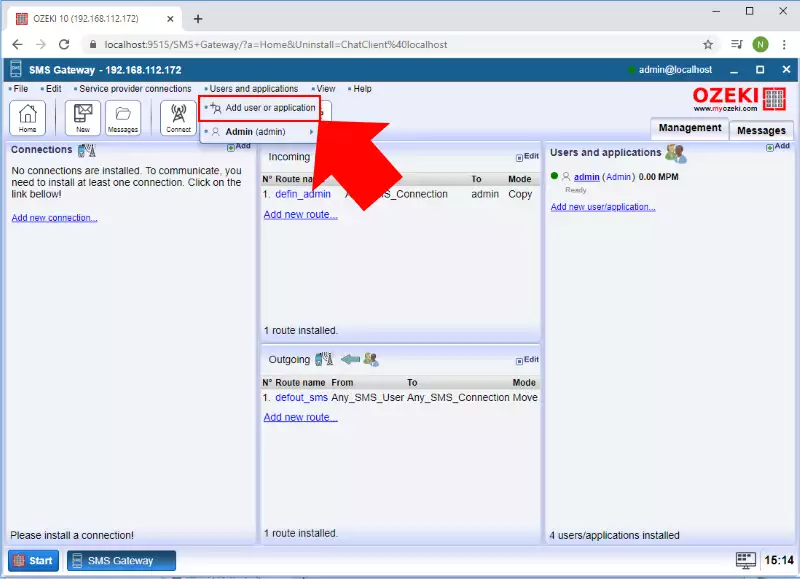
To start your first messaging system, first, you need to create an entity that can function as a gateway. To do that, as Figure 6 demonstrates, select Users and applications and click on Add user or application.
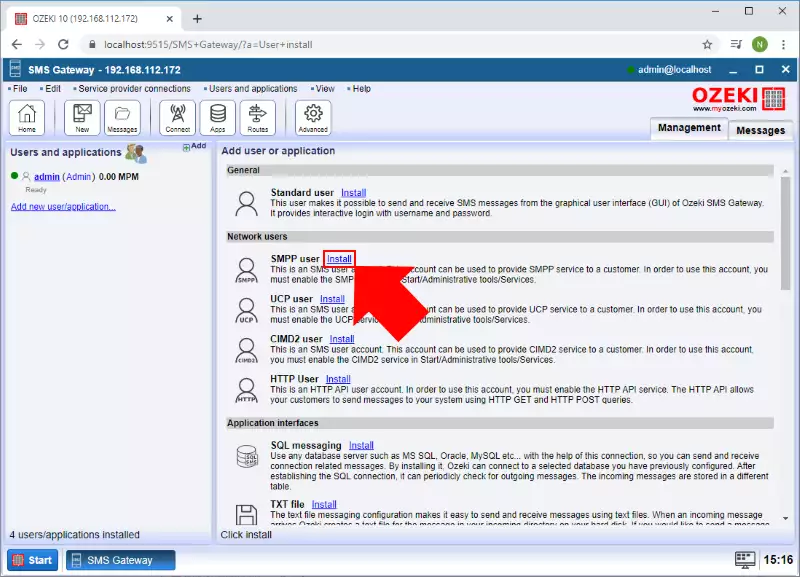
From the next menu, you can choose the user or application, that you would like to create. As Figure 7 shows, this guide shows how to create an SMPP User, so to do the same, click on the Install button of that user.
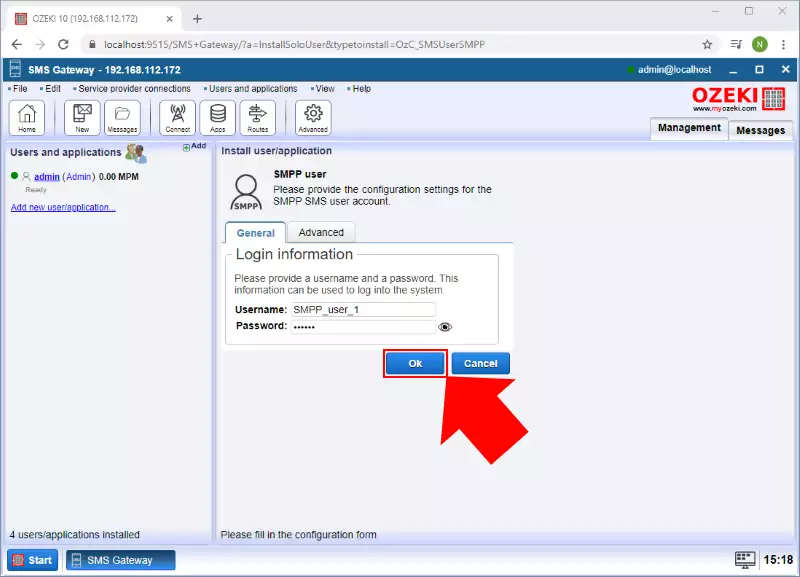
To complete the installation of the SMPP user, lastly, you just have to type a username and a password just like in Figure 8. These will be important details for the client who have to connect to the gateway. Lastly just click on Ok to create the SMPP user.
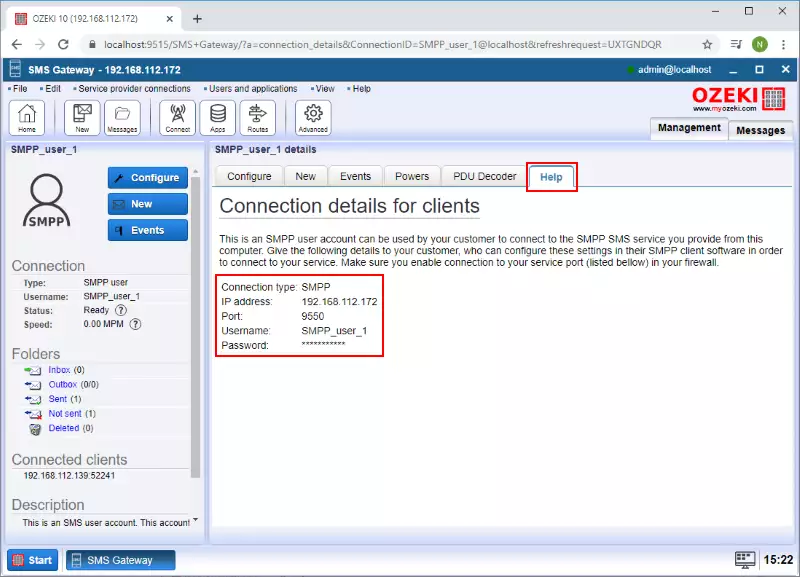
After you created the SMPP user account, you can check all details that will be crucial for the client to connect to that user. For that, as you can see it on Figure 9, just select the Help tab, and here you can find the details that your clients need to be able to connect to the created SMPP user account.
Step 5 - Create SMPP client
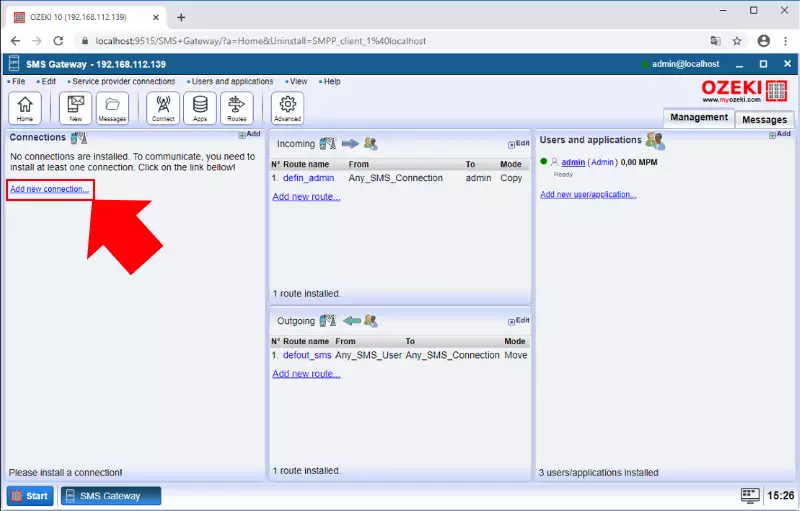
The next step is to create the SMPP client connection that can connect to the SMPP user gateway. To create that connection, first click on Add new connection... as Figure 10 demonstrates it.
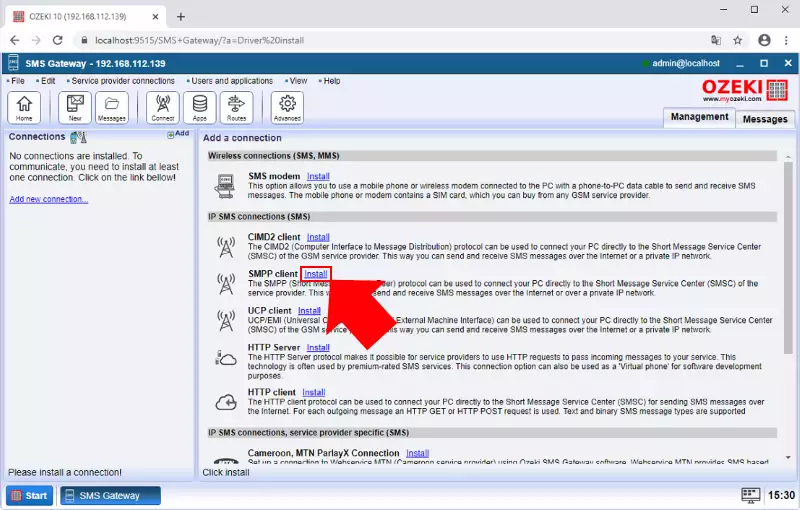
In the next menu, you will be able to see is the list of connections that you can create in SMS Gateway. Here, you need to click on the Install button of the SMPP client connection as you can see it on Figure 11.
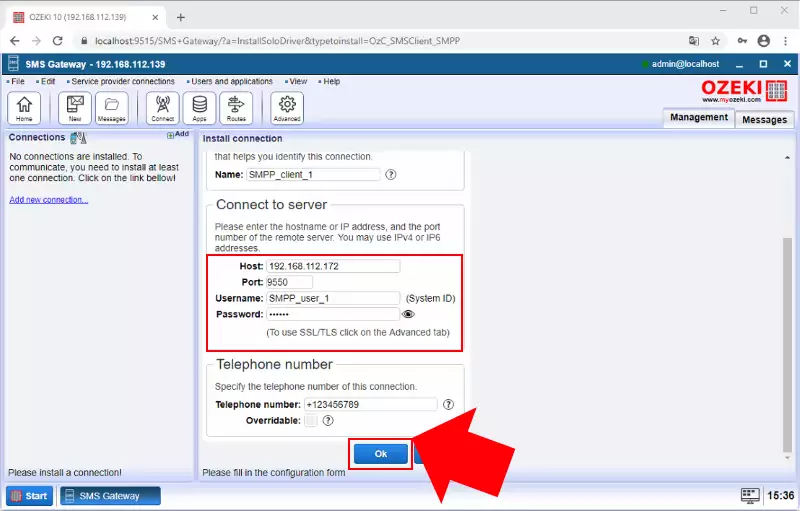
The last step of the creation of SMPP client is to give the details of the SMPP user account that the client will connect to (Figure 12). Also, you have to give the name of the client account and a telephone number here, before clicking on Ok.
Step 6 - Send your first message
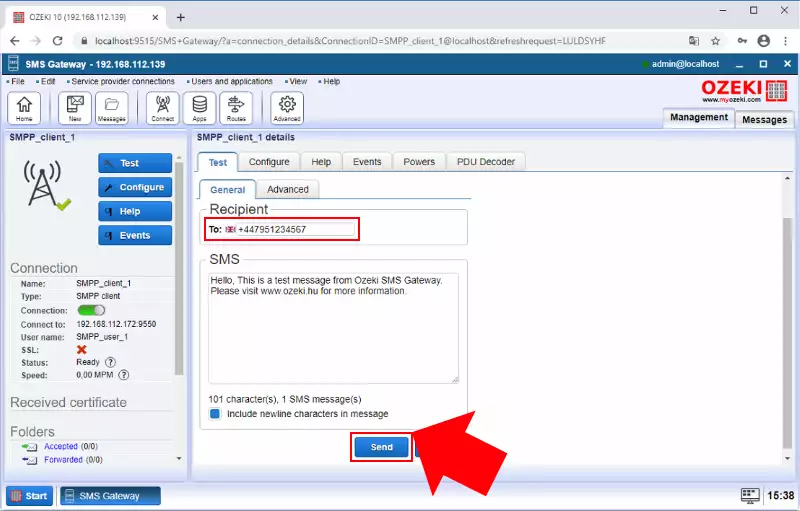
The last thing that you have to do to complete this guide is to send your first test message. For that, just select the Test tab in the menu of the create SMPP client. Here, you need to specify the telephone number of the recipient and write your message. To send the message, just lick on the Send button as Figure 13 shows below.
To be able to use an Ozeki 10 product, you need to purchase and activate it. To learn how you can activate an Ozeki 10 product please click on the following link: http://www.ozeki.hu/index.php?owpn=7689.
