How to setup an Informix database connection
In this chapter you can learn how to connect to your Informix database through ODBC connection. Via ODBC you can connect to different types of database servers, because it is a general type of connection. If you have connected successfully, then you can import contacts from your Informix database to the Ozeki Bulk Messenger software.
Step 1 - Start ODBC Data Sources
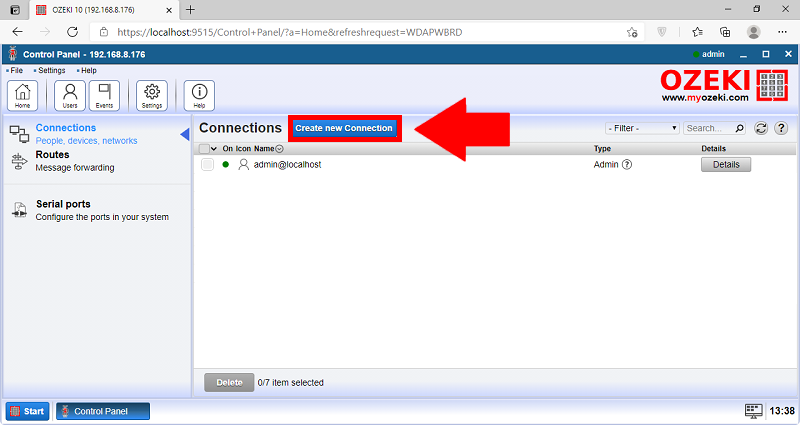
First you need to search ODBC Data Sources from the Start menu (Figure 1)
Step 2 - Add an IBM INFORMIX ODBC DRIVER
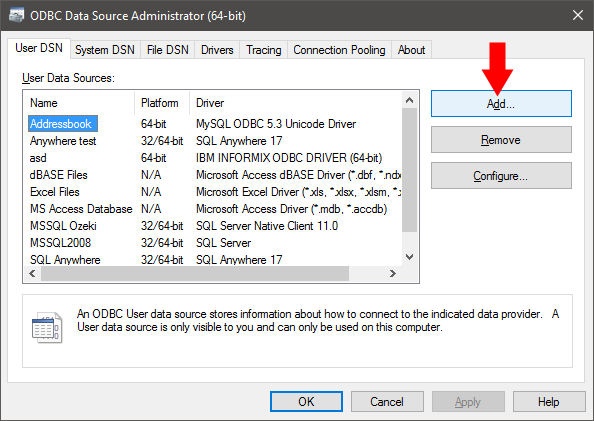
Click 'Add...' (Figure 2)
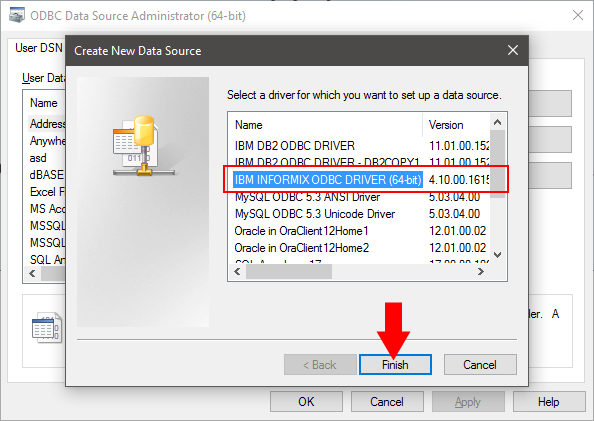
Choose 'IBM INFORMIX ODBC DRIVER (64-bit)' (Figure 3).
Step 3 - Connect the ODBC DRIVER to your Informix database
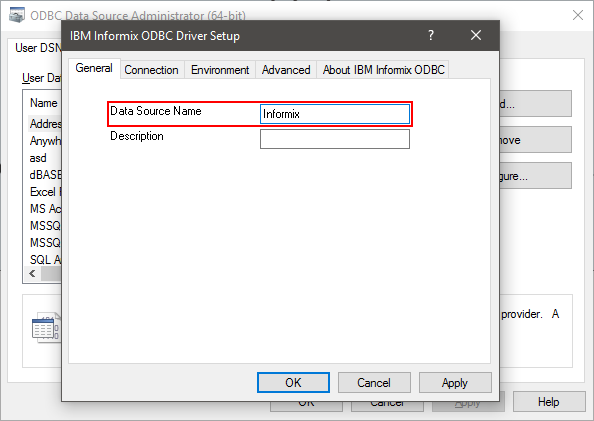
You need to add a data source name (Figure 4). We called it 'Informix'.
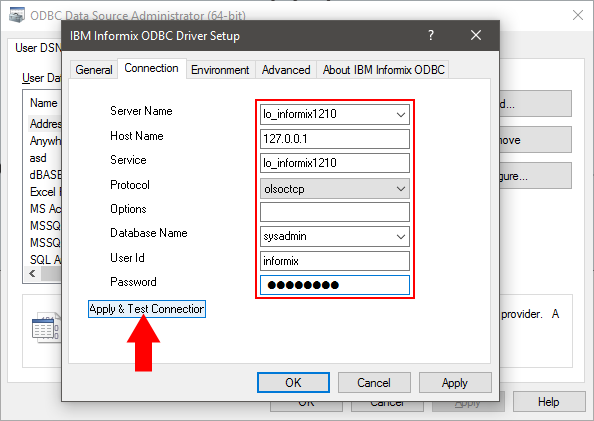
Now please fillout the connection details to your Informix database. When you are ready click 'Apply & Test Connection' (Figure 5).
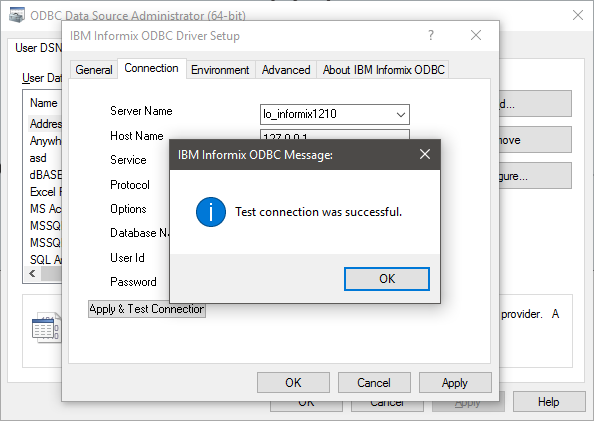
If you see the 'Test connection was successful.' messagebox (Figure 6) then it is sure that the IBM INFORMIX ODBC DRIVER can connect to your Informix database.
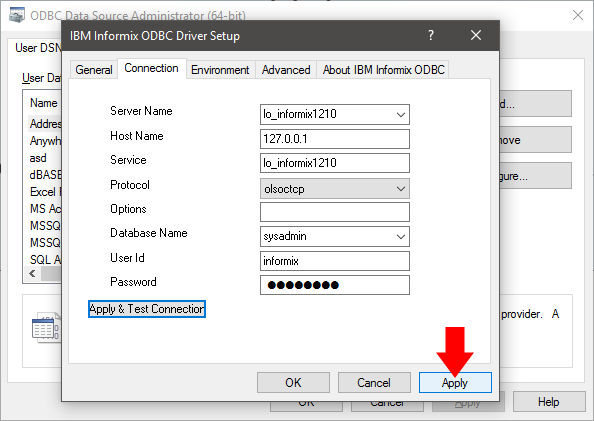
Now click 'Apply' (Figure 7).
We will now go back to Ozeki Bulk Messenger.
Step 4 - Open ODBC database connection in Ozeki Bulk Messenger
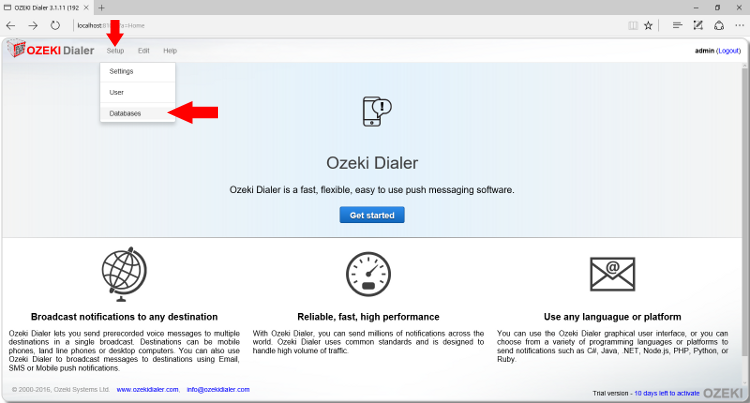
Click 'Databases' from the 'Setup' menu (Figure 8).
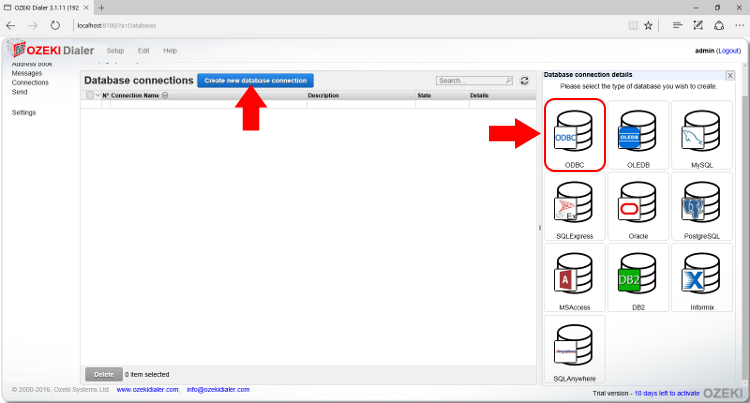
Click on 'Create new database connection' and select 'ODBC' (Figure 9).
Step 5 - Configure the ODBC connection in Ozeki Bulk Messenger
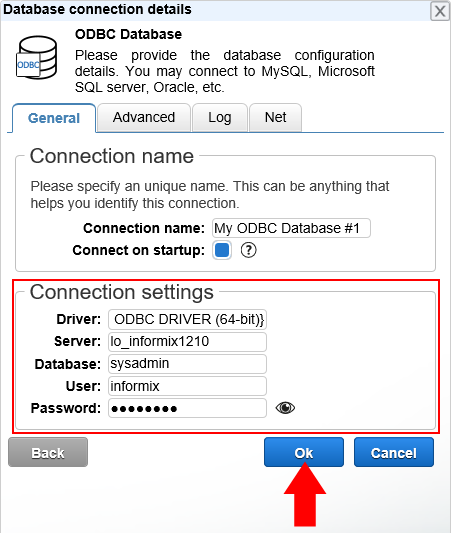
Fill out the connection details accurately and click 'Ok' (Figure 10). The driver is:
{IBM INFORMIX ODBC DRIVER (64-bit)}
Step 6 - Testing out the database connection
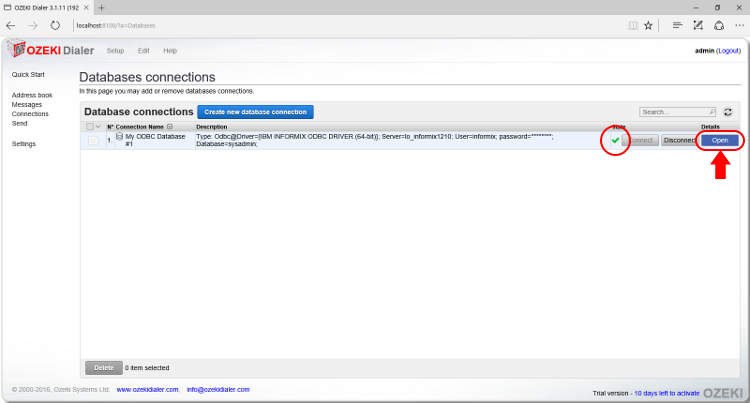
You will see a green tick if everything went fine. Now click 'Open' to test the database connection. (Figure 11)
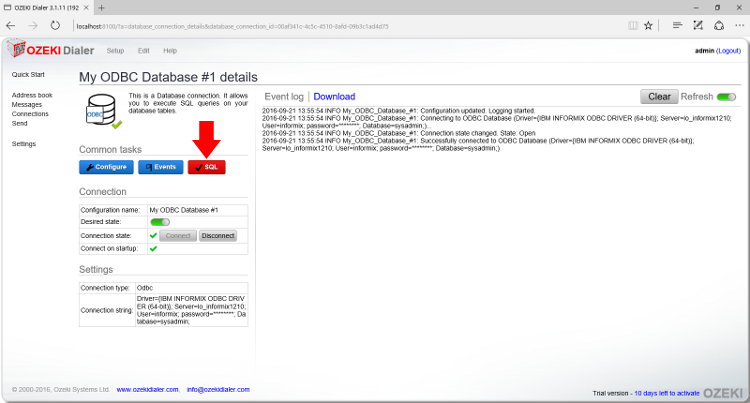
You can test the database by using SQL code so click on 'SQL' to continue (Figure 12).
You can write your own codes or you can find example codes in Ozeki Bulk Messenger. Click 'Execute' to run the code on your Informix database. (Figure 13)
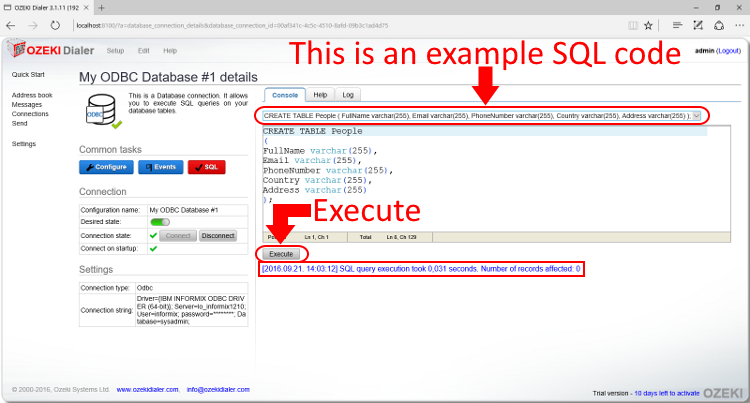
By selecting queries from your tables, you can create your SQL addressbooks in Ozeki Bulk Messenger. For example:
SELECT FullName, PhoneNumber, Email FROM People;
