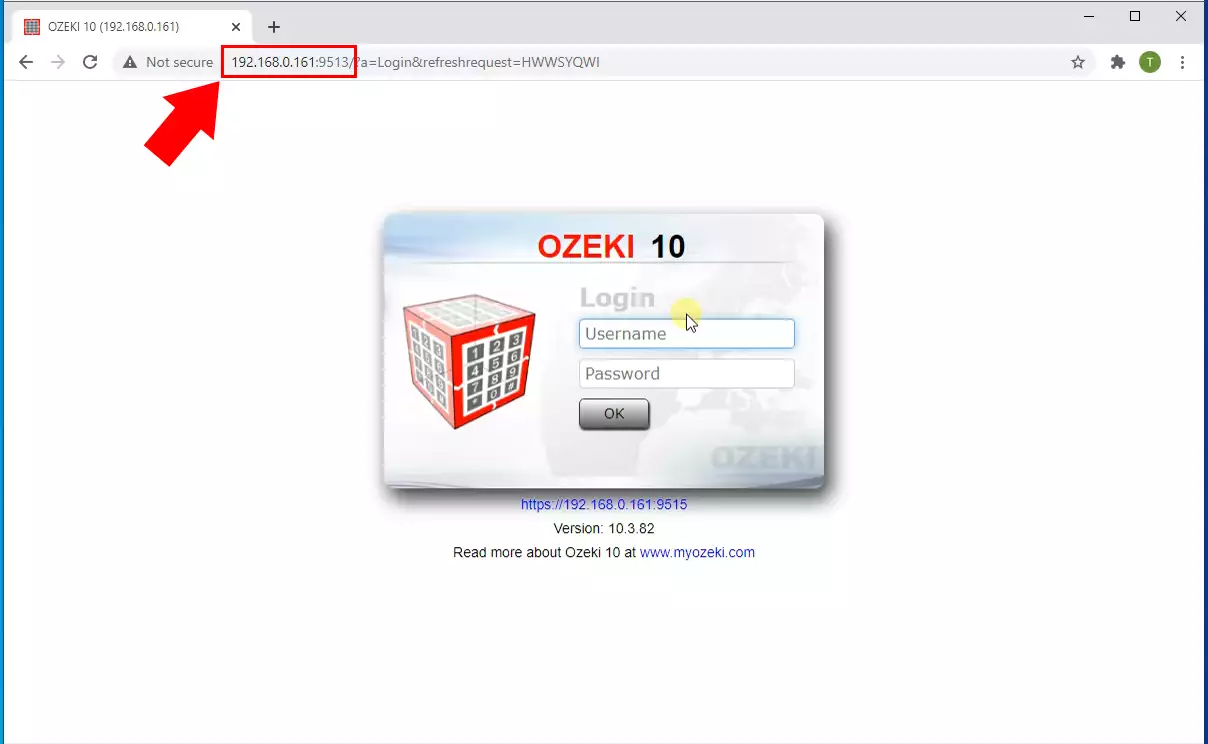
How to setup Ozeki Remote Access through SSH
If you install Ozeki on a Remote Linux machine, you will meet the Remote Access is Not Allowed message. The reason is that, by default, remote access is not allowed for security reasons. In this guide, we will show you how you can remotely access the user interface to change the Admin password. After it the GUI will be available from any remote machine.
Step 1: Install Ozeki on Ubuntu
In the link below you can find a guide that demonstrates how you can set up the Ozeki Installer on your Linux machine. This product is a great app store that allows you to purchase any Ozeki product that you want in just one click. In that guide you also find how you can install the Ozeki SMS Gateway with Ozeki Installer.
So the Step 1 is to visit the "How to install Ozeki on Linux" page and follow the steps.
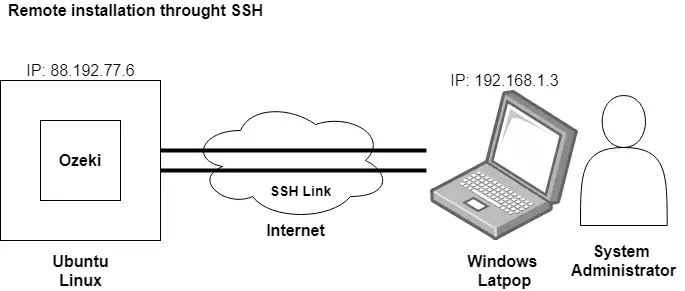
Step 2: Start Ozeki from the command line
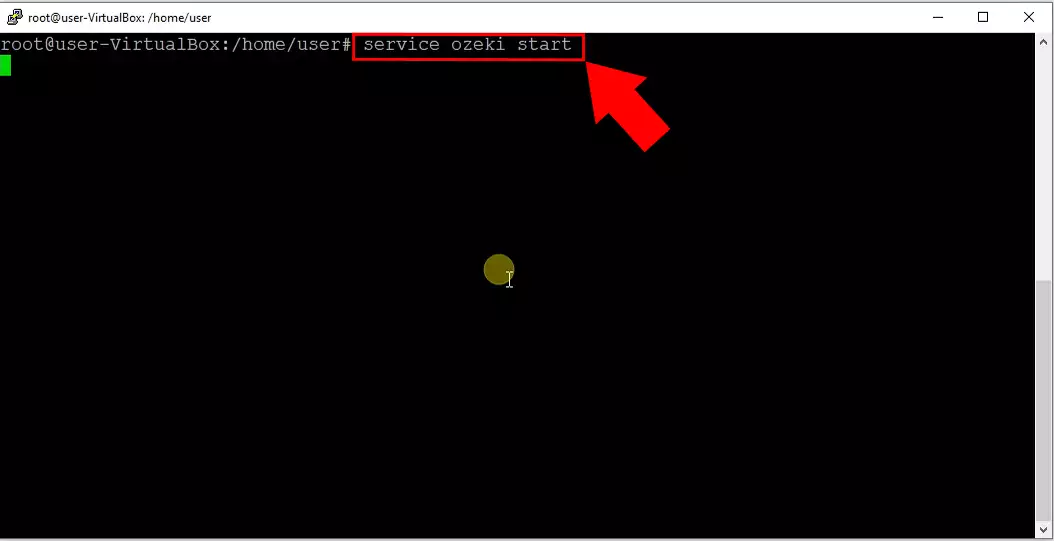
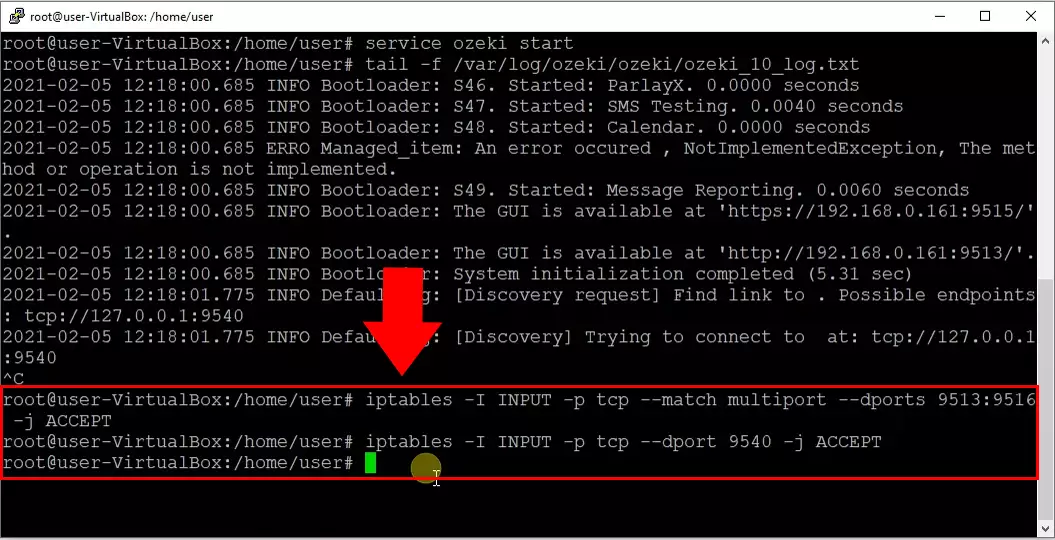
In order to have a working Ozeki Gateway system, you need to launch the service for the program. You can do this in the command line of Linux. Please provide the following code (Figure 2) for the command line and hit enter.
service ozeki start
Step 3: View the logs using tail
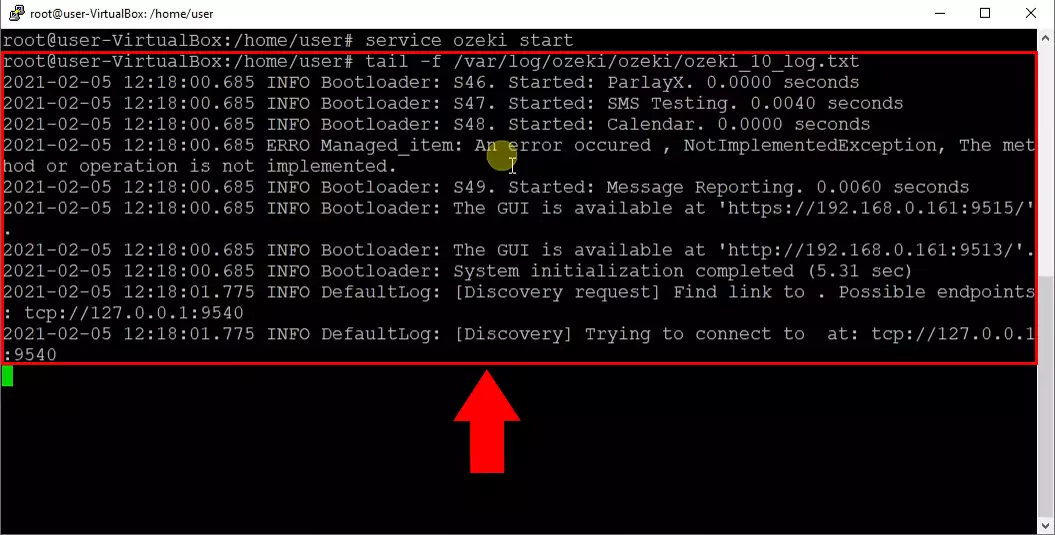
You can follow the process of the service launch using the logs. To view it (Figure 3), you can use the tail command that we provided below. If the service is started, you can find the IP:PORT where the GUI is available.
tail -f /var/log/ozeki/ozeki/ozeki_10_log.txt
Step 4: Enable the ports in your firewall
Now in order to access to the GUI from an another computer you need to enable the ports in your firewall (Figure 4). Here you can find the lists of the most common ports used by Ozeki to help you with firewall setup: "Firewall configuration of Ozeki 10"
HTTP and HTTPS GUI
iptables -I INPUT -p tcp --match multiport --dports 9513:9516 -j ACCEPT
Chat network
iptables -I INPUT -p tcp --dport 9540 -j ACCEPT
Step 4: Open browser from your PC
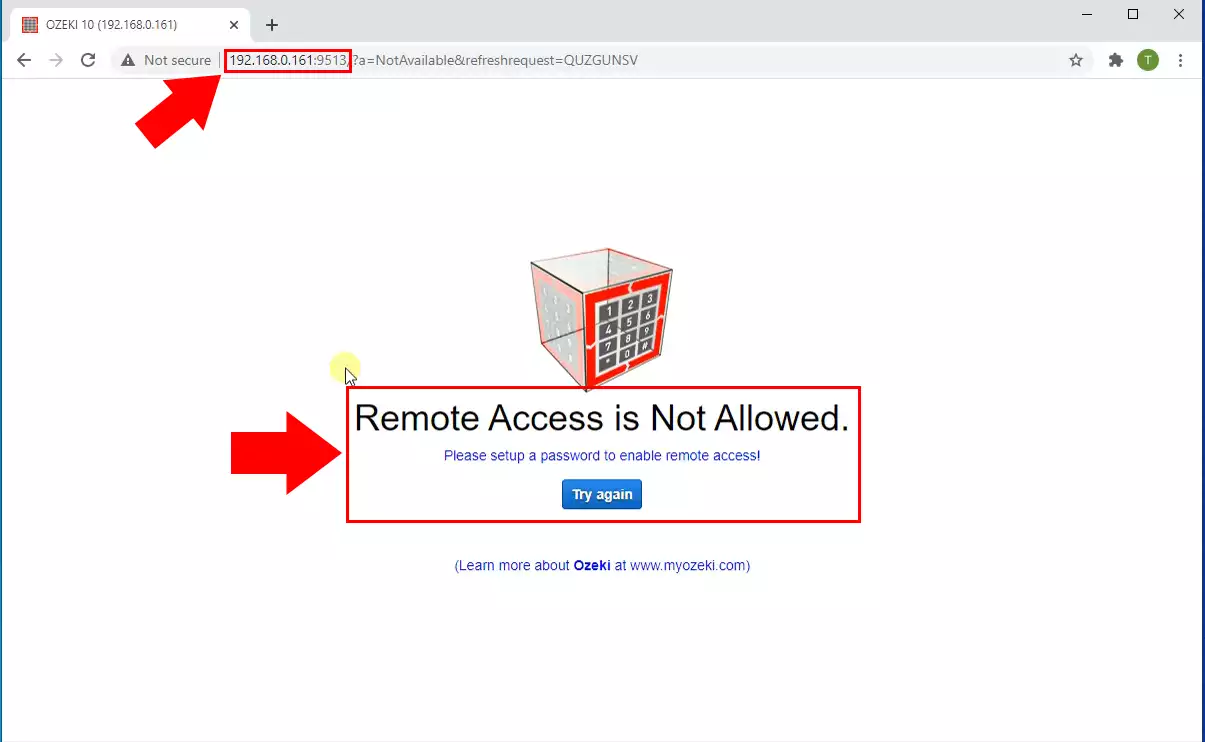
On Figure 5, you can see the error message that you get when trying to access the GUI before changing the admin password. It says the Remote Access is Not Allowed. By default the remote access is not allowed for security reasons. To have access to the interface remotely, you need to change the default admin password.
Step 5: Configure PuTTY port forwarding
Changing the admin password is only possible from the machine where the Ozeki system is installed.
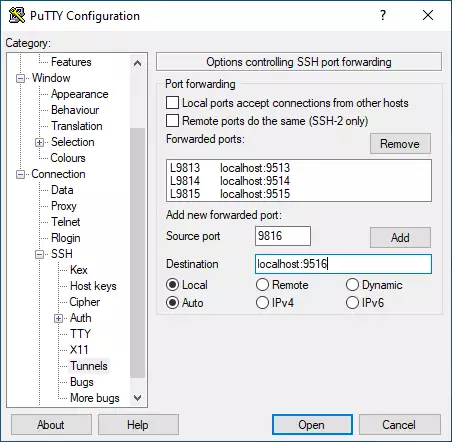
You can use the PuTTY ssh tunnel feature(Figure 6) to forward Localhost ports to the appropriate ports on your Linux machine.
This allows you to change the password remotely.
We forward four ports:
| 9813 | localhost:9513 | HTTP port |
| 9814 | localhost:9514 | Websocket port |
| 9815 | localhost:9515 | HTTPS port |
| 9816 | localhost:9516 | Secure Websocket port |
Step 6: Open browser from your pc
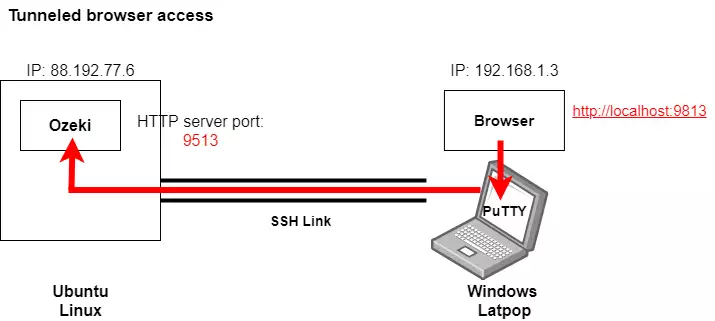
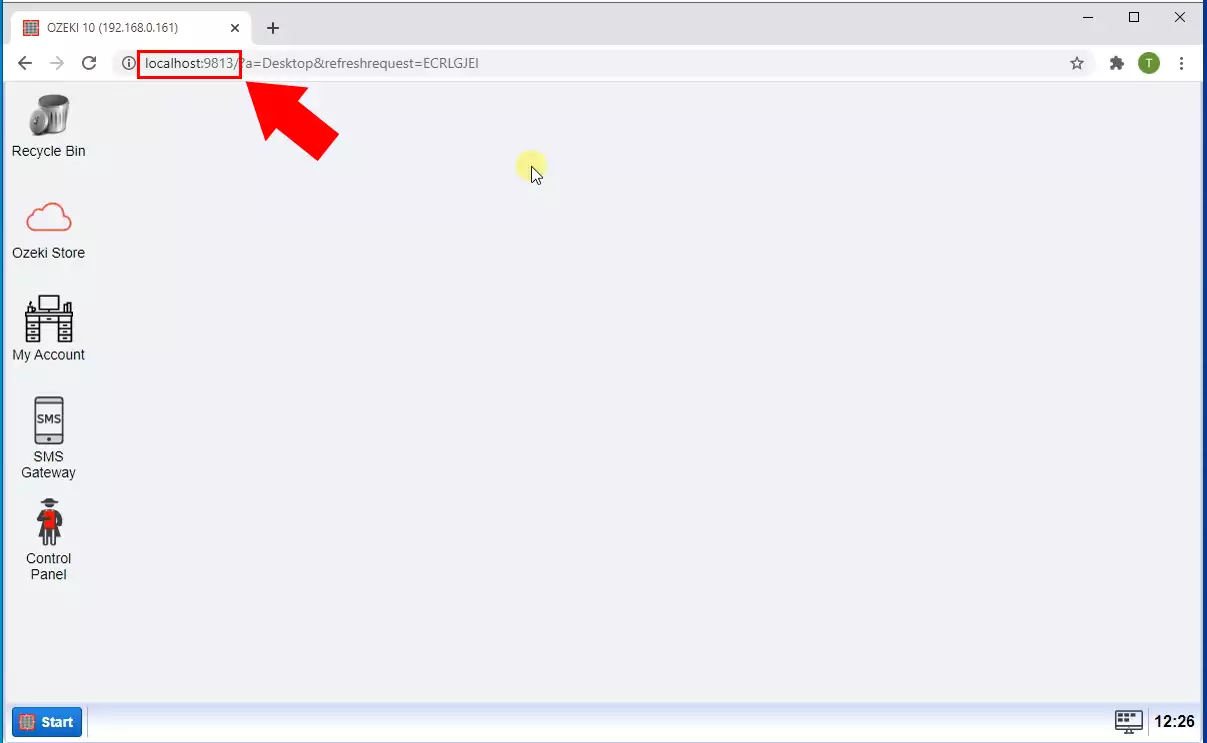
After forwarding the ports in the Putty by opening localhost, you can see that the Ozeki user interface appears (Figure 8). This way you can now change the password to access the GUI remotely.
Step 7: Setup a password
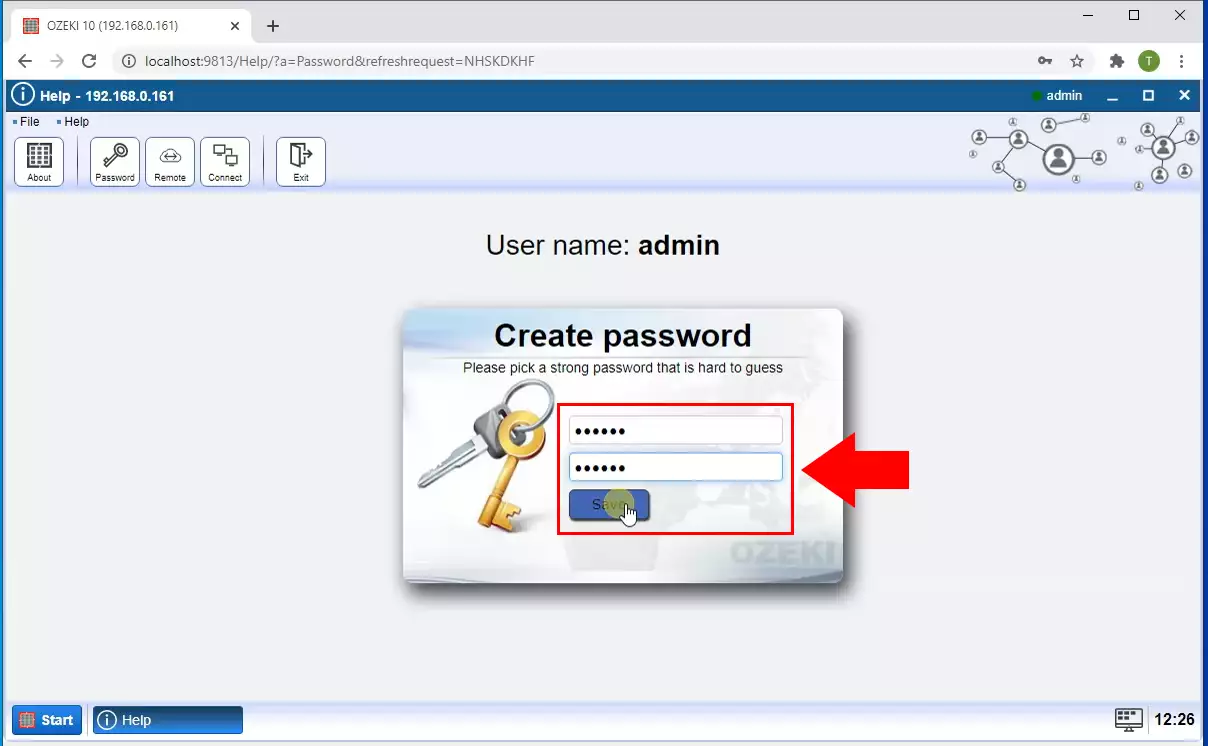
You will find a detailed description of how to change the Admin user password on the page below: How to change the admin password
Step 8: Open browser without port forwarding
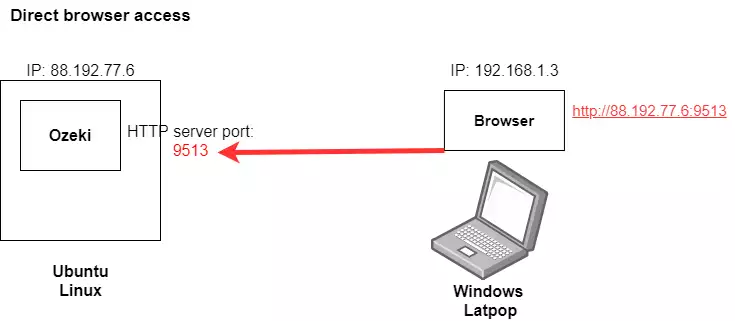
After changing the password, you can see that if you open the IP address of the Linux machine in the browser, the message Remote Access is Not Allowed will no longer be displayed, but you will be able to log in to the Ozeki system (Figure 8). Enter the new password for the Admin user to log in.
