Windows firewall setup to let webbrowsers access your Ozeki 10 system
In this step by step guide you can learn how you can allow incoming connections for Ozeki 10 at Windows Firewall(Windows 10).
Step 1 - Open firewall settings
The first step is to open the Windows firewall from the start menu. Type firewall into the search bar and select Firewall & network protection (Figure 1).
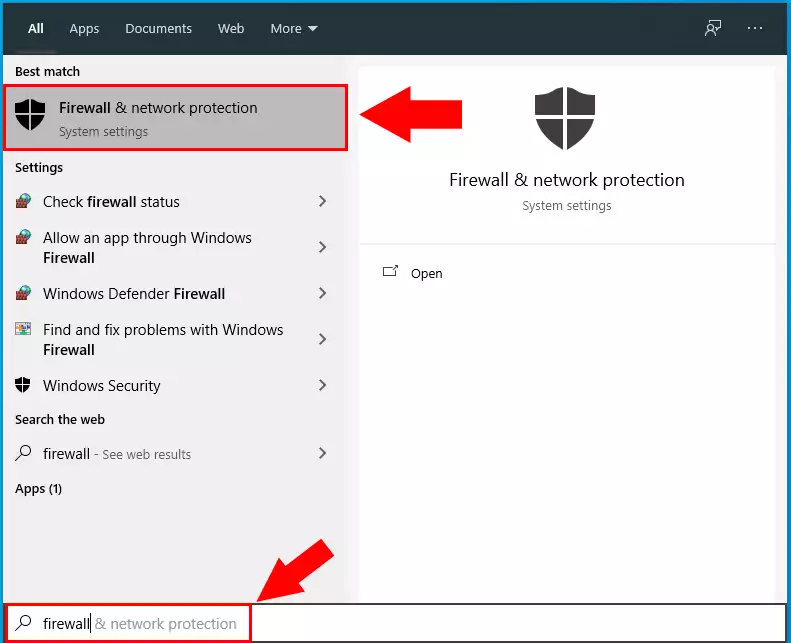
Figure 1 - Open firewall settings
Step 2 - Advanced settings
At Windows Firewall, select "Advanced Settings" (Figure 1).
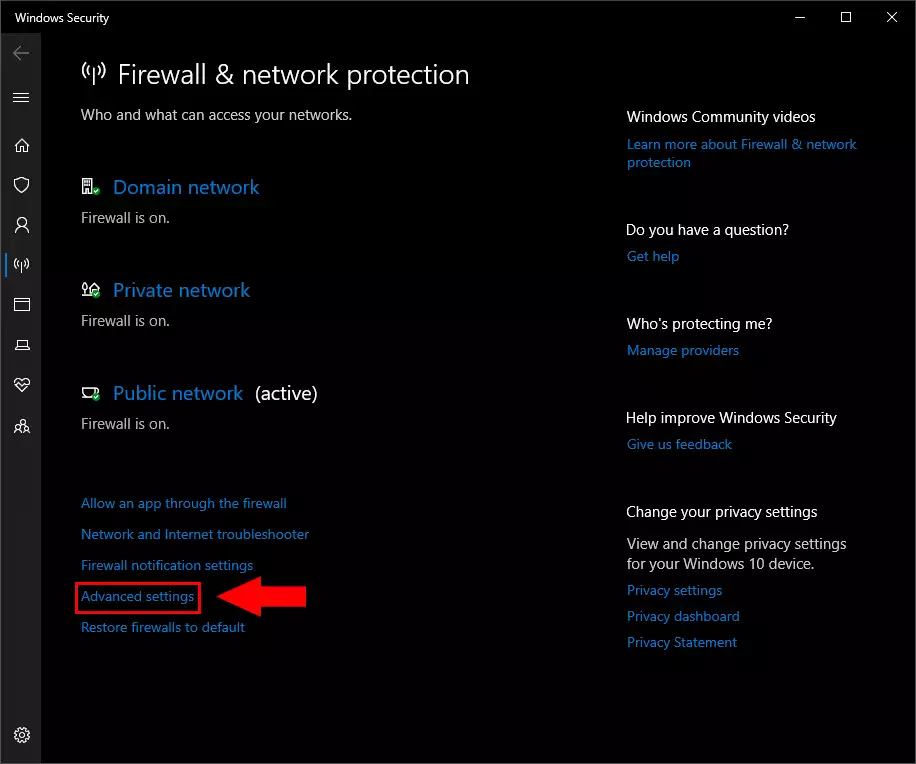
Figure 2 - Advanced settings
Step 3 - Select Inbound Rules
In the next page select "Inbound Rules"(Figure 3).
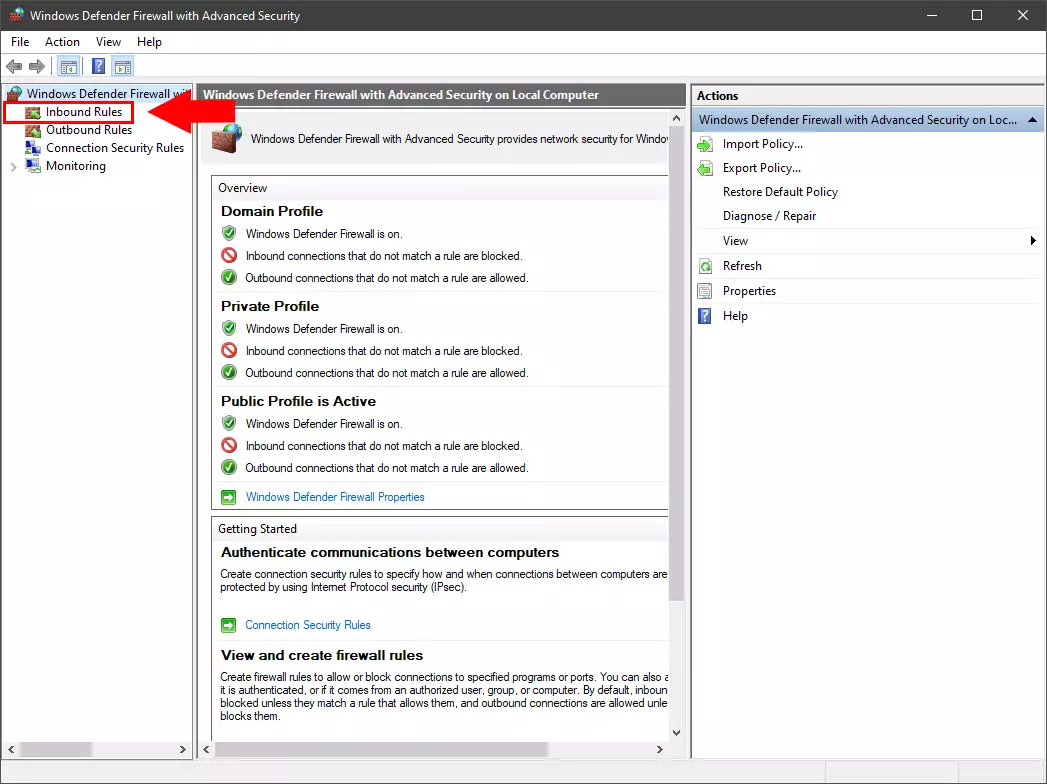
Figure 3 - Select Inbound Rules
Step 4 - Add New Rule
Now click to "New Rule..." button at right((Figure 4).
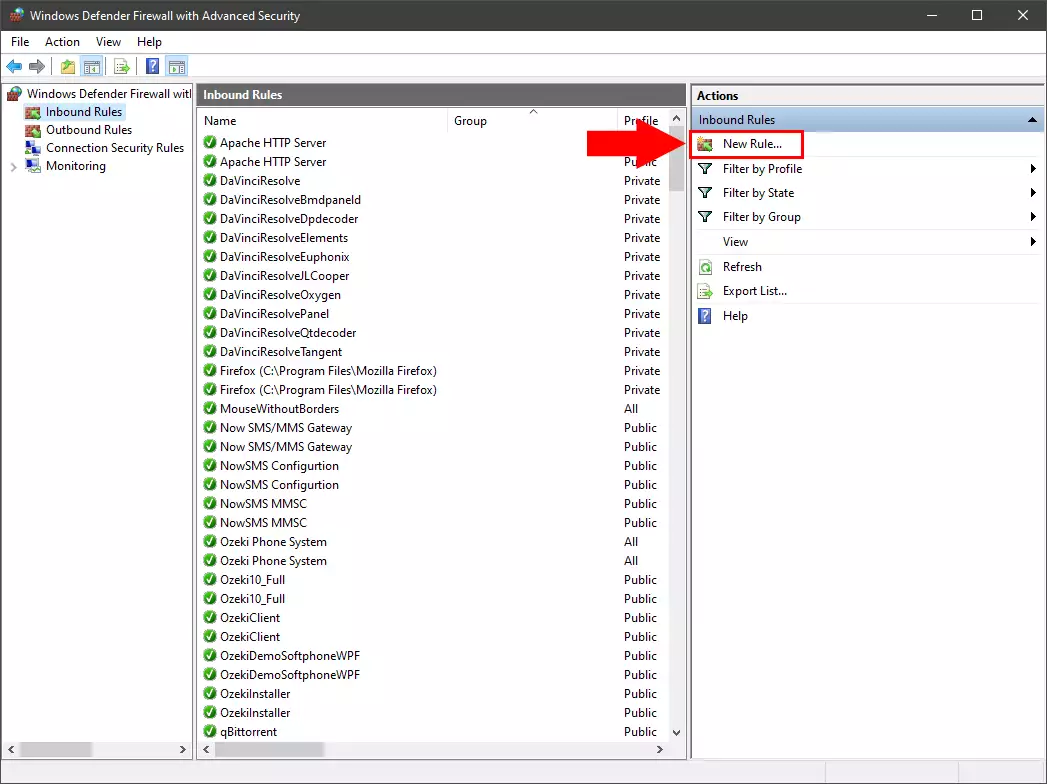
Figure 4 - Add New Rule
Step 5 - Select rule type
In the next dialog box select the "Port" radio button and then click to "Next" (Figure 5).
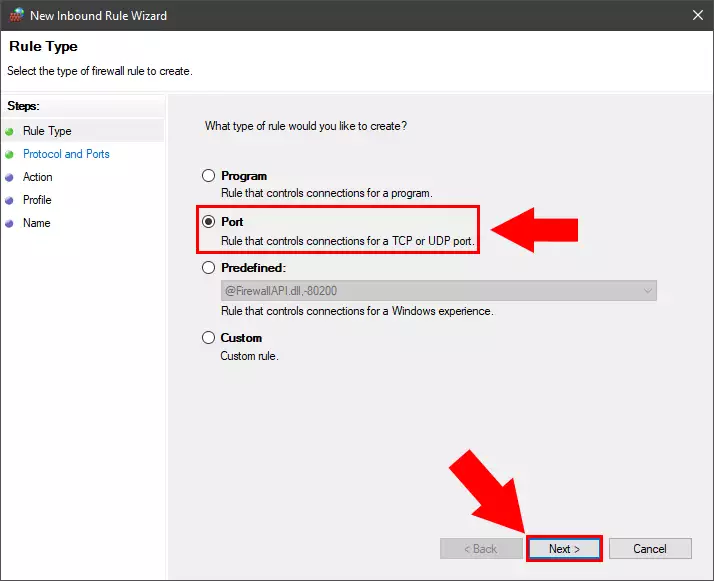
Figure 5 - Rule type
Step 6 - Specify port range
At the next page type in the "port numbers" (9000-9100) what you want to enable and click to "Next" (Figure 6).
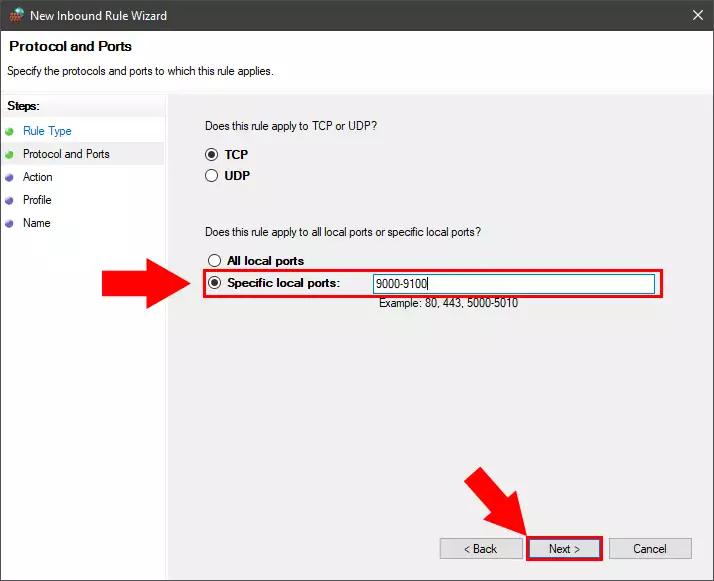
Figure 6 - Specify port range
Step 7 - Allow Connection
Leave the radio button on "Allow the connection" and click to "Next" (Figure 7).
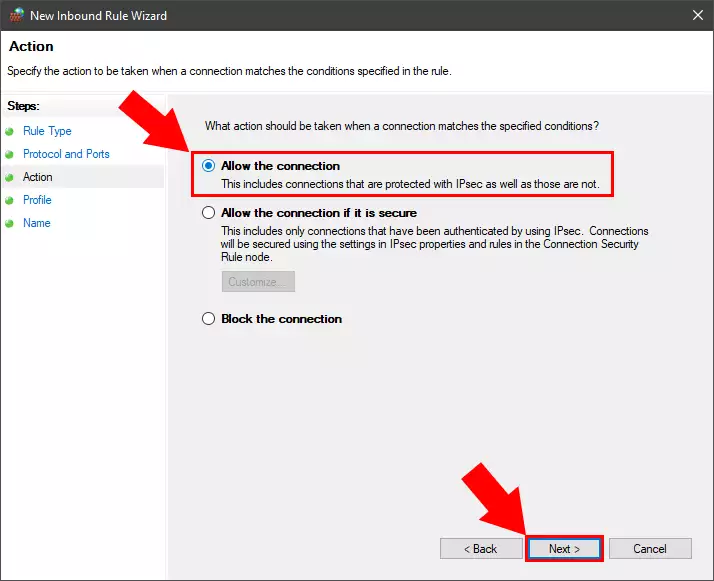
Figure 7 - Allow Connection
Step 8 - Select profile
Leave all pipes in the boxes and click "Next" (Figure 8).
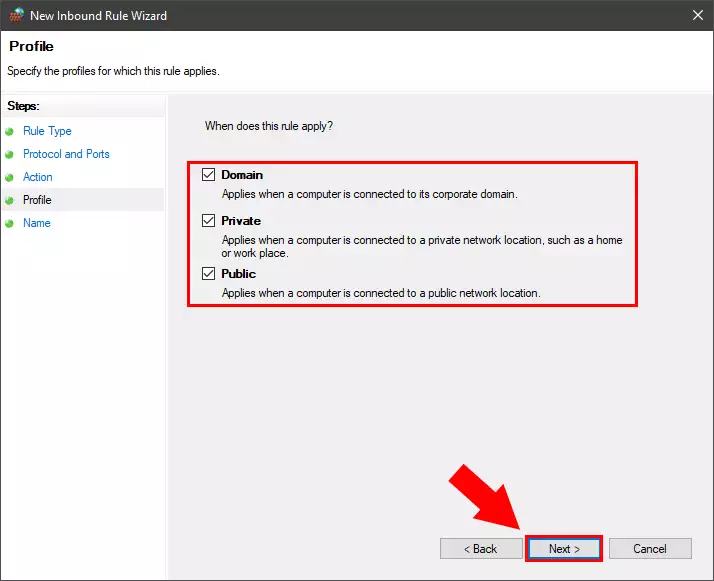
Figure 8 - Select profile
Step 9 - Name the rule
In the last page "Name the Rule" and click the "Finish" button (Figure 9).
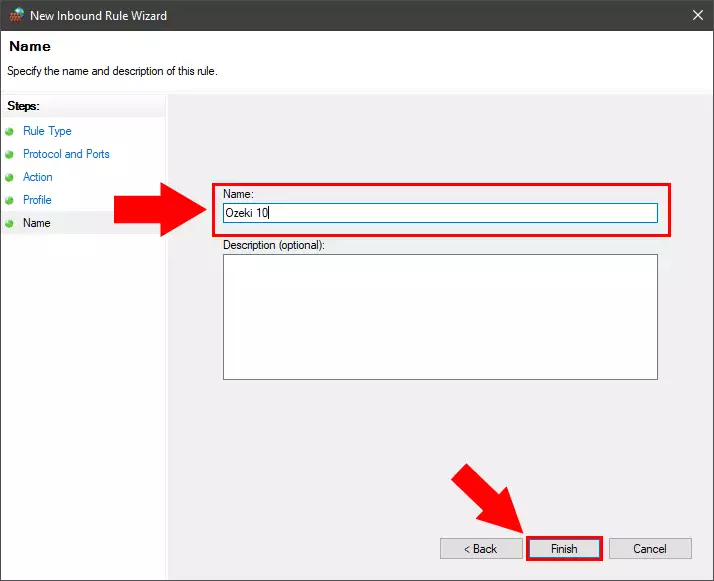
Figure 9 - Name the rule
Step 10 - Rule is created
Finally you can see your new rule in the list is the rules (Figure 10).
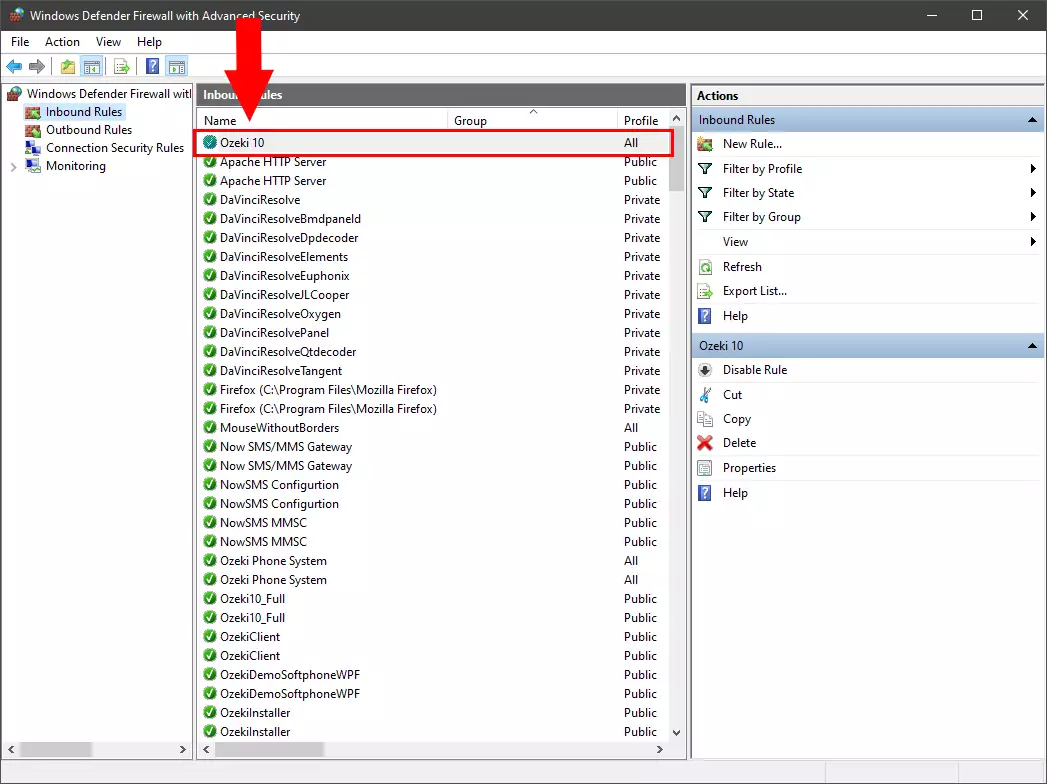
Figure 10 - Rule created