Part 3 - Connect your Phone System to the public telephone network
To make it more simple to you, we made a step-by-step tutorial about connecting your phone system to the public telephone network with a VoIP - GSM gateway.
Video tutorial - Part Two - Connect your phone system to the public telephone network using a VoIP - GSM gateway
And now, we present you our step-by-step guide with pictures in order to make it easier for you to use and to setup our product.
Step 1: Setup the VoIP gateway
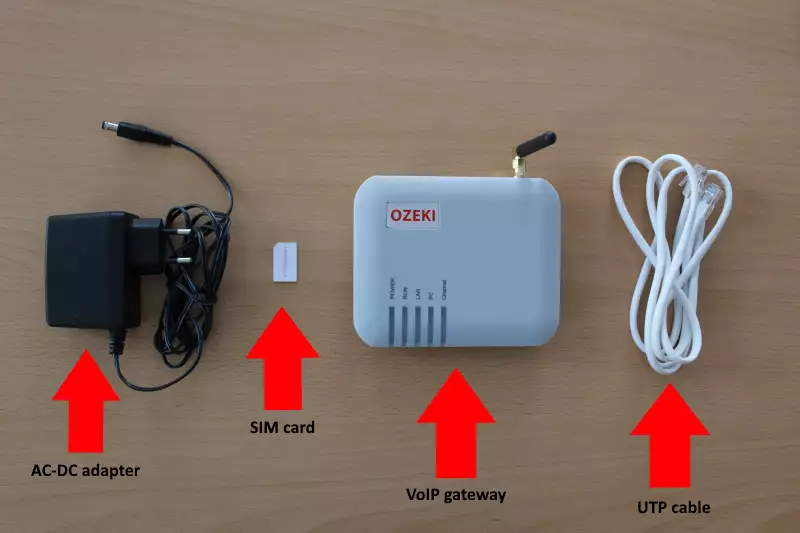
At this point, you have some extensions, that can communicate with each other, but can't do that with the public network. For that, you have to set up the VoIP Gateway. The main components of the gateway (Figure 1) are the gateway itself, a SIM card, a UTP cable and a AD-DC adapter.
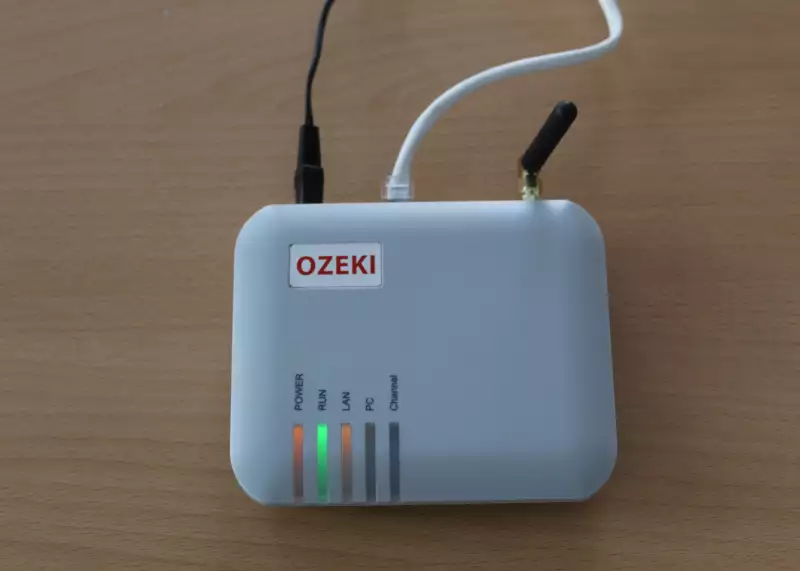
To the LAN port, you connect the UTP cable and plug it into the switch as you did with the SIP telephones. With the AD-DC adapter, you can provide the power for the gateway, that will starts automatically. As you can see in Figure 2 the LEDs on the gateway indicates the status of the power and the connectivity.
Step 2: Connect your system to the public network
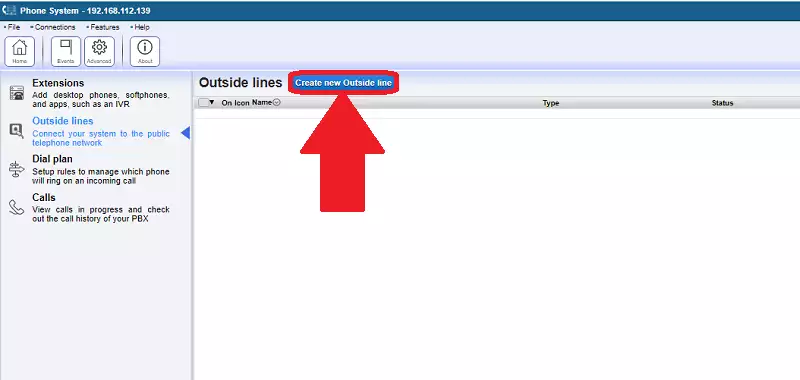
With the connected phone extensions now you are able to communicate within your Local Area Network, but you can't launch or receive phone calls from the public network. For that you need to connect Ozeki 10 PBX to your VoIP service provider via a gateway connection. In the Phone System application, as you can see it on Figure 3 you can reach that by opening the Outside lines menu, then click on the Create new Outside line button and then select the GSM/PSTN icon.
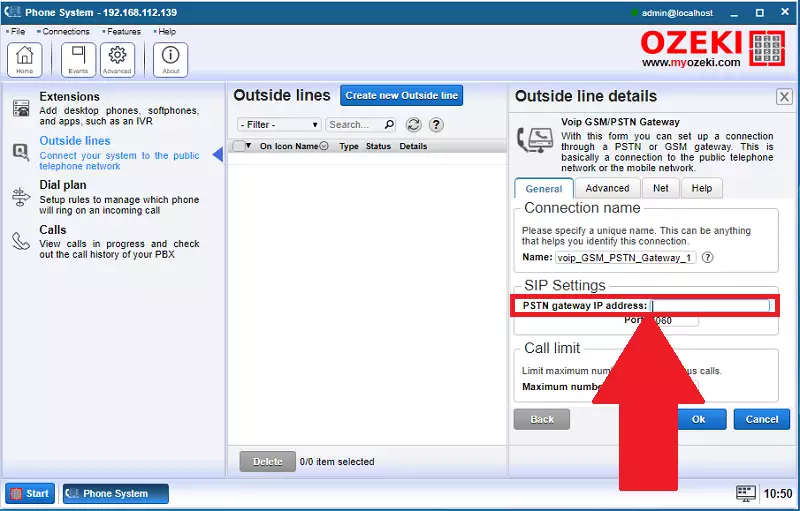
Next, in the details field, you just need to enter the IP address of the VoIP GSM Gateway as you can see in Figure 4. After you have done that and clicked OK, now you will be able to see the created connection in the Outside line menu. If the connection indicator turns green, you are properly connected to the gateway.
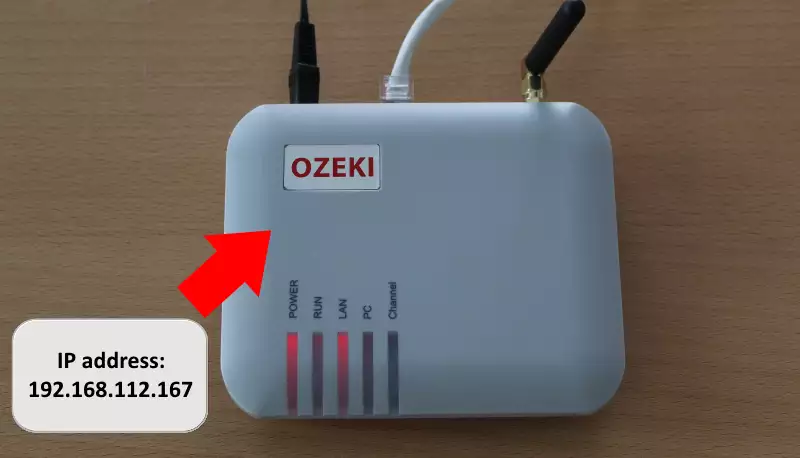
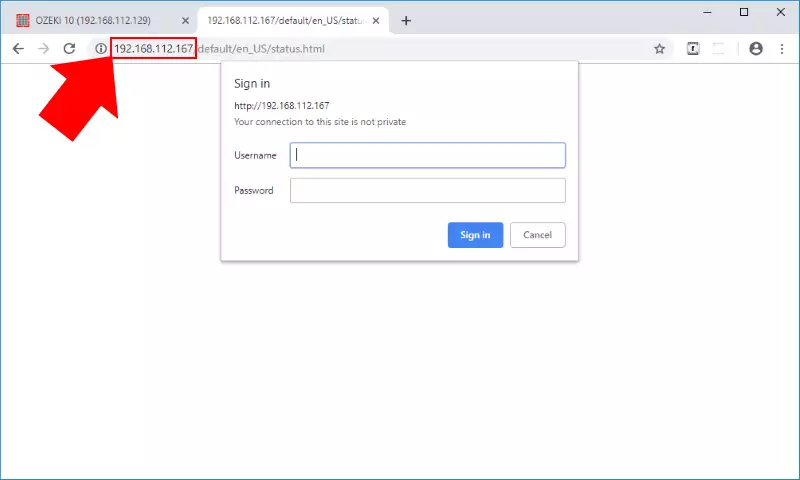
After you created the connection in Ozeki 10, you need to configure the VoIP gateway as well. You can do that by typing the IP address of the gateway (Figure 5) in your web browser. Here you need to login to the configuration menu, as Figure 6 demonstrates it.
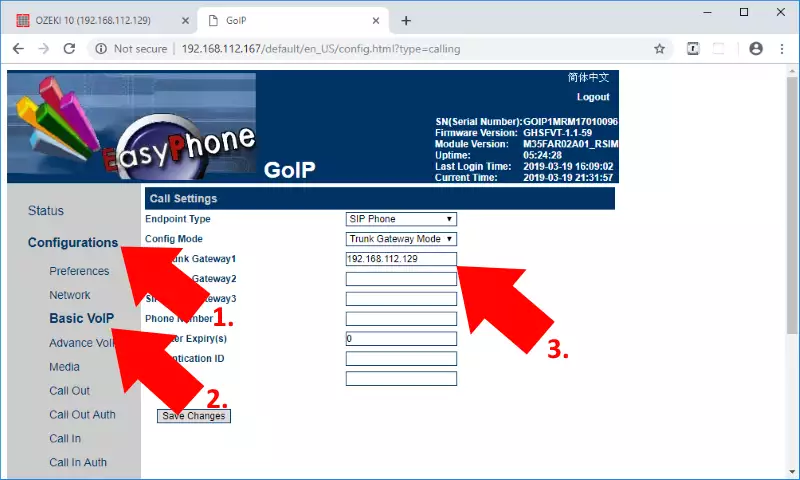
After you logged in, first select the Configurations menu, and here to modify the setting of the VoIP click on Basic VoIP. Next, as you can see in Figure 7, you have to enter the IP address of your computer to the SIP trunk gateway field. If you done that, just click on Save Changes.
Step 3: Setup dial plans
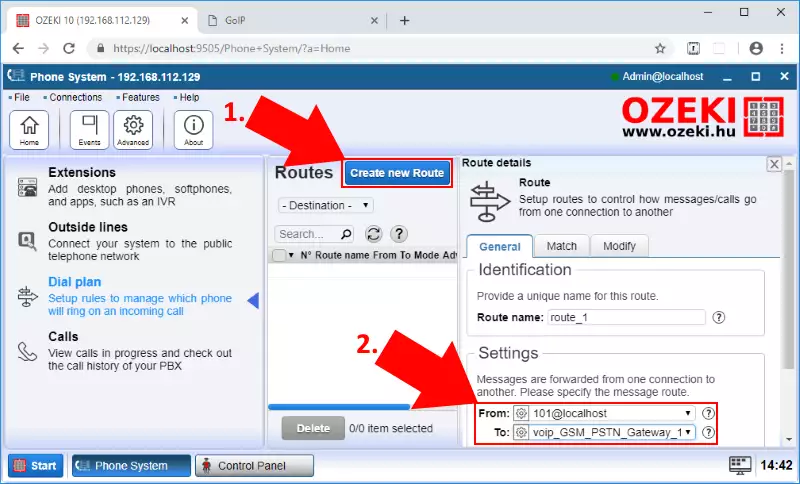
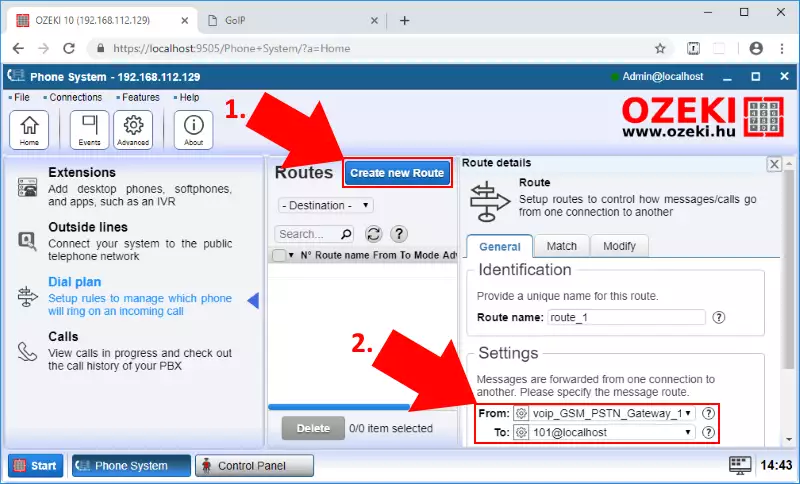
If you want to dial telephones outside the phone system, maybe it is a clever idea to organize these calls. You can do that in the Dial plan menu. Here, first click on Create new Route. First, you are going to create a routing rule for the outgoing calls. As Figure 8 shows that, just select one of your extensions, and route the calls to the VoIP gateway connection.
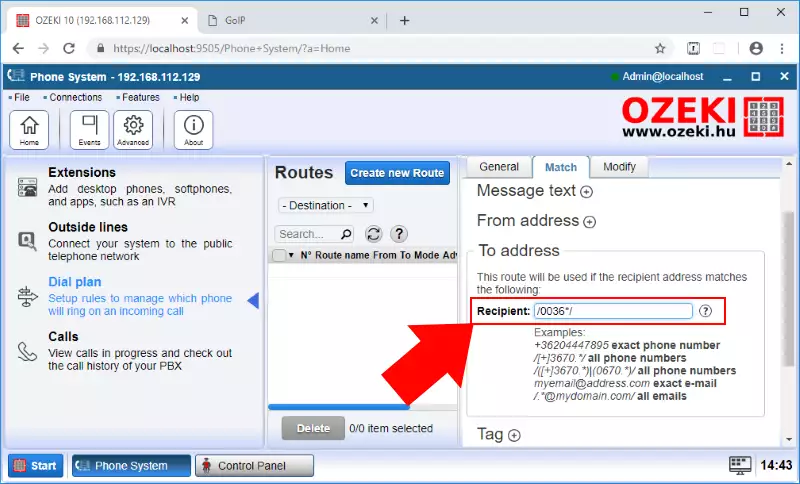
In Match menu, you can set some further rules for the routing. In the To address field (Figure 9) you can type a telephone number that will be checked at every call, and the routing will only be used, when the dialed number matches with this number. To create the route you just need to click on OK, and now you can see the rule in the Dial plan menu.
Dial plans can be also created for the incoming calls as well. For that just click on Create new Route once again, and now select the VoIP gateway connection to the From field and also select a extension that will receive the call (Figure 10).
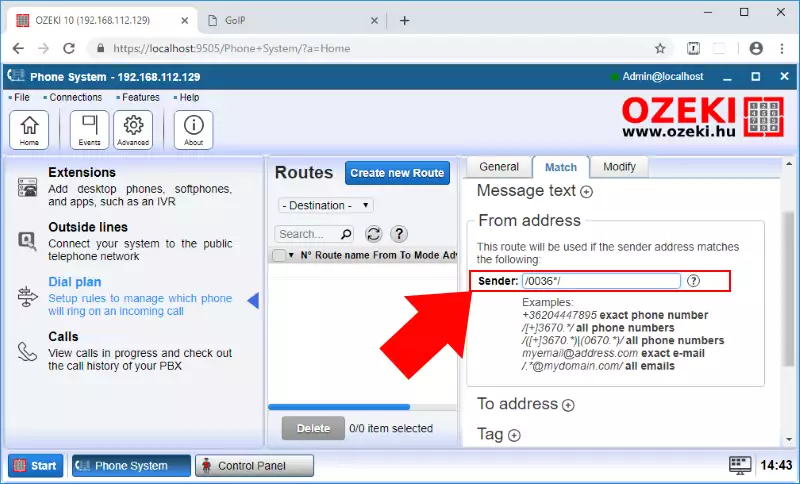
In the Match menu, you can set some rules for the incoming calls. In the From address field you can enter a phone number (Figure 11), and in this case the route will be used if the sender number matches with this number.
Step 4: Test call on the public network
At this point of the guide, your phone system is ready to call every kind of phone outside the phone system with one of the extensions. To start the call, you just need to type the phone number that you want to call as you can see in Figure 12.
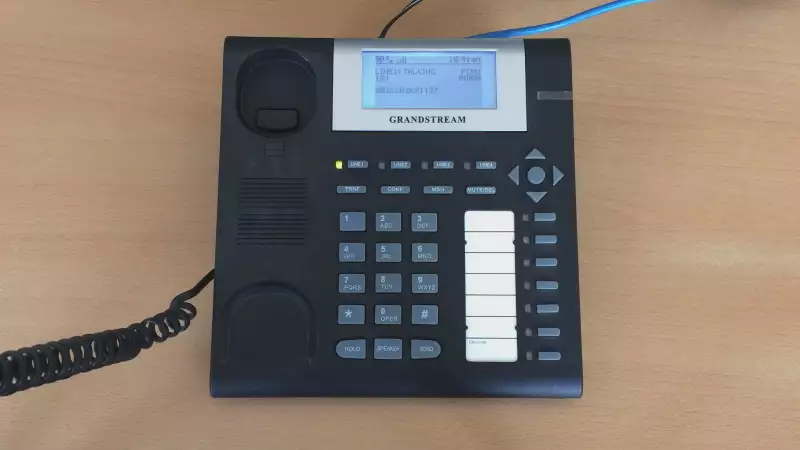
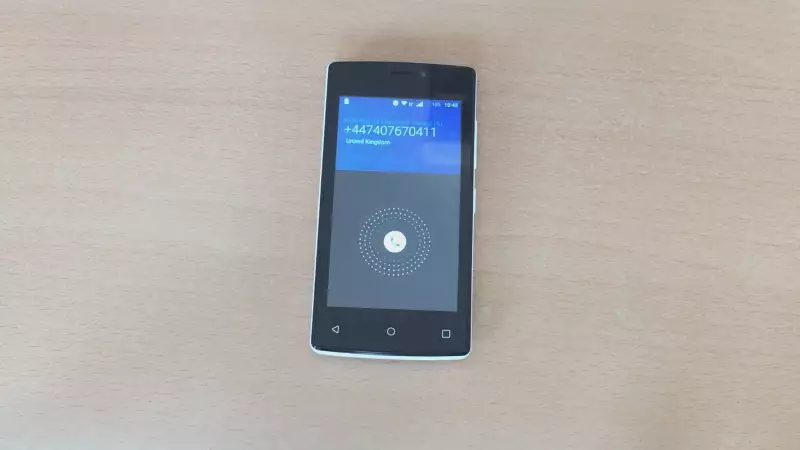
If you did everything correctly, the result of this call will be that the request will arrive at the recipient phone like in Figure 13, and you can start the conversation on the public network via the VoIP GSM gateway.
If you want to learn about how to create an IVR extension, feel free to follow the Part 4 of this guide.
