How to setup MySQL ODBC Driver
The MySQL ODBC connector is a driver that allow applications to access data in a database management system. It always uses SQL for accessing data. It means that you can connect Ozeki 10 with your database using this type of connector. Please follow the steps of the tutorial below to create an ODBC connector for your MySQL Database.
How to download MySQL ODBC Driver
Please follow the steps below to install ODBC driver.
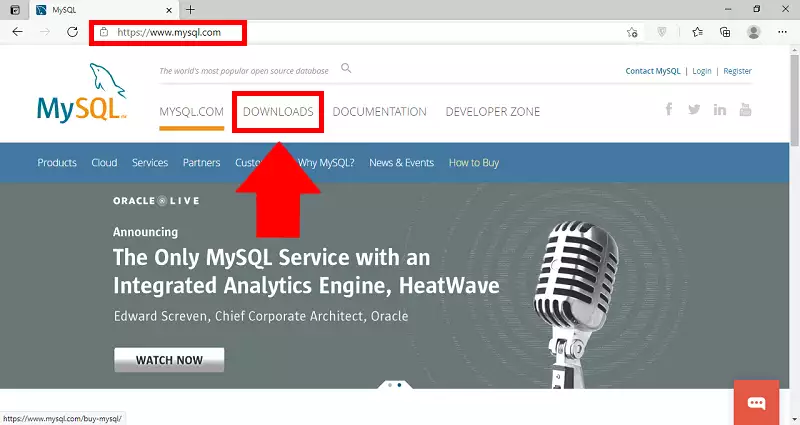
The first step is to download the required files from the official download page of MySQL. To do that, please head over to this page and click the Downloads button located on the upper side of the screen. On Figure 1, you can see where to click.
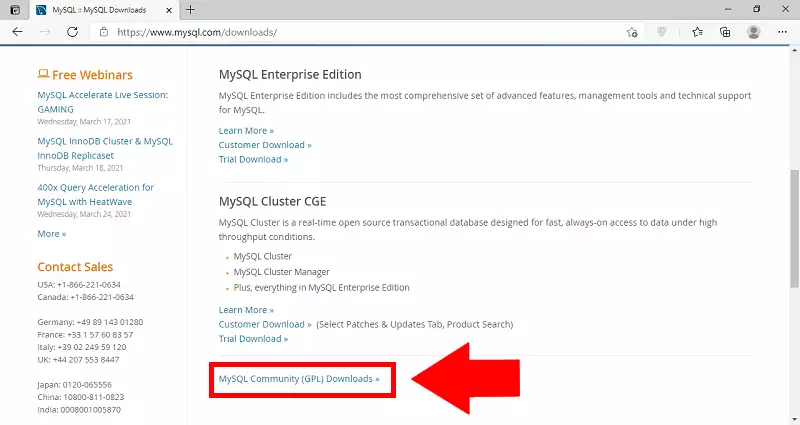
Now you are on the Download page of MySQL. Please scroll down until you can see the Community Downloads section. Click the link visible on Figure 2, to see the list of community downloads which contains the ODBC Connector we need.
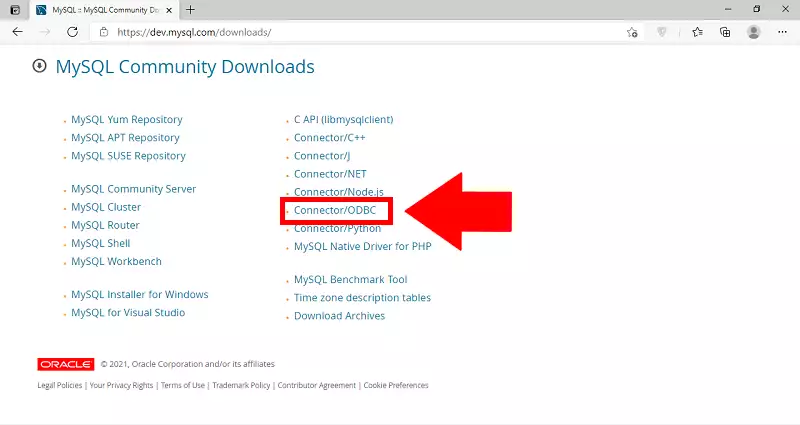
Here you can see all the community downloads. What you need to search for in the list is Connector/ODBC. Click it and it will take you to the version selector page. On Figure 3, you could see which line you need to click.
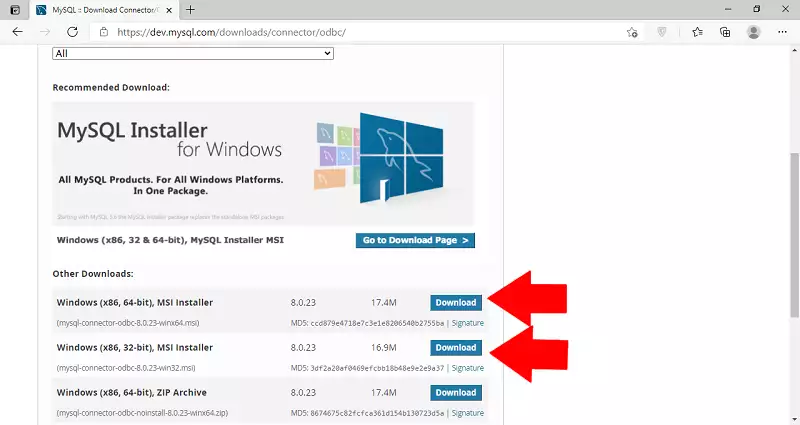
Now you need to select which type of installer you wish to download. Please select a type of MSI installer. The top two option is suitable for you, the difference is in the type of Windows it can be installed to. Choose the 32-bit or the 64-bit version according to your OS. You can see all your option on Figure 4.
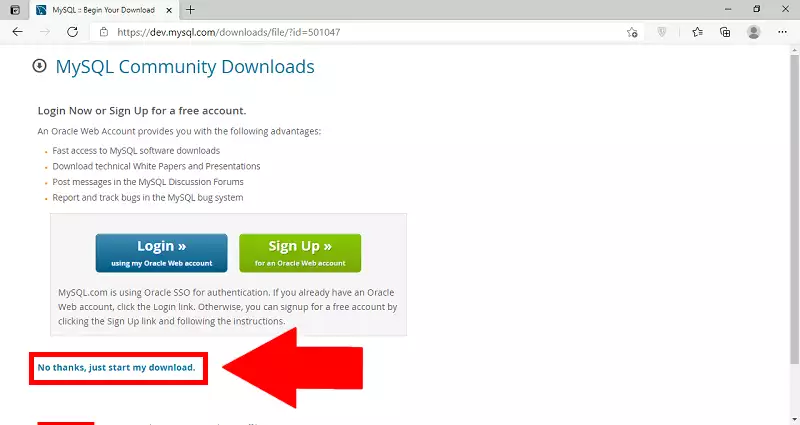
This page will ask you to login to your existing Oracle Web Account or create a new one. Neither MySQL nor the ODBC connector requires logging in so feel free to skip it by clicking the No thanks, just start my download. button. On Figure 5, you can see where to click.
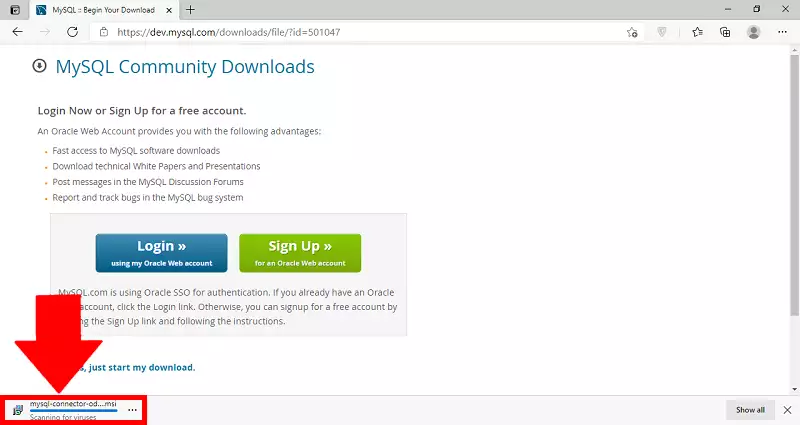
As you can see on Figure 6, your browser started the download process. Wait until it is finished and click it to launch the installation process.
How to install MySQL ODBC Driver
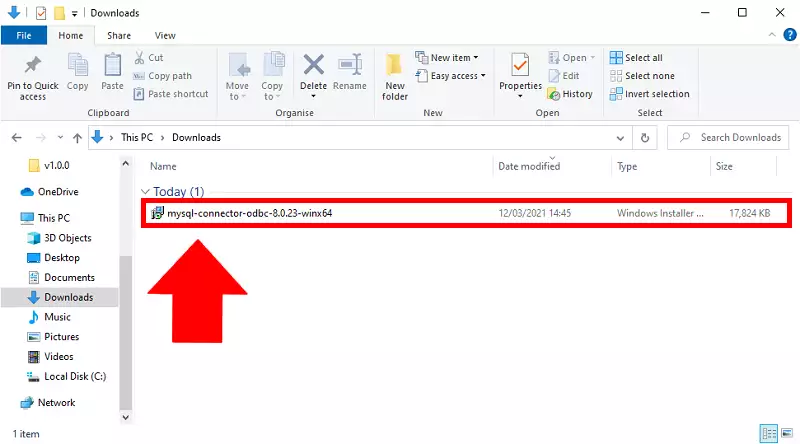
Start the installer by clicking the downloaded file in your browser, or in your downloads in the File Explorer. You can see what you need to look for on Figure 7.
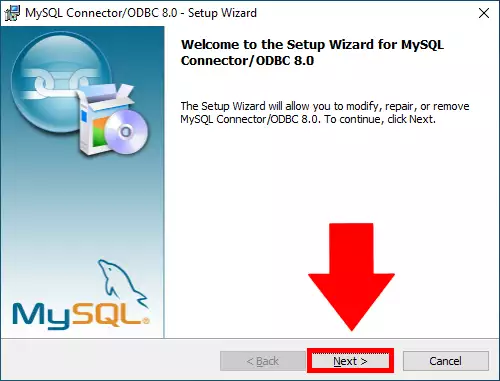
After you have launched the installer, you are presented with the first page. Click the Next button located on the bottom of the window. You can see which button to look for on Figure 8.
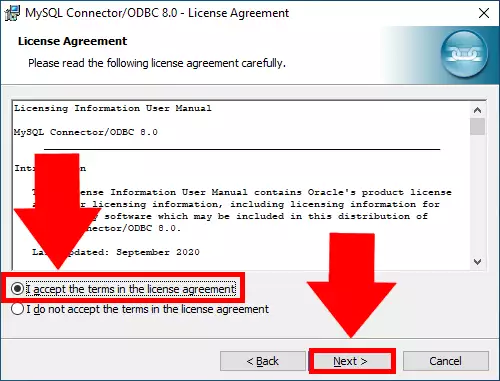
Now you can see the license agreement of the MySQL Connector. You need to accept it in order to proceed with the installation. This includes licensing information for your software. On Figure 9, we show you which button to look for.
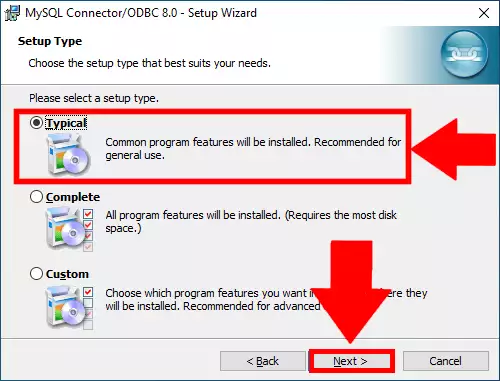
Now you could choose how you wish to install the MySQL OBDC connector. The typical installation will install all the commonly used aspects of the connector. The Complete will install every possible features. You could choose which component you need by choosing the Custom option. The Typical will work fine for the rest of the tutorial. Click the Next button to proceed, as you can see on Figure 10.
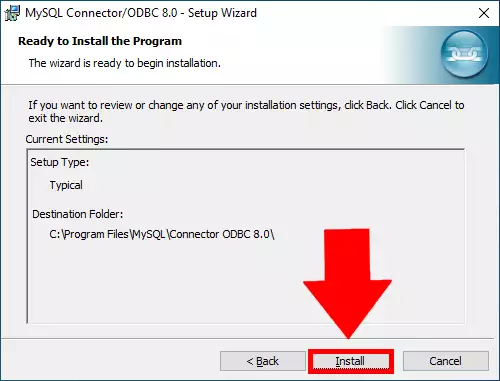
Now you are finished with setting up the installation. Click the Install button to start the process of installation. You can see the button on Figure 11.
If you can see the window, which we presented on Figure 12, it means that the installation was successful, and you have a working copy of the connector. Click the Finish button to proceed.
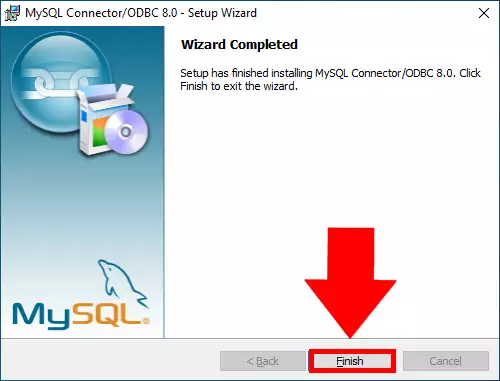
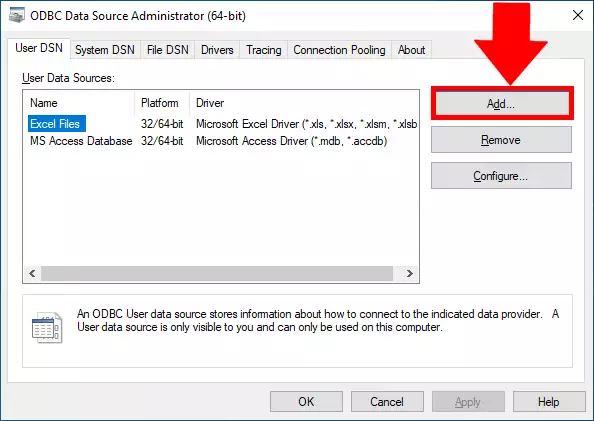
To add the database as a data source, open the ODBC Data Source Administrator software. You could do this by searching ODBC in the Start menu. After opening it, you could see an Add... button. Click it and it will take you to the Create New Data Source page. You can see where to click on Figure 13.
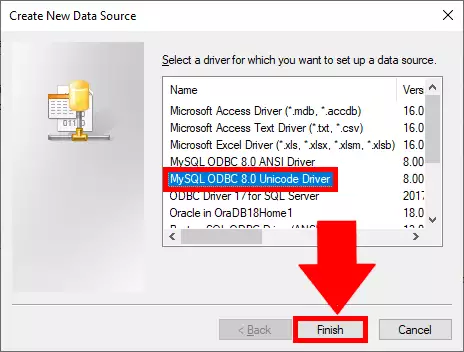
Now you can see the list of drivers which could be setup as a data source. Find the MySQL ODBC Driver and click the Finish button, as you can see on Figure 14.
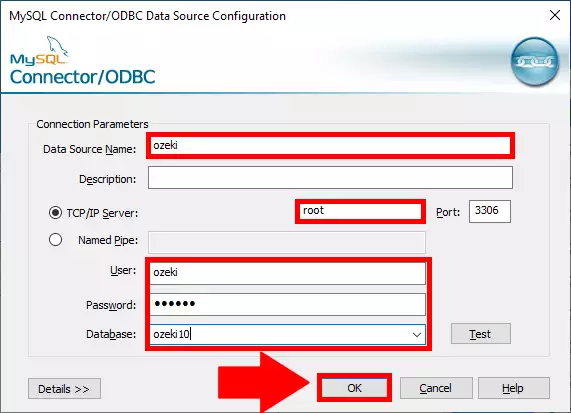
Here you can see that the MySQL connector Data Source Configurator is opened. Here you need to provide information about your existing MySQL Server such as the IP address, the port number, the username and password. Complete all the fields you could see on Figure 15 and click the OK button.
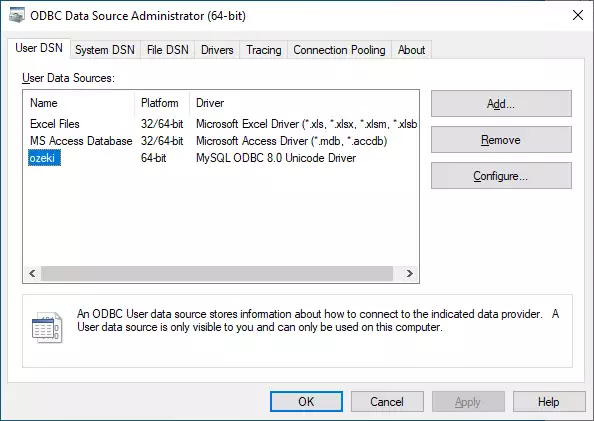
Here you can see that the User Data Source list is completed with your new ozeki data source. It means that the ODBC connector is ready to work with your MySQL server and the Ozeki Gateway. You can see the whole list on Figure 16.
